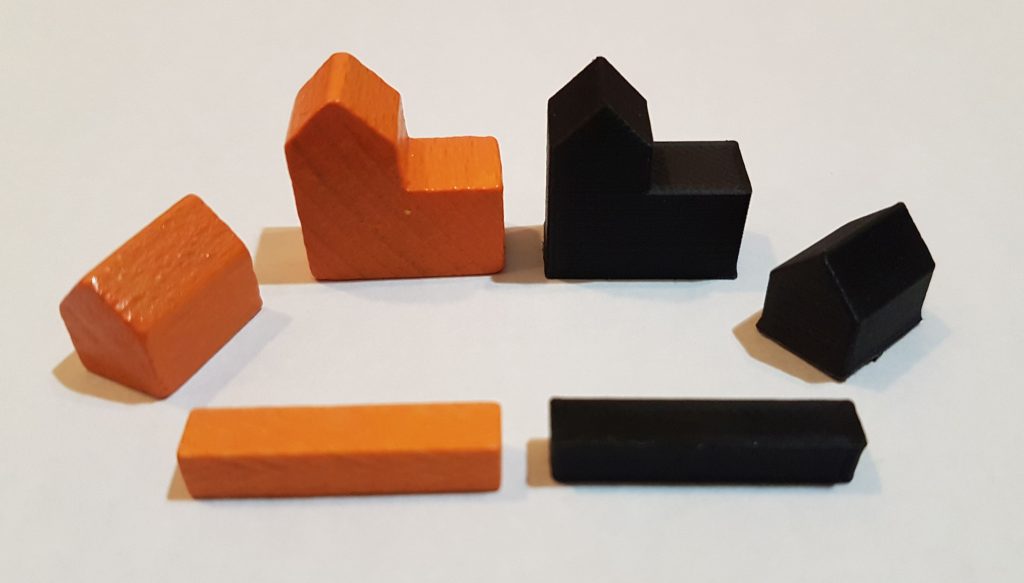
Adding magic to the mundane, one filament at a time.

Tag: Ticket to Ride (Page 2 of 2)

Beyond Game Pieces

New Directions

As we indicated last week, our promised new releases took us out of the realm of board game pieces. We ventured into two entirely new areas: jewelry and drink coasters! Read more about them below, but first I’m going to tell you about fixing the heat creep blockage we also mentioned last week.

The Blockage Got Worse

When I wrote about it last week we had a workaround for temporarily dealing with the blockage. But then the problem got worse. While we could still get some filament through, it wasn’t enough. We were facing pretty bad under-extrusion problems, where not enough filament was getting through the nozzle, leaving the print with gaps, thin layers, and poor adhesion. We ended up needing to stop all printing for a day and a half.

Digging Into the Problem

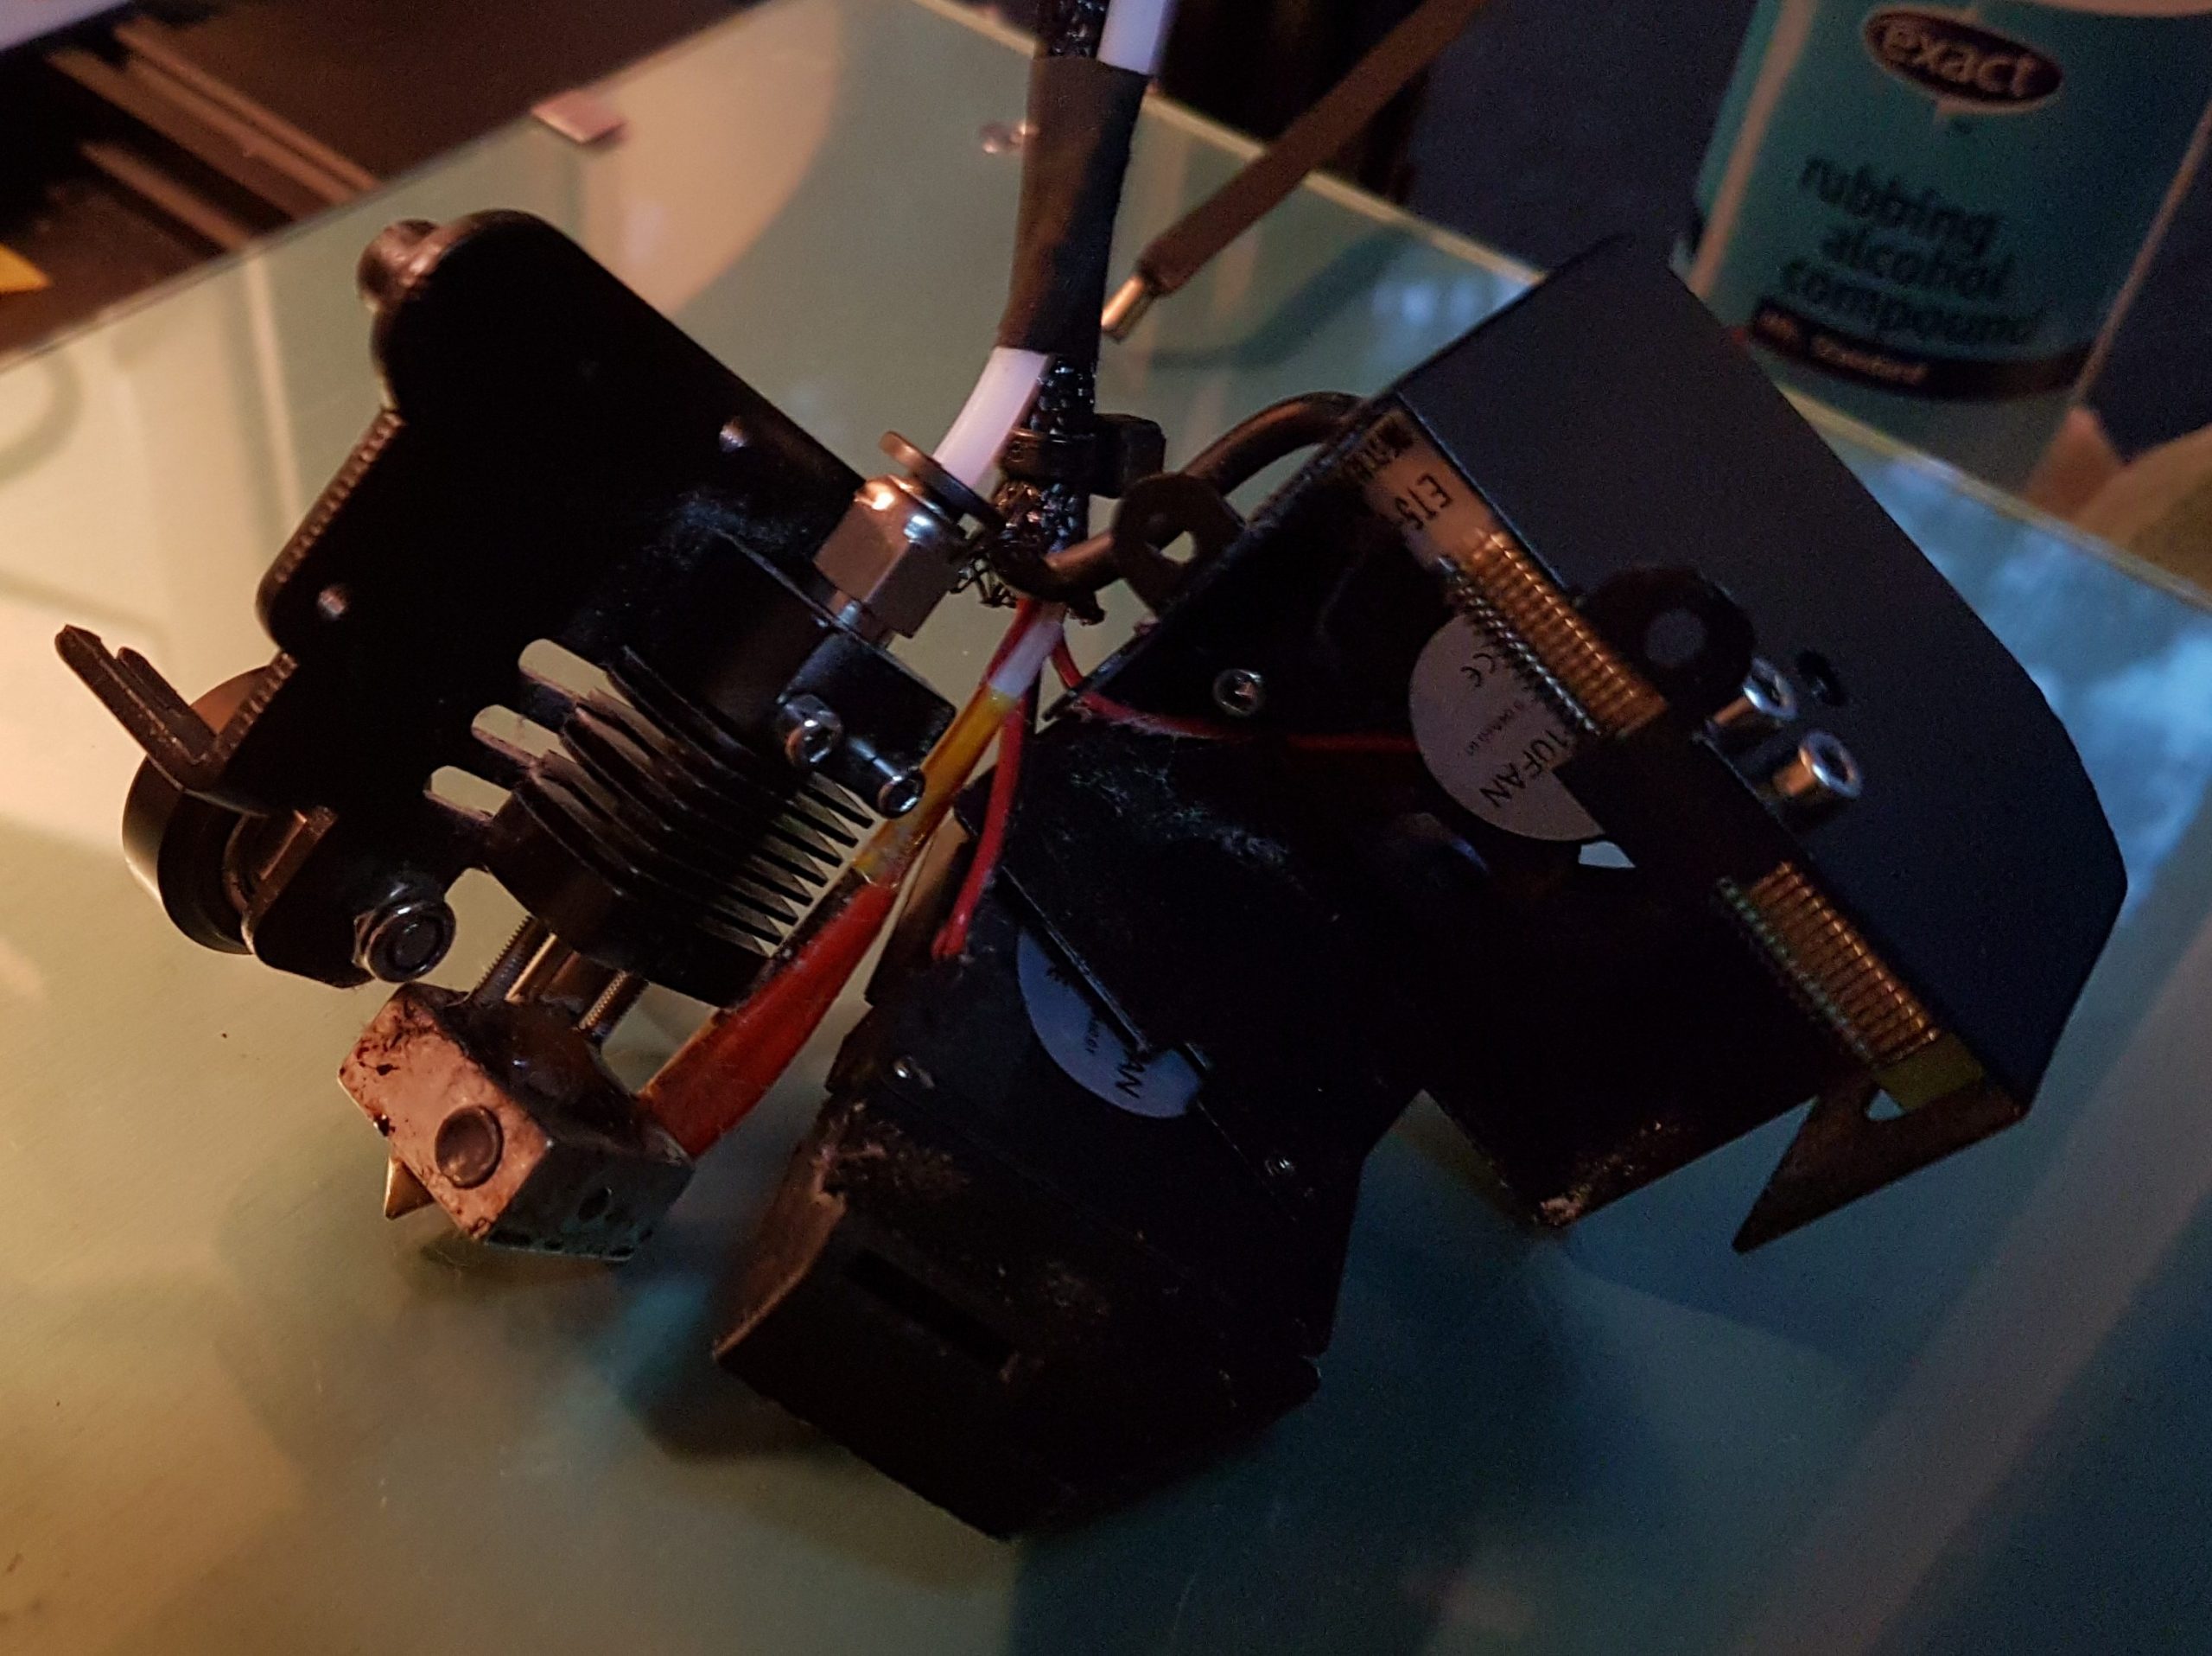
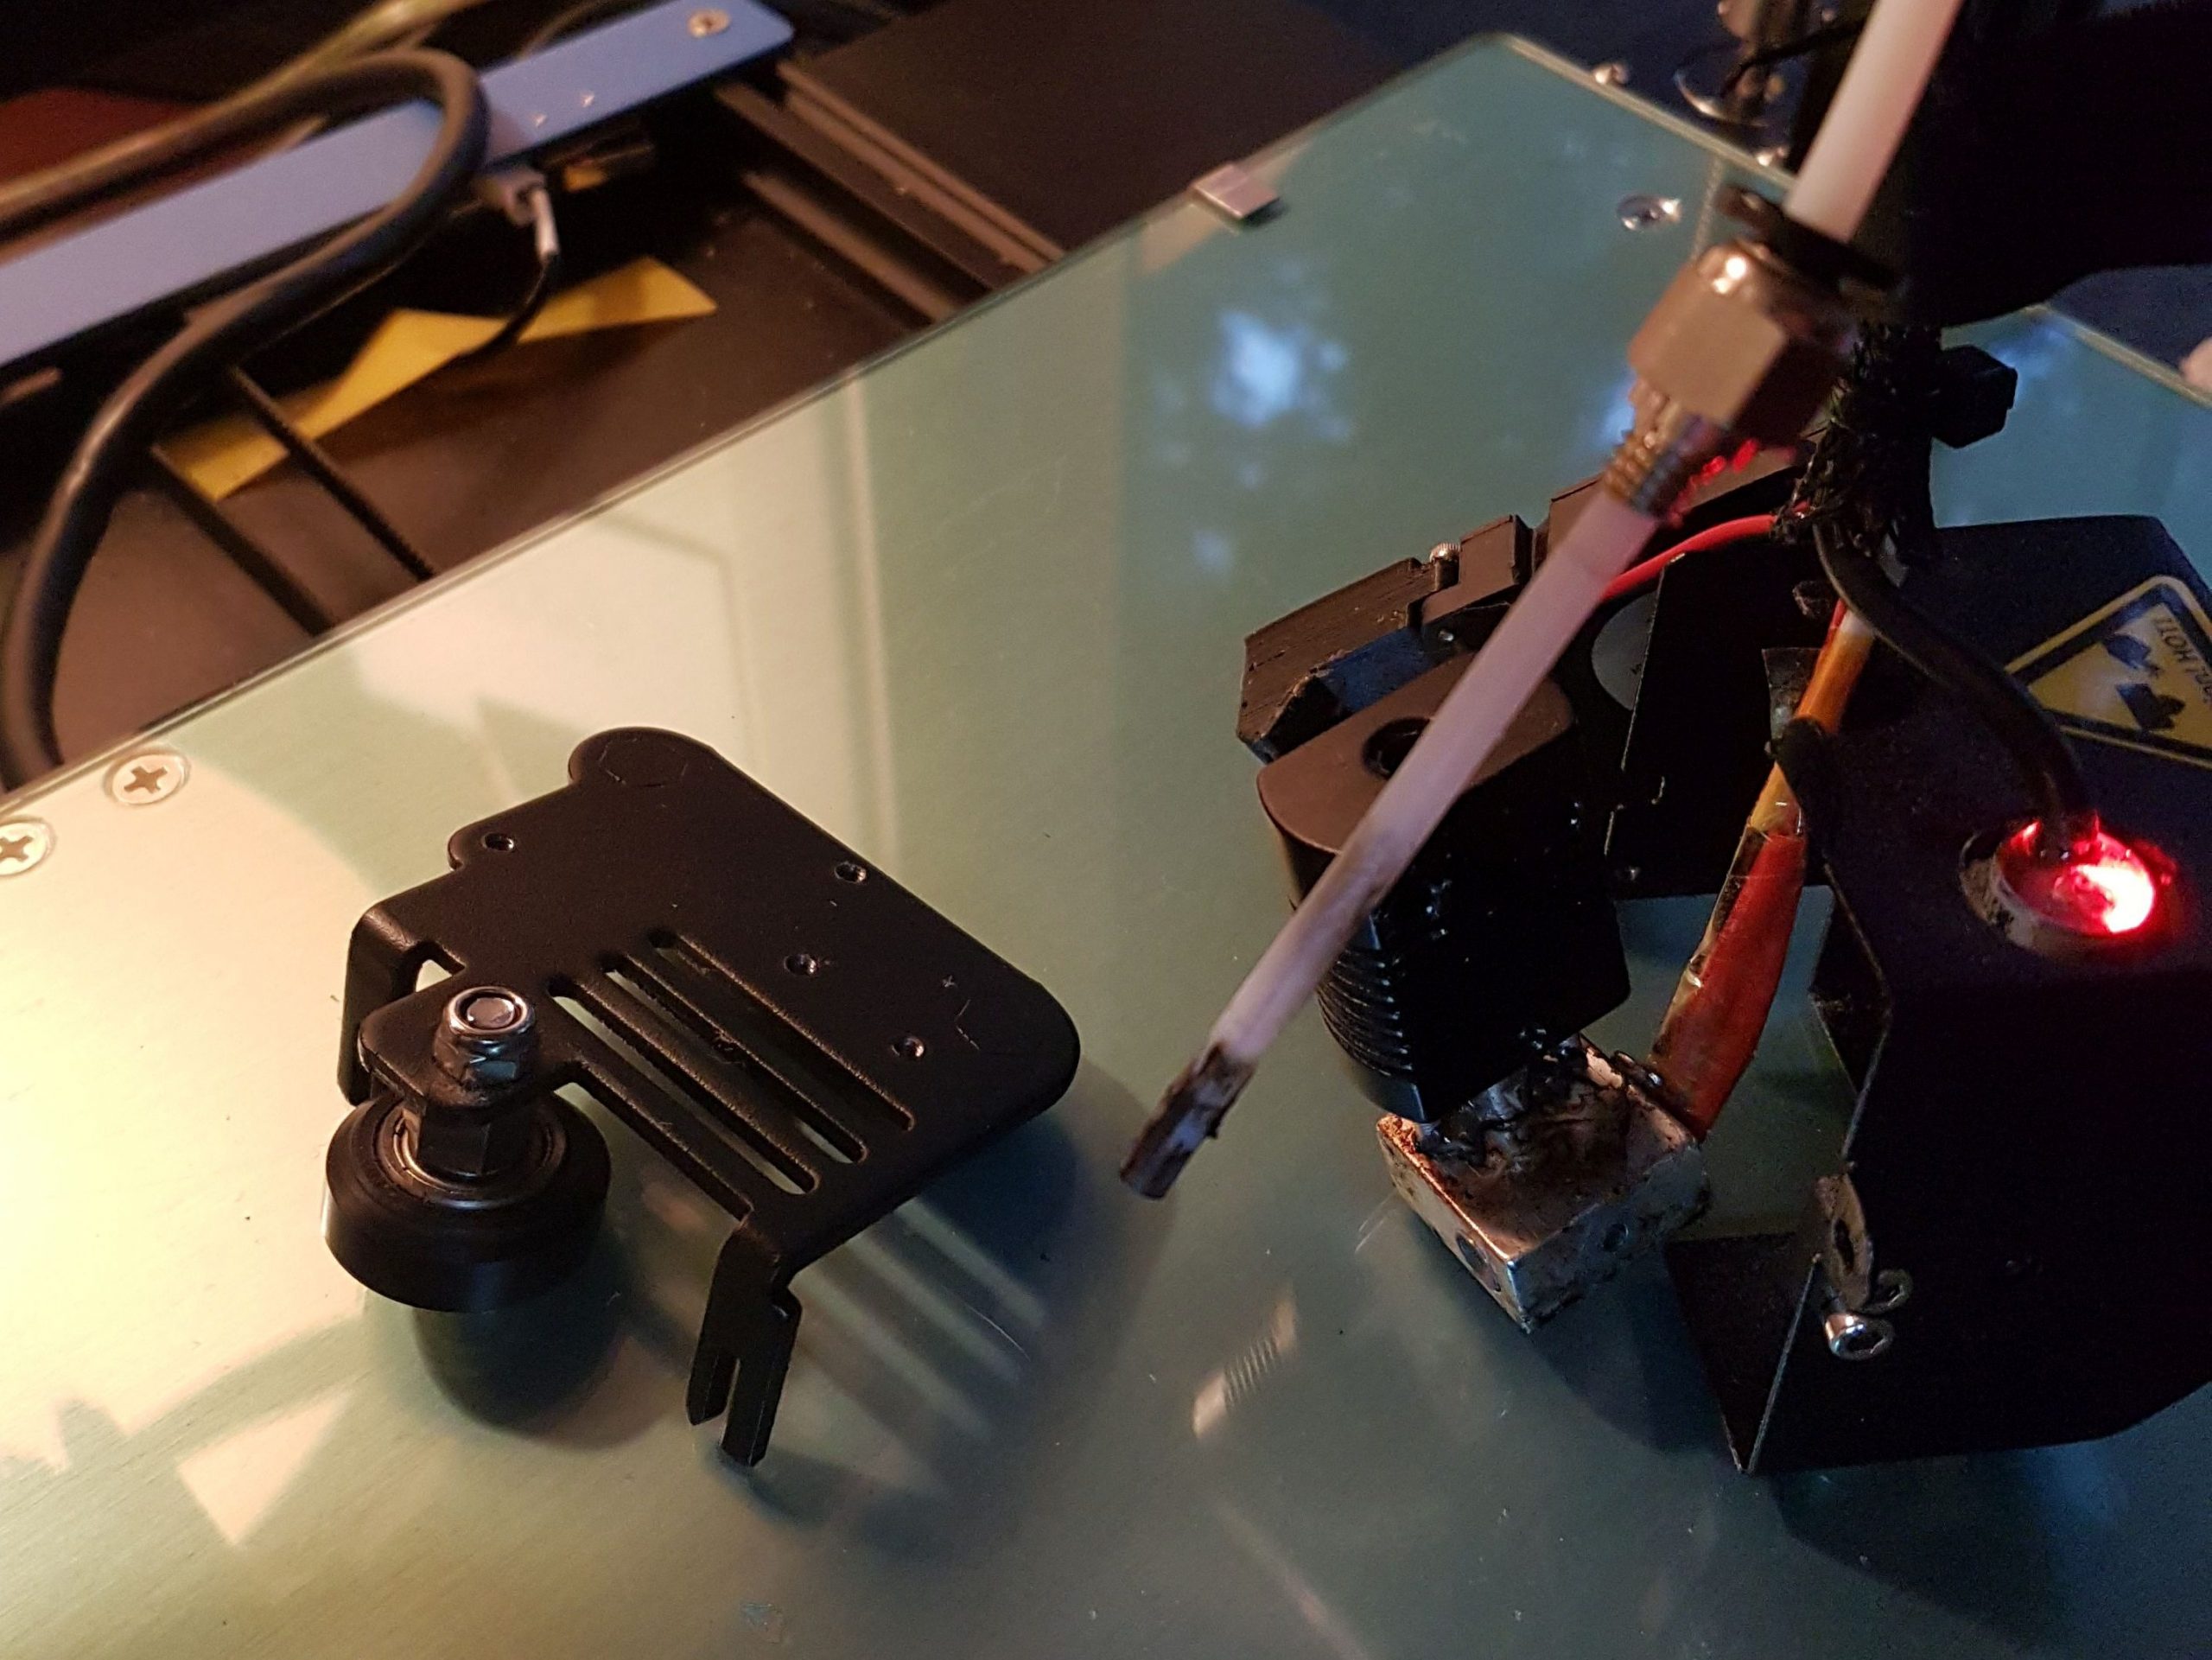
Then our supplies arrived and I began disassembling the printer’s hot end (what you might think of as the print head on a traditional printer). Here you see it opened up and laid out for inspection. Even to get to this point I had to disengage it from the X-axis drive belt, and remove two of the wheels and the print cooling fan. The problem is somewhere between where the Bowden tube (the white tube at the top) enters, and the nozzle (the pointy metal bit at the lower left of the assembly).

Isolating the Problem Area

Next I removed the back panel (with the remaining wheel) from the heat dissipation block (the central black thing with the fins for air cooling), and unscrewed the Bowden tube connector. You can also see a glob of melted and burnt filament plastic on top of the rectangular heating block that the nozzle is screwed into. But to go any further I had to turn on the printer and heat it up. Everything was fused together by solidified printing plastic, and it had to be softened before I could do anything else.

Smokin’ Hot! Literally!

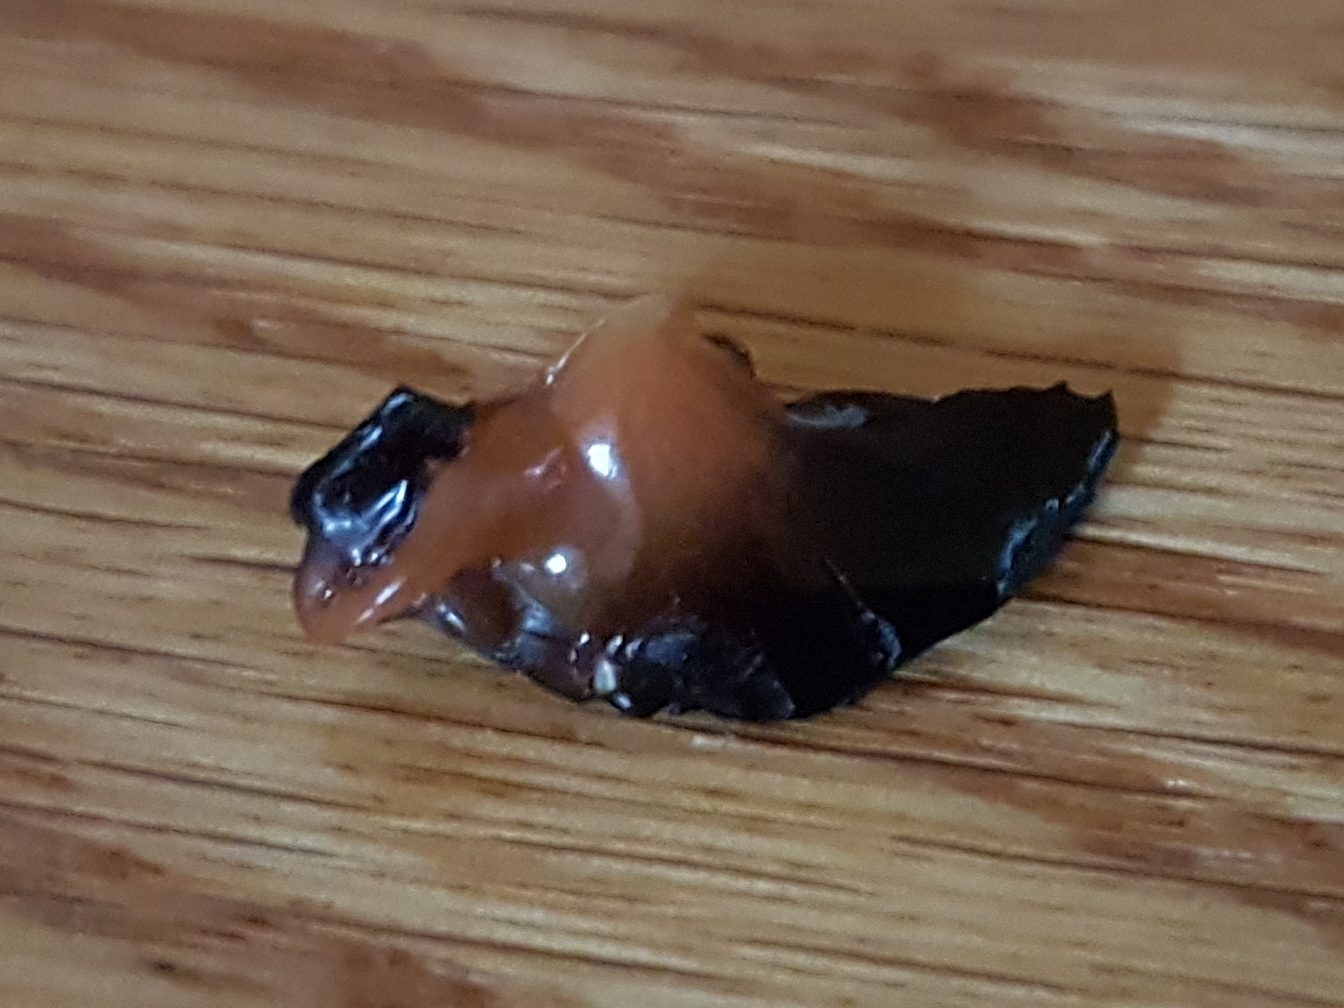
Once it was heated I was able to pull that piece of plastic off the top of the heating block.

I also removed the nozzle and confirmed that the blockage was higher than that.

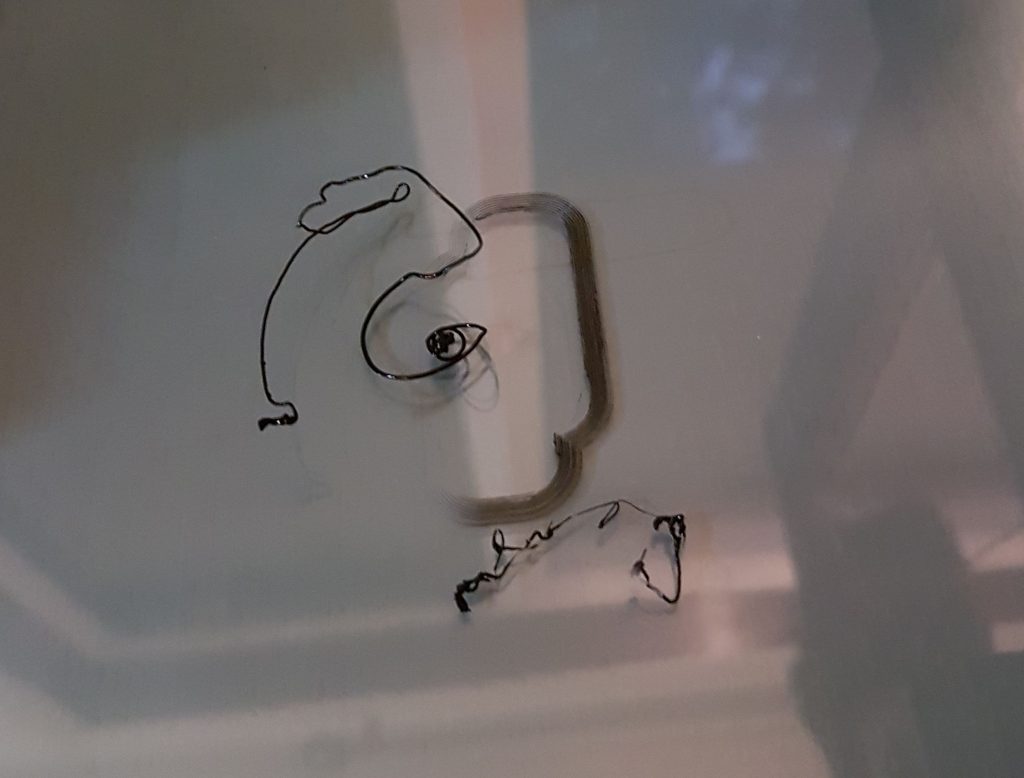
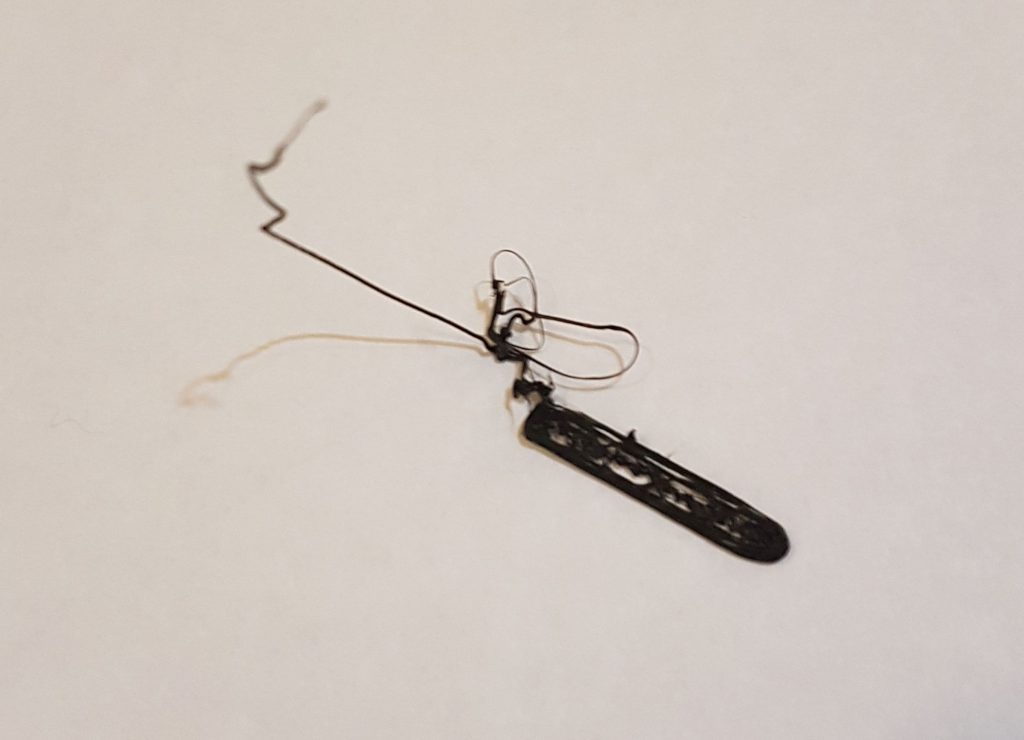
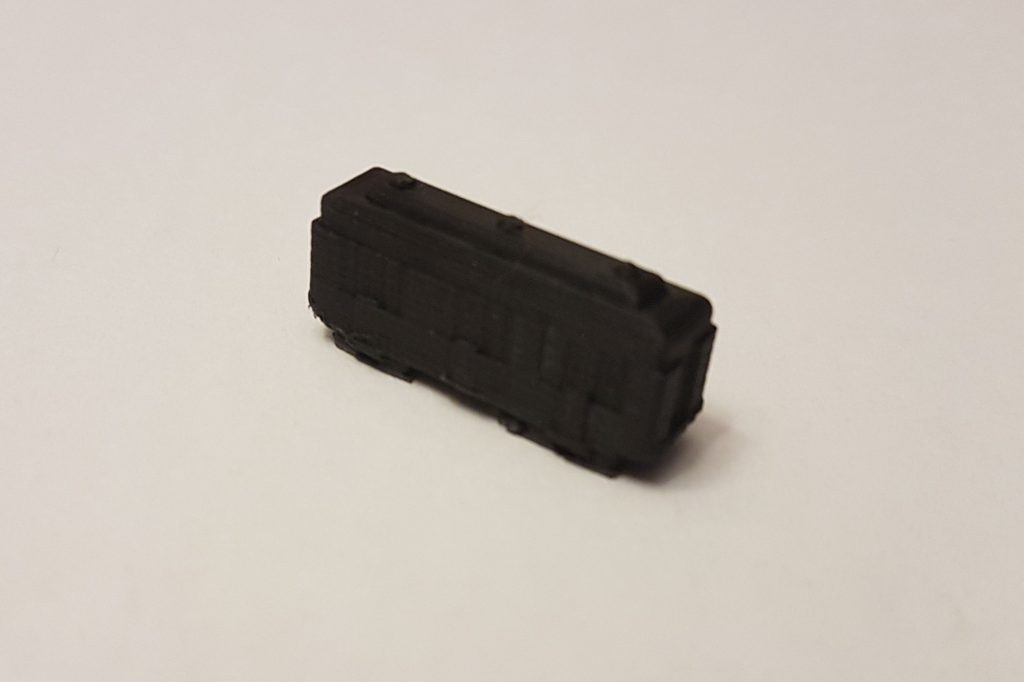
The Bowden tube itself was really stuck hard in there! I had to hold the heat dissipation block with pliers and pull hard on the tube to get it out, all while being very aware that I was dealing with parts heated to 235ºC (455ºF).

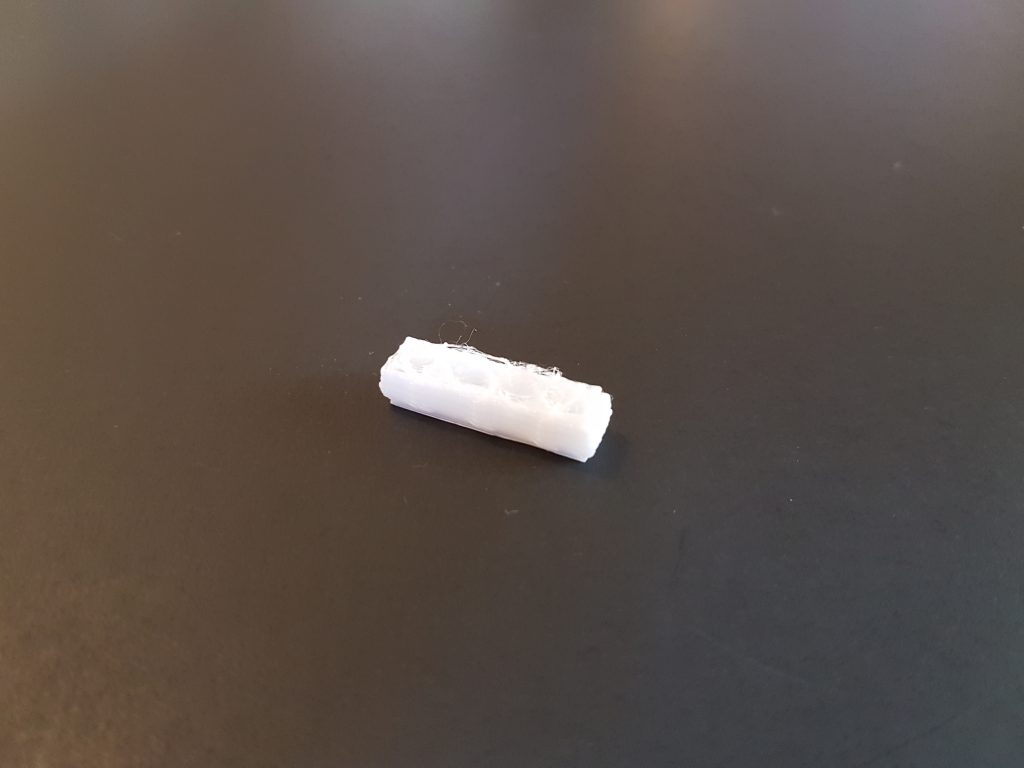
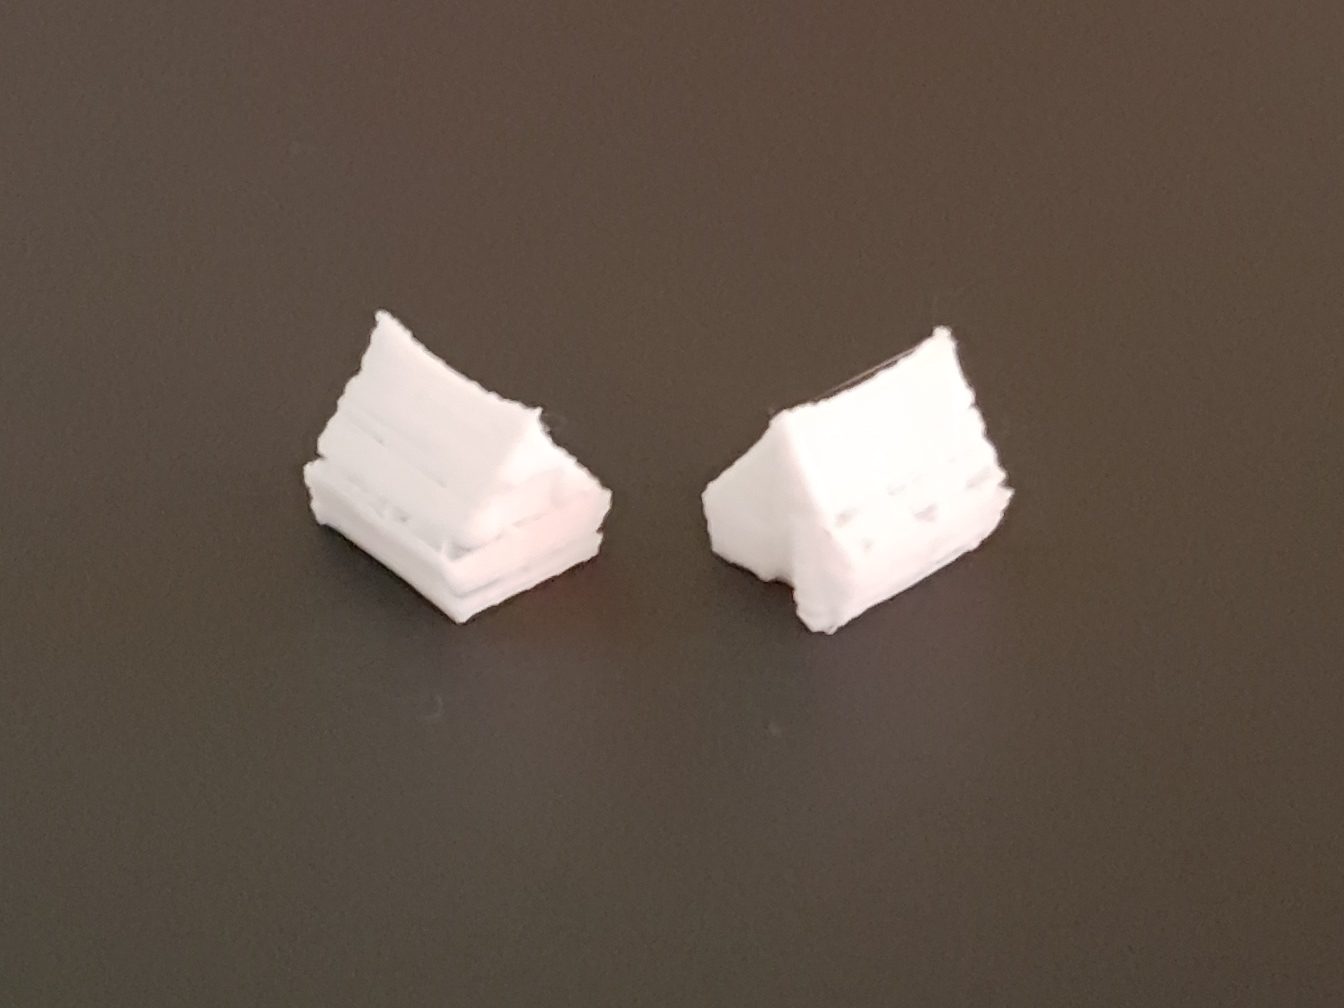
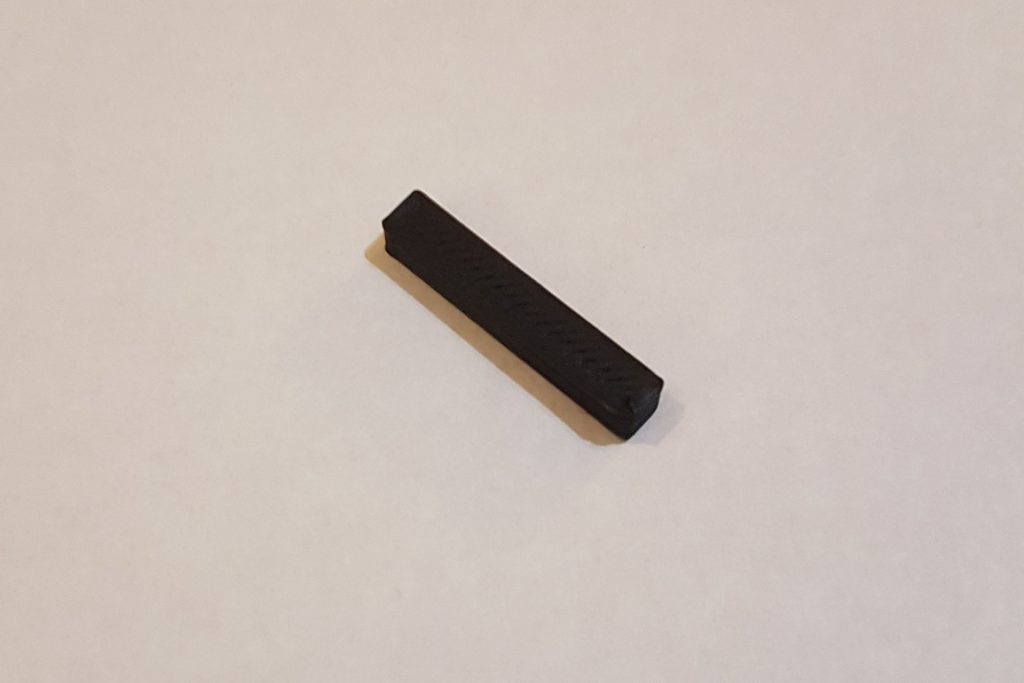
When it finally came out, it was blackened and smoking! Unfortunately the smoke dissipated before I could snap a pic of it, but here you can see the blackened end of the Bowden tube. It smelled faintly sweet, which makes sense I guess considering PLA is made from corn starch.

The Solution

While the root cause of the problem is still just an educated guess (as I speculated last week, I think it came from operating the printer very hot for the metallic filament), the immediate problem was clear. The end of the Bowden tube was completely blocked with burned filament. Since I had already purchased a new one, I just had to cut it to length and install it. I was grateful to not have to remove the heat break (the metal connection between the heater block and the heat dissipation block), though I did clean out the inside of it with a pipe cleaner. (A real pipe cleaner, not the colored ones that kids use for crafts as that would have melted.)

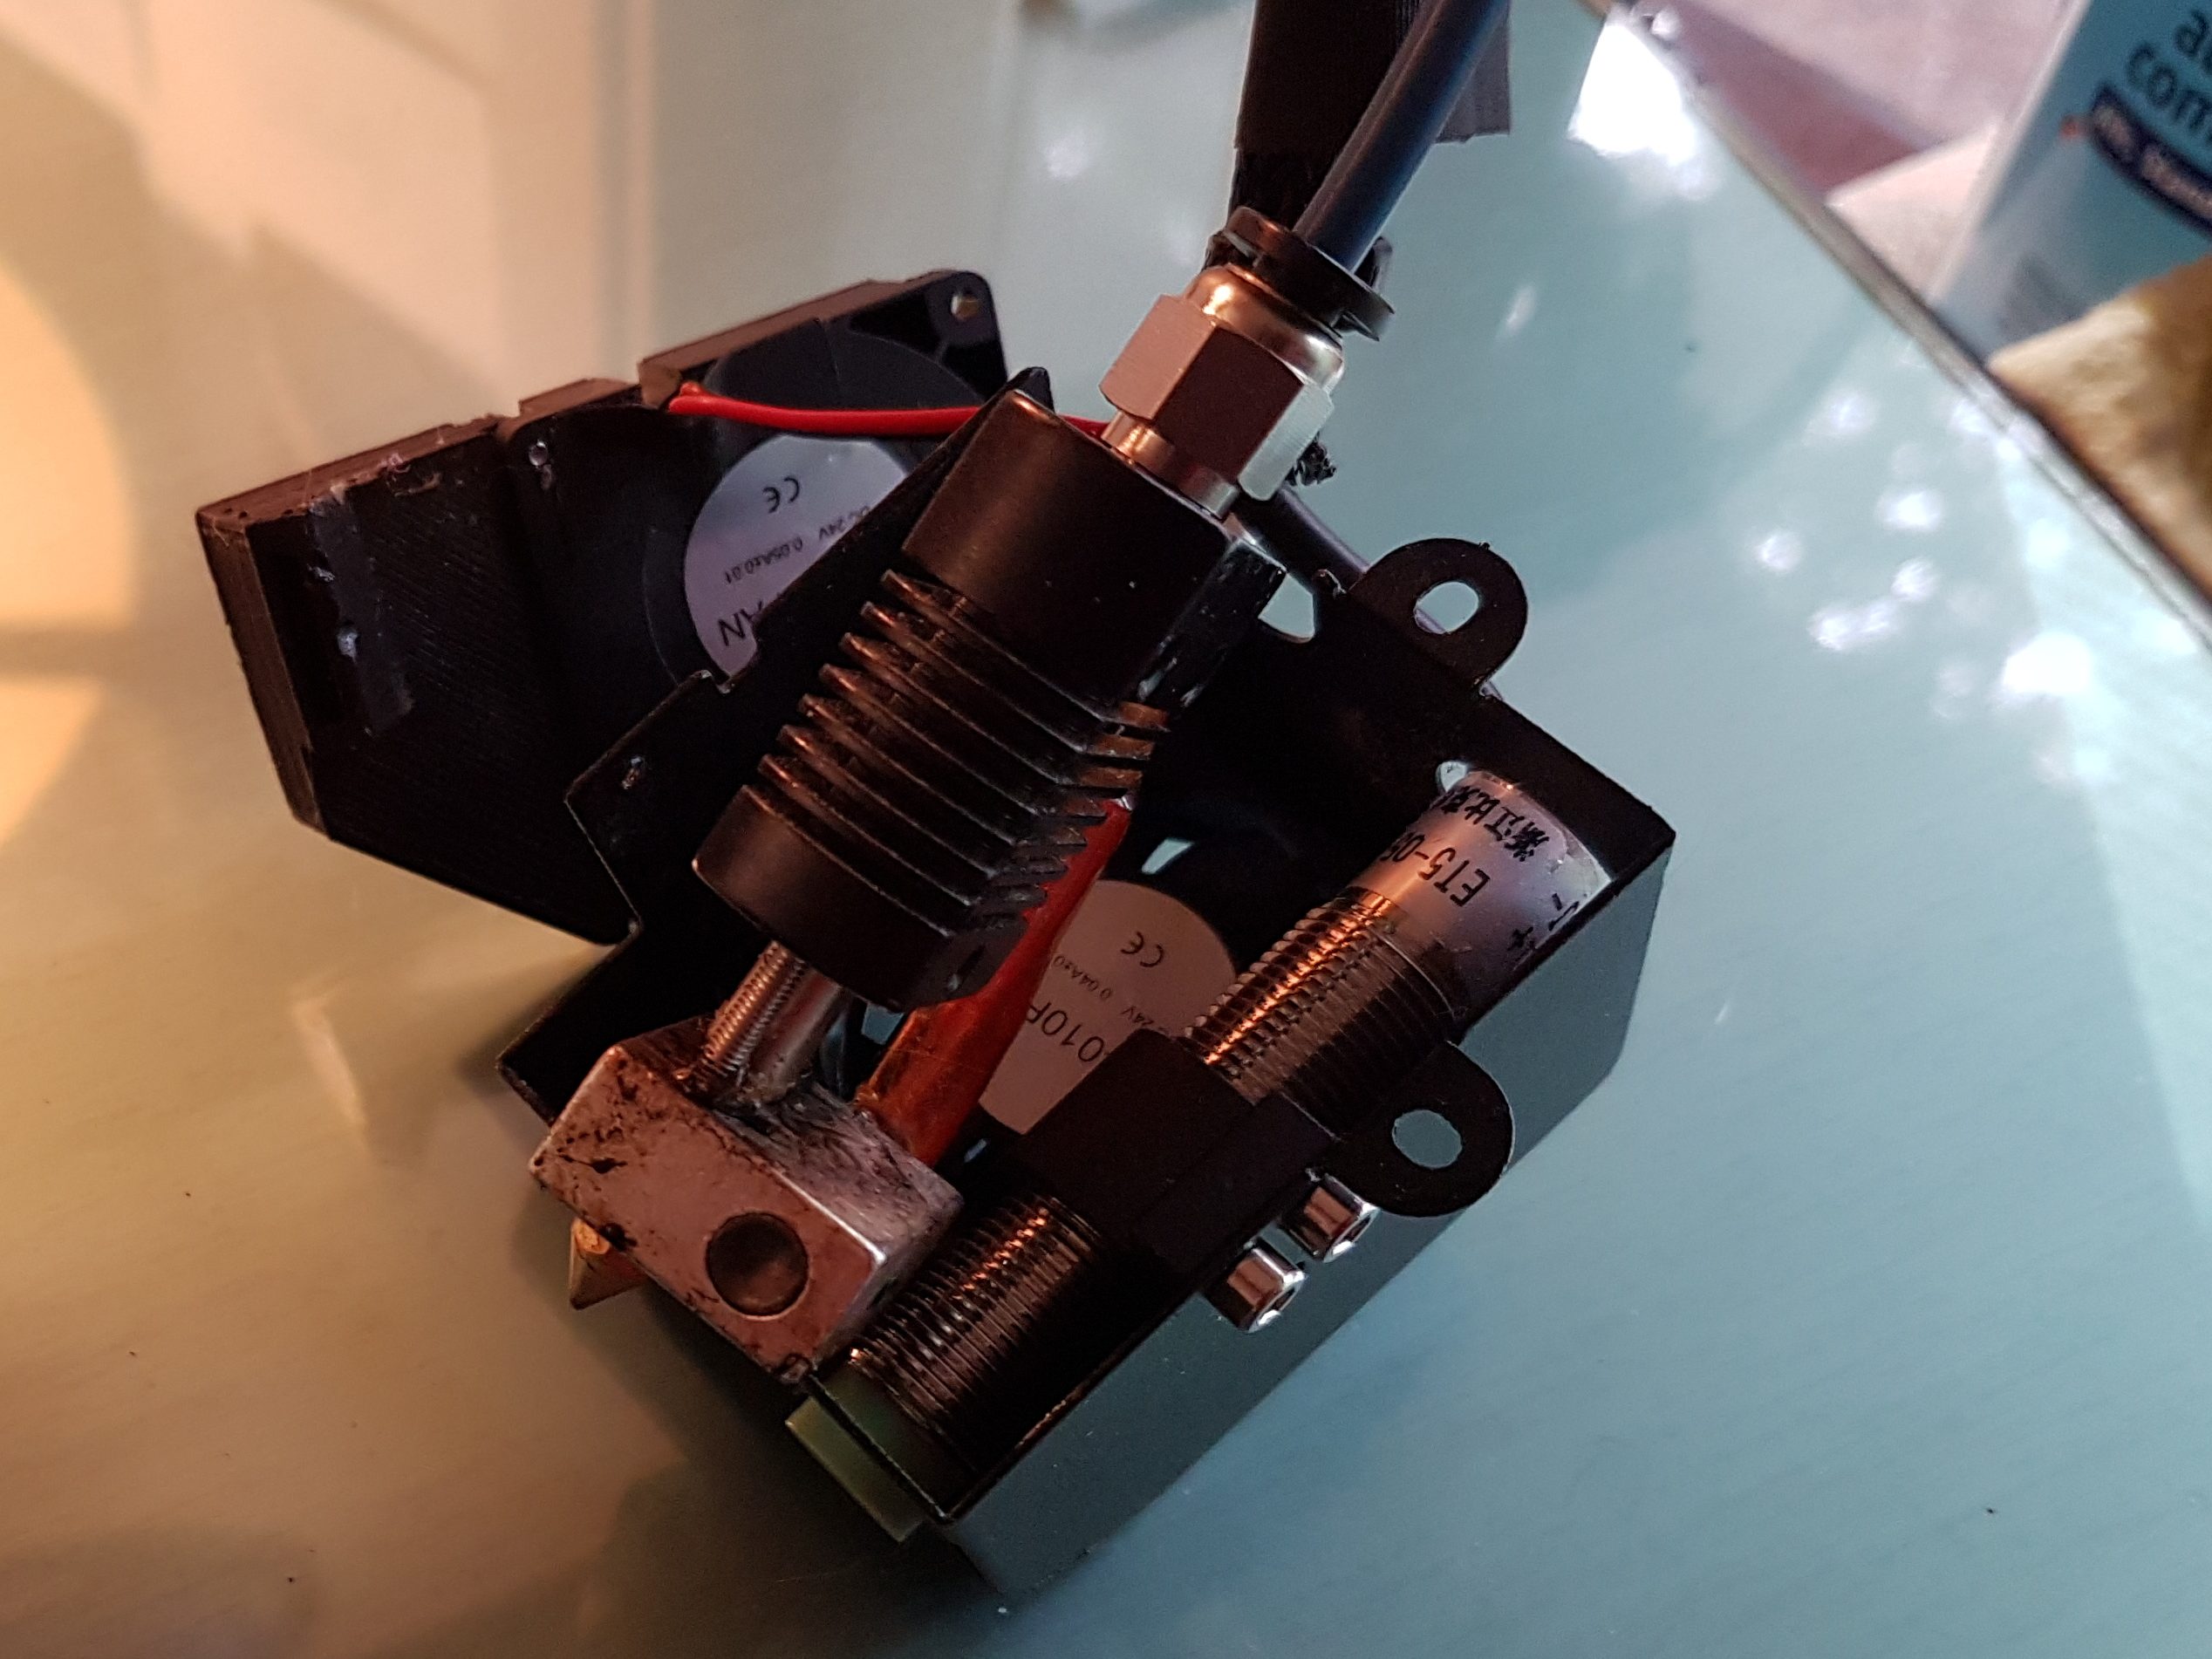
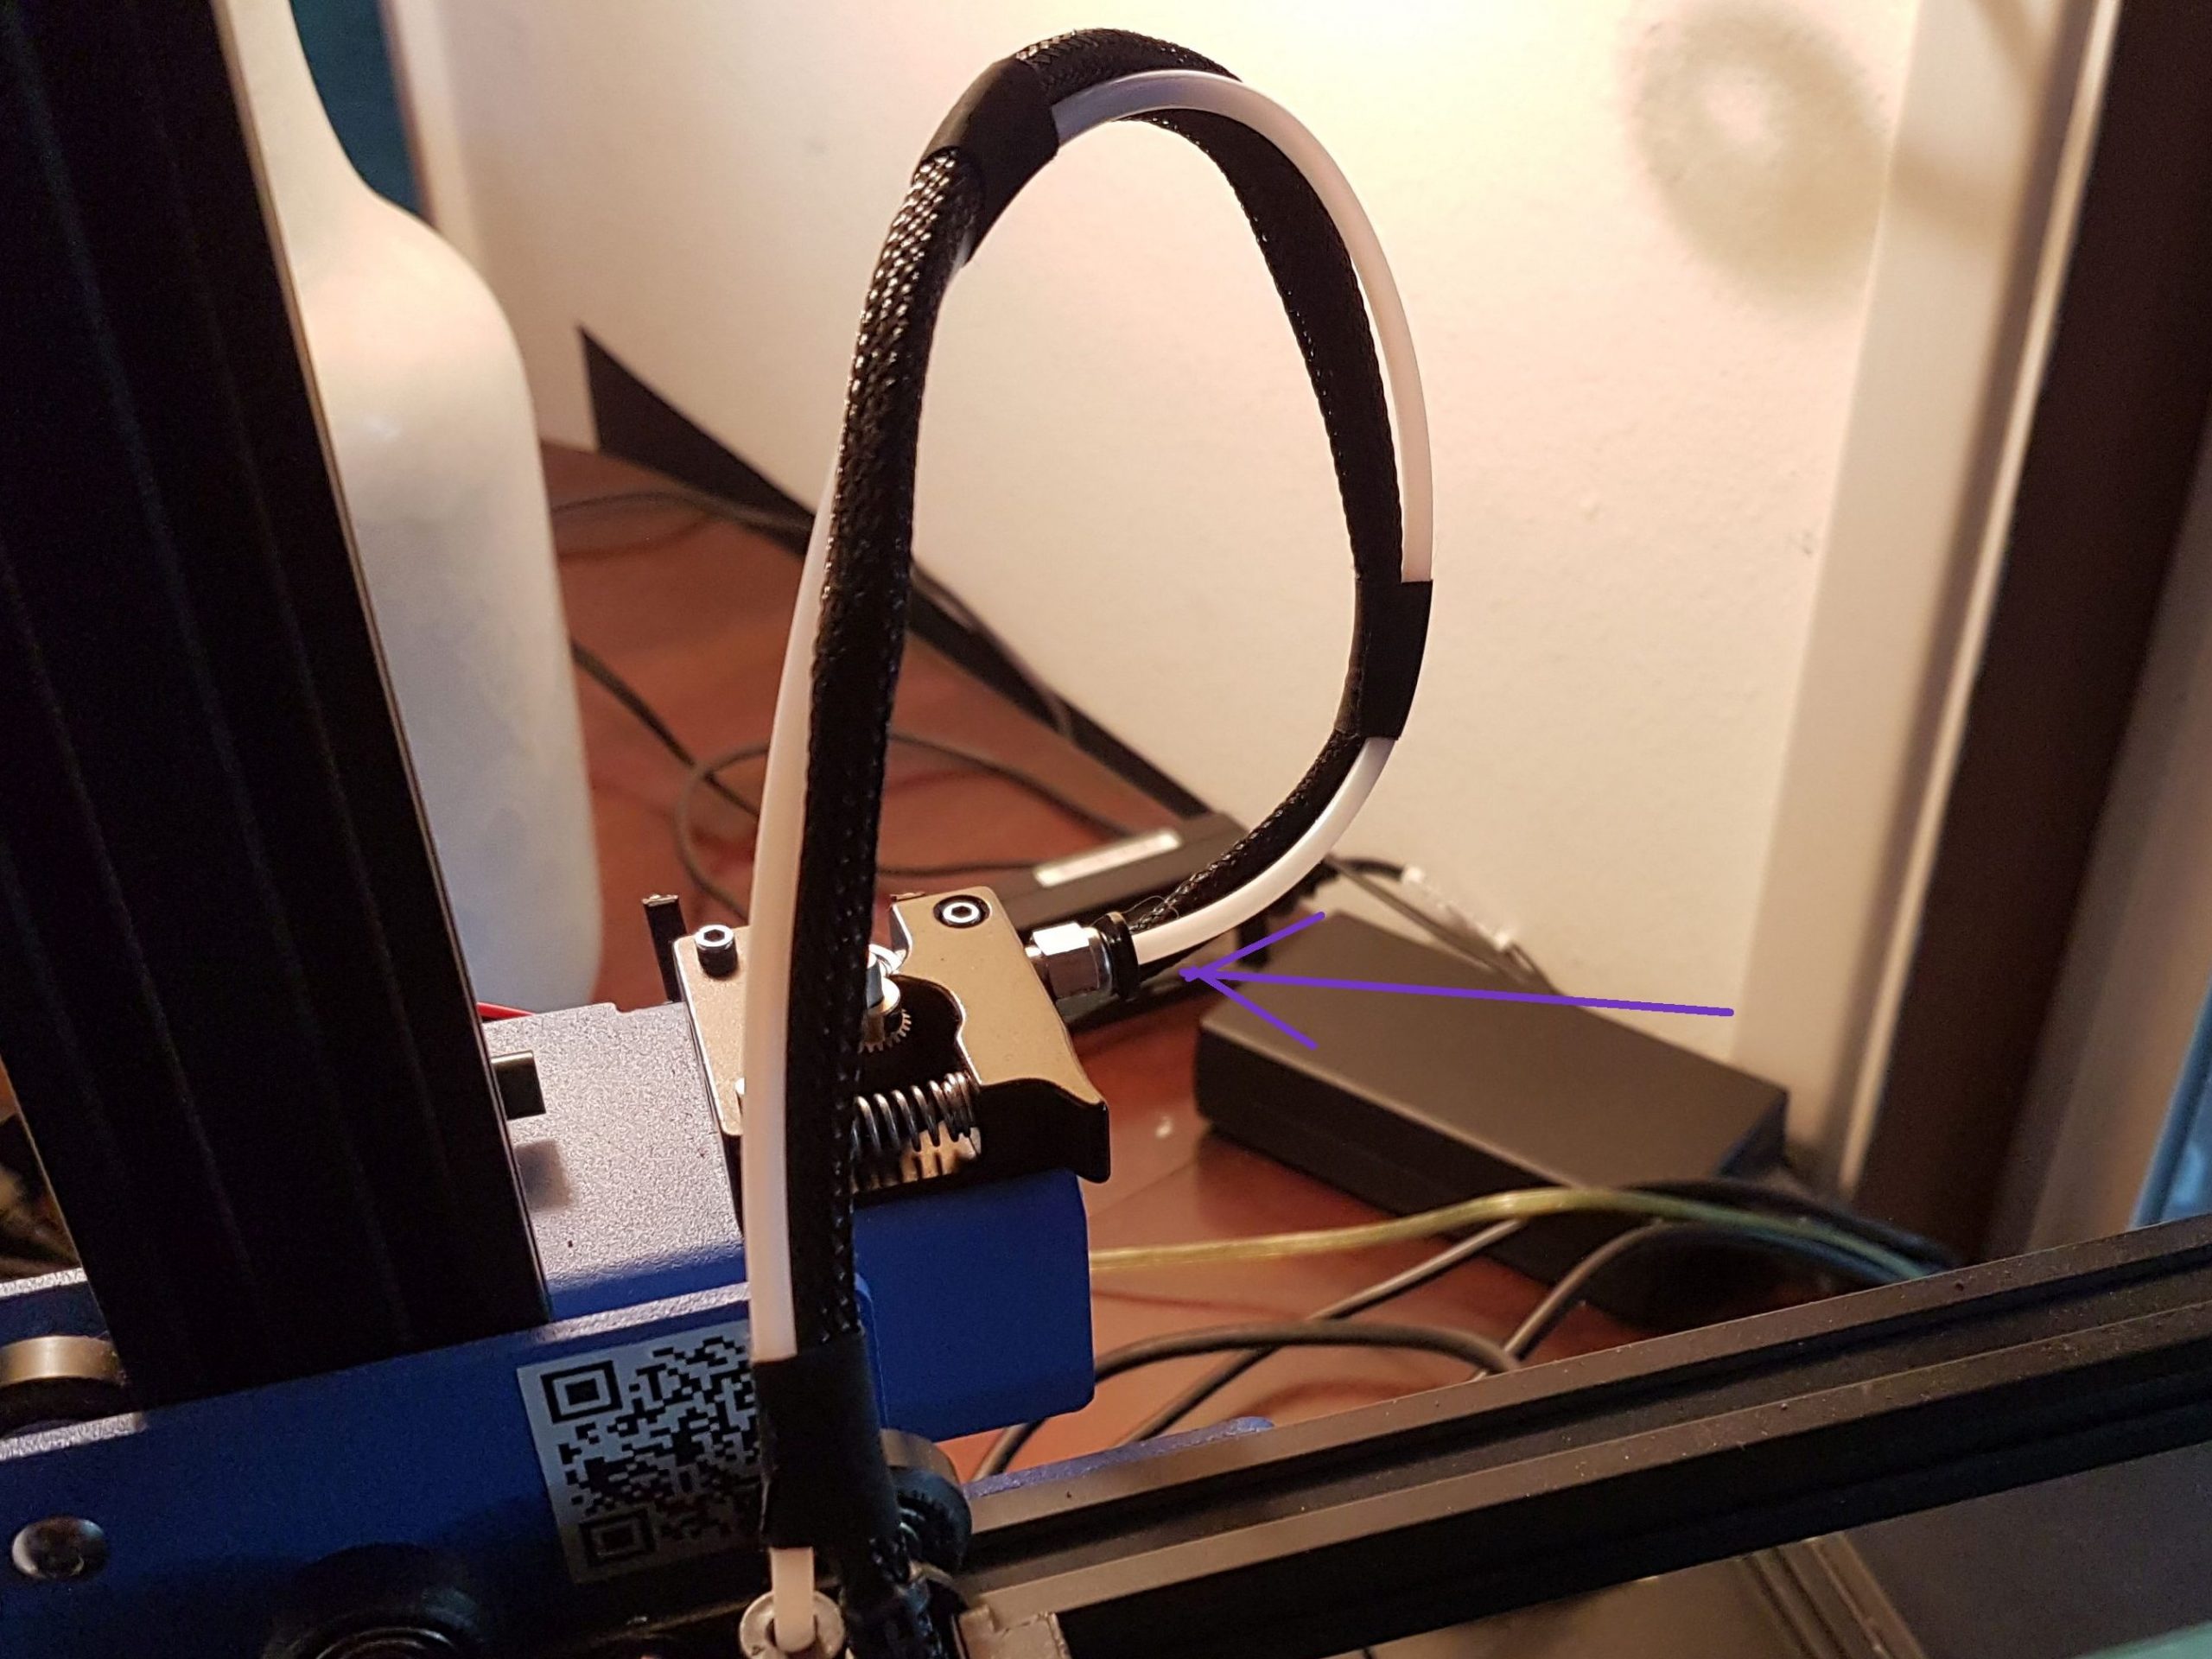
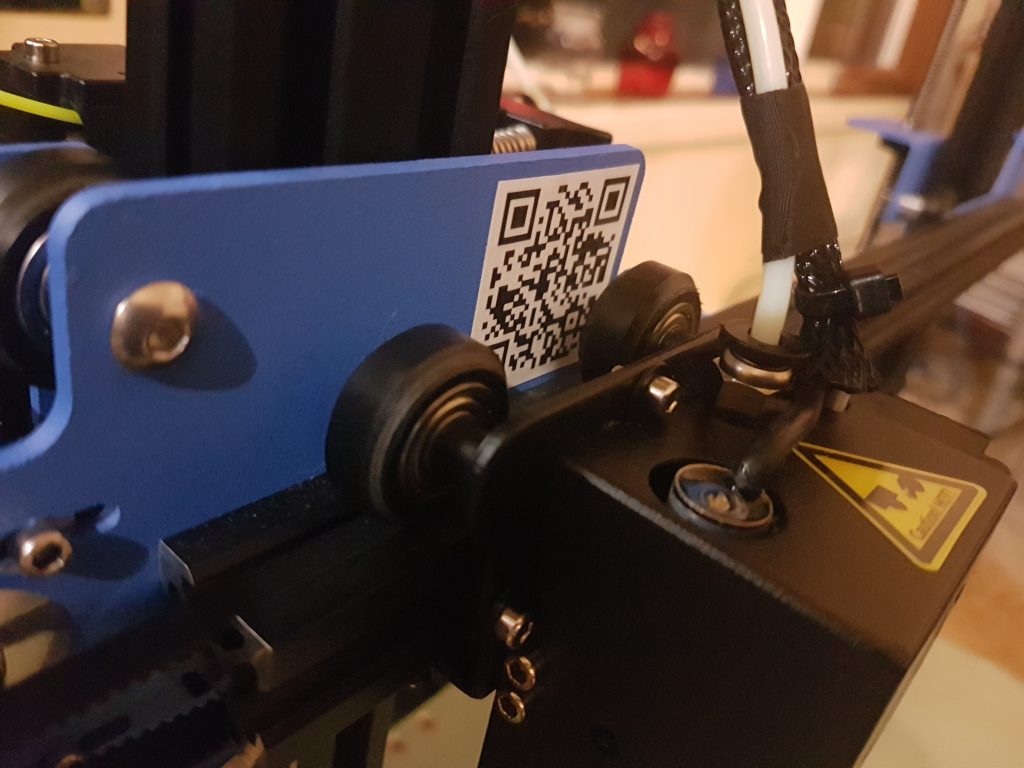
Here it is with the new Bowden tube installed (this one is blue) and the nozzle back in place.

As I put it all back together, I also cleaned it up and tightened some screws that had become slightly loosened.

Better Than Ever!

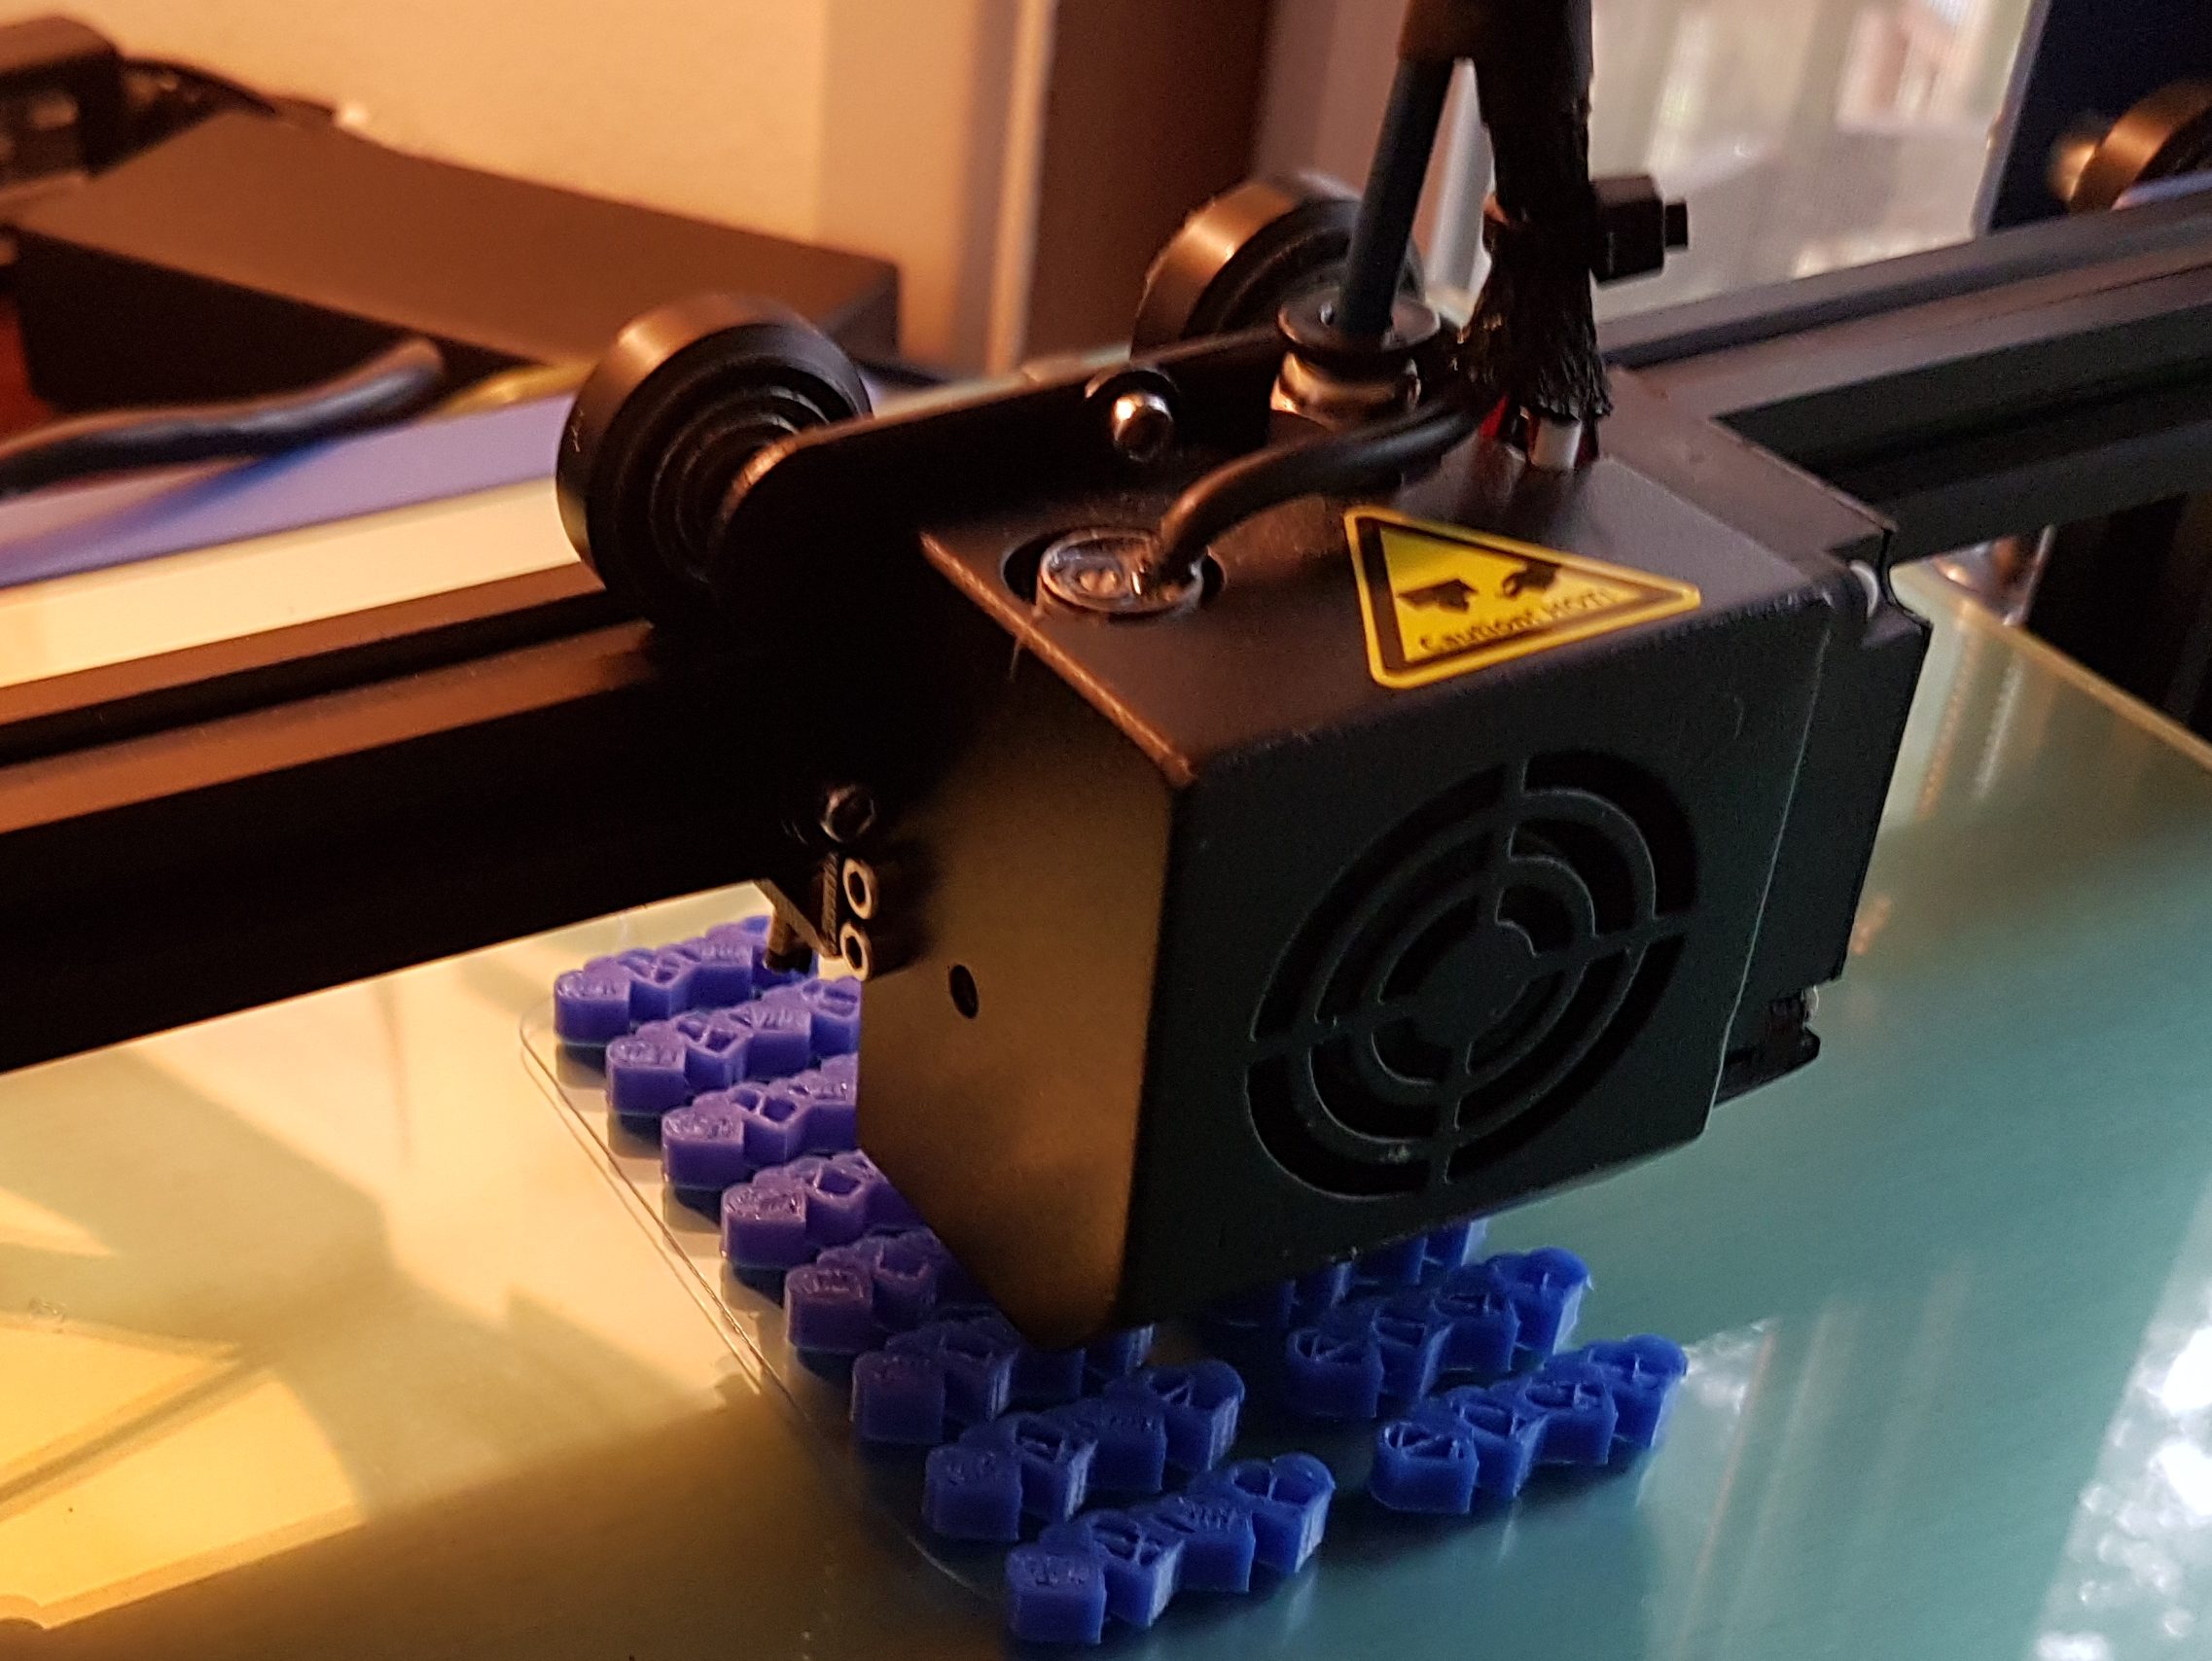
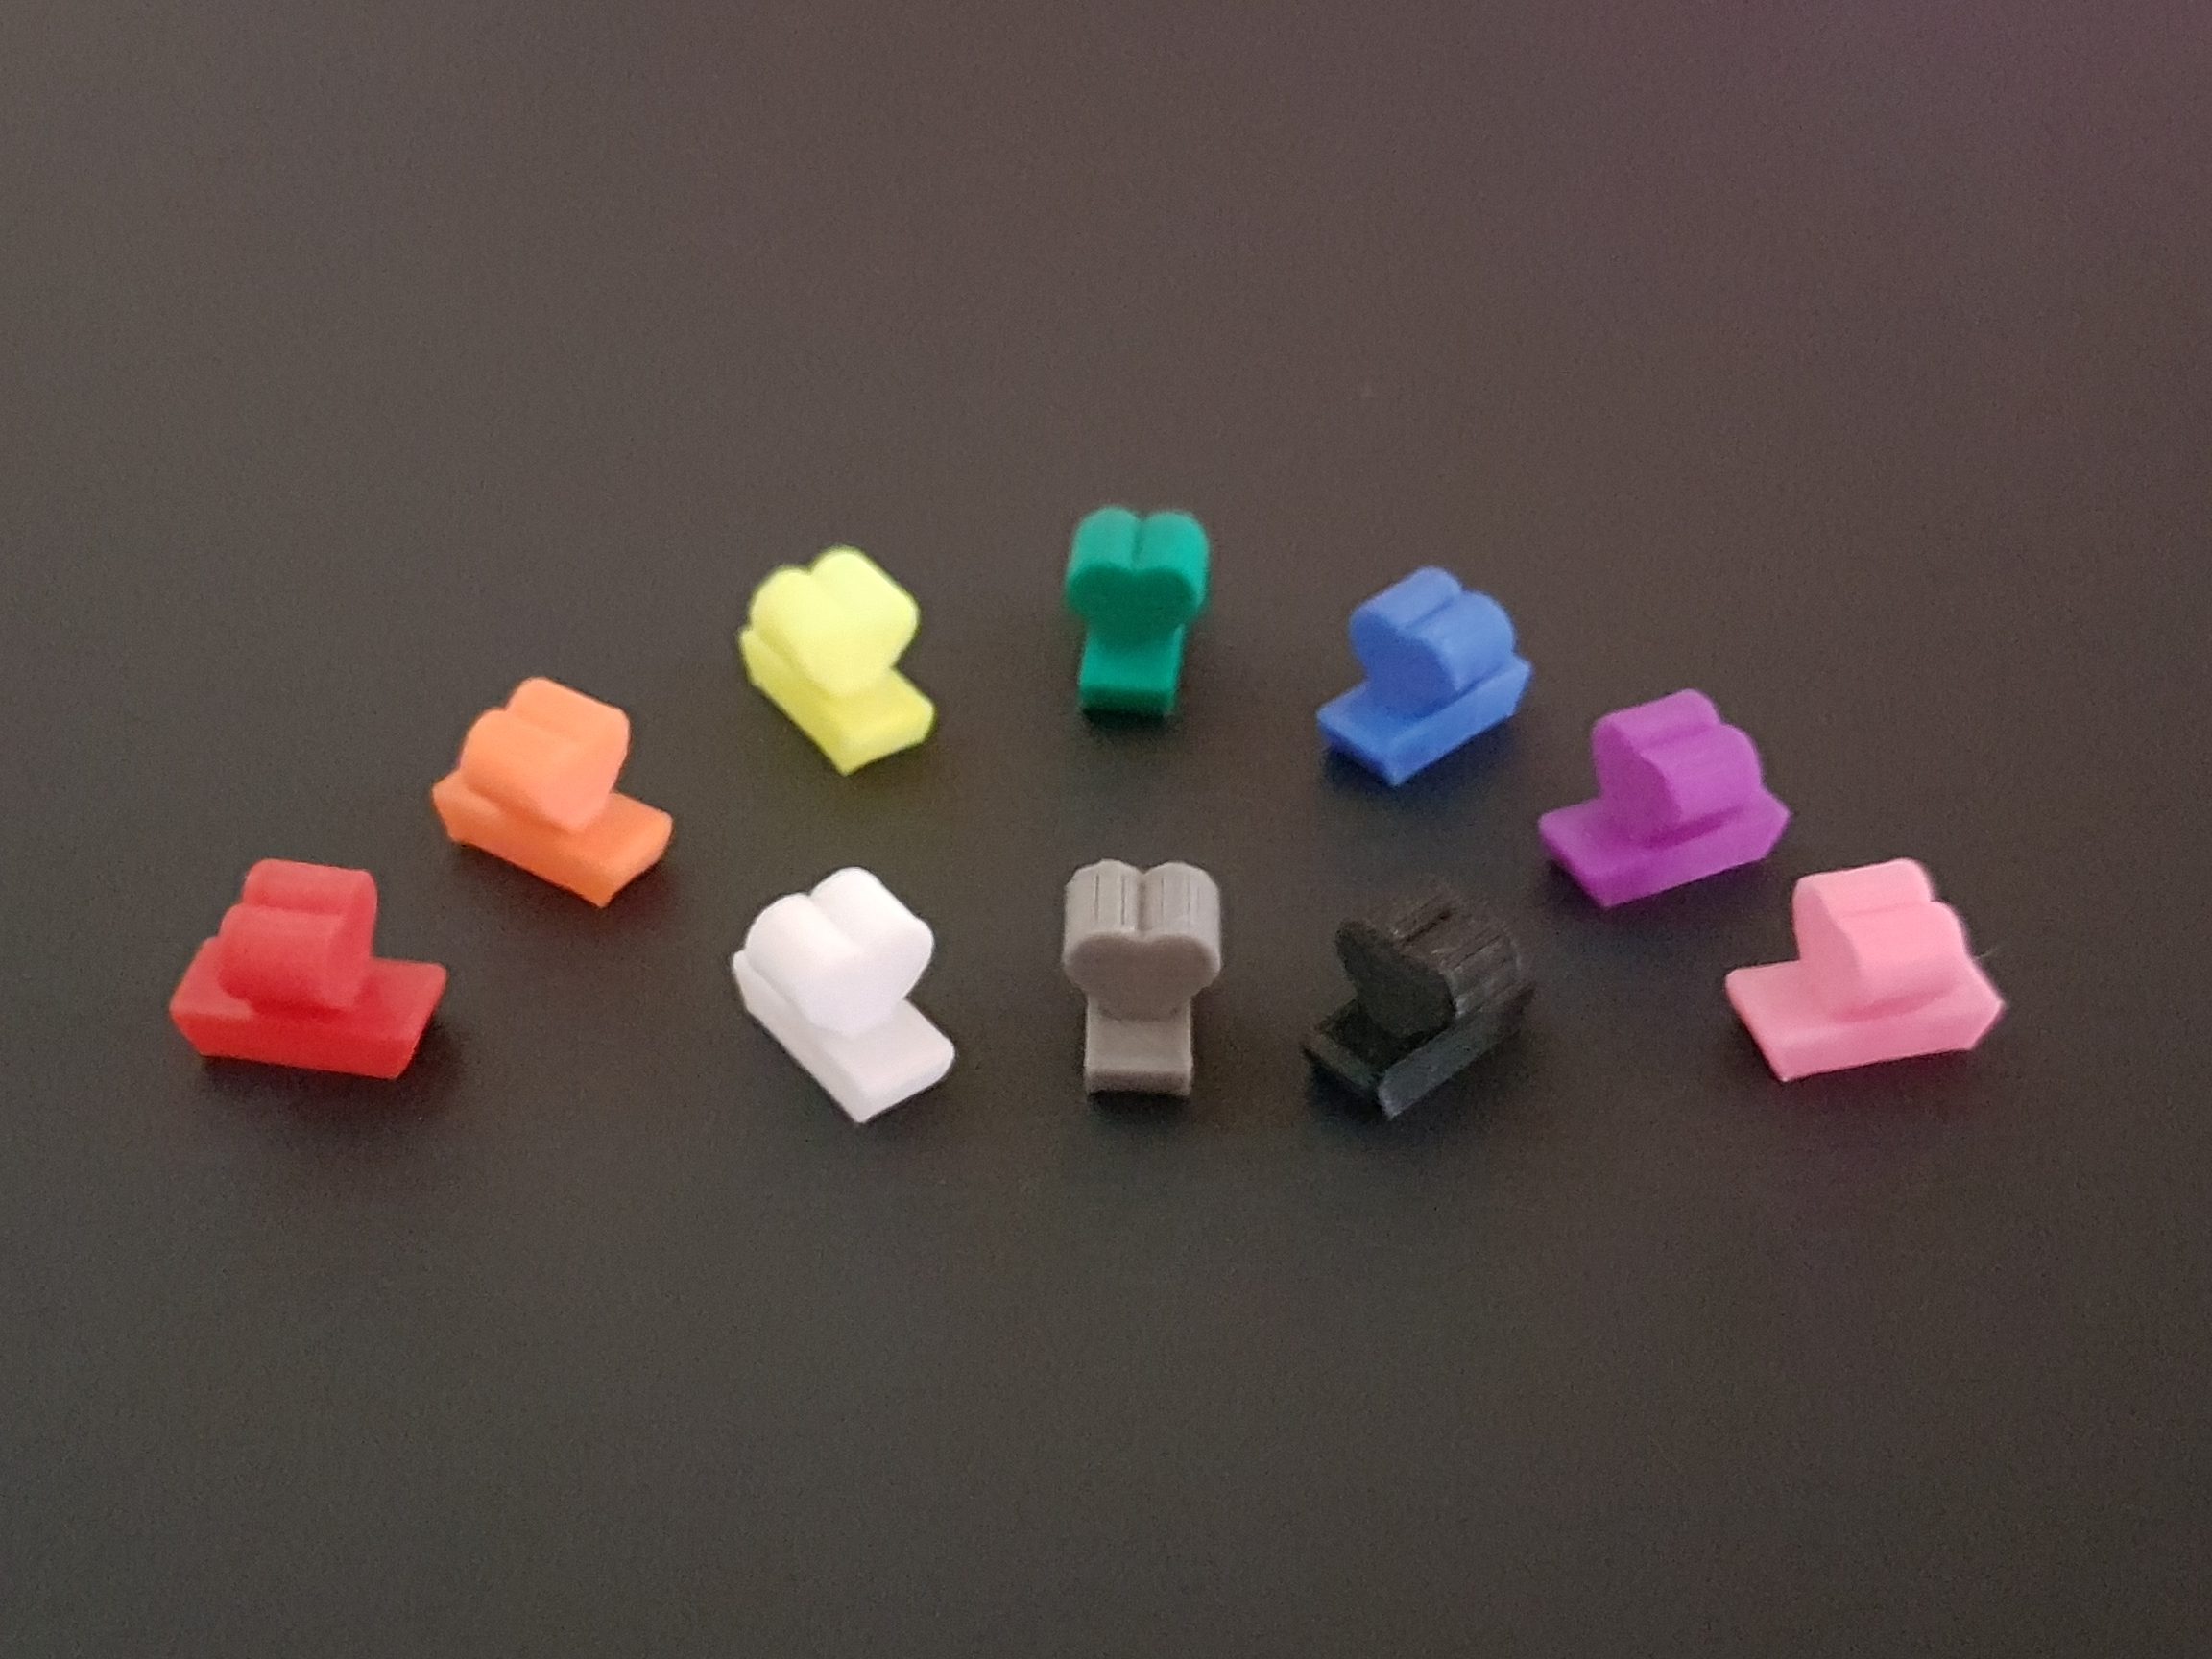
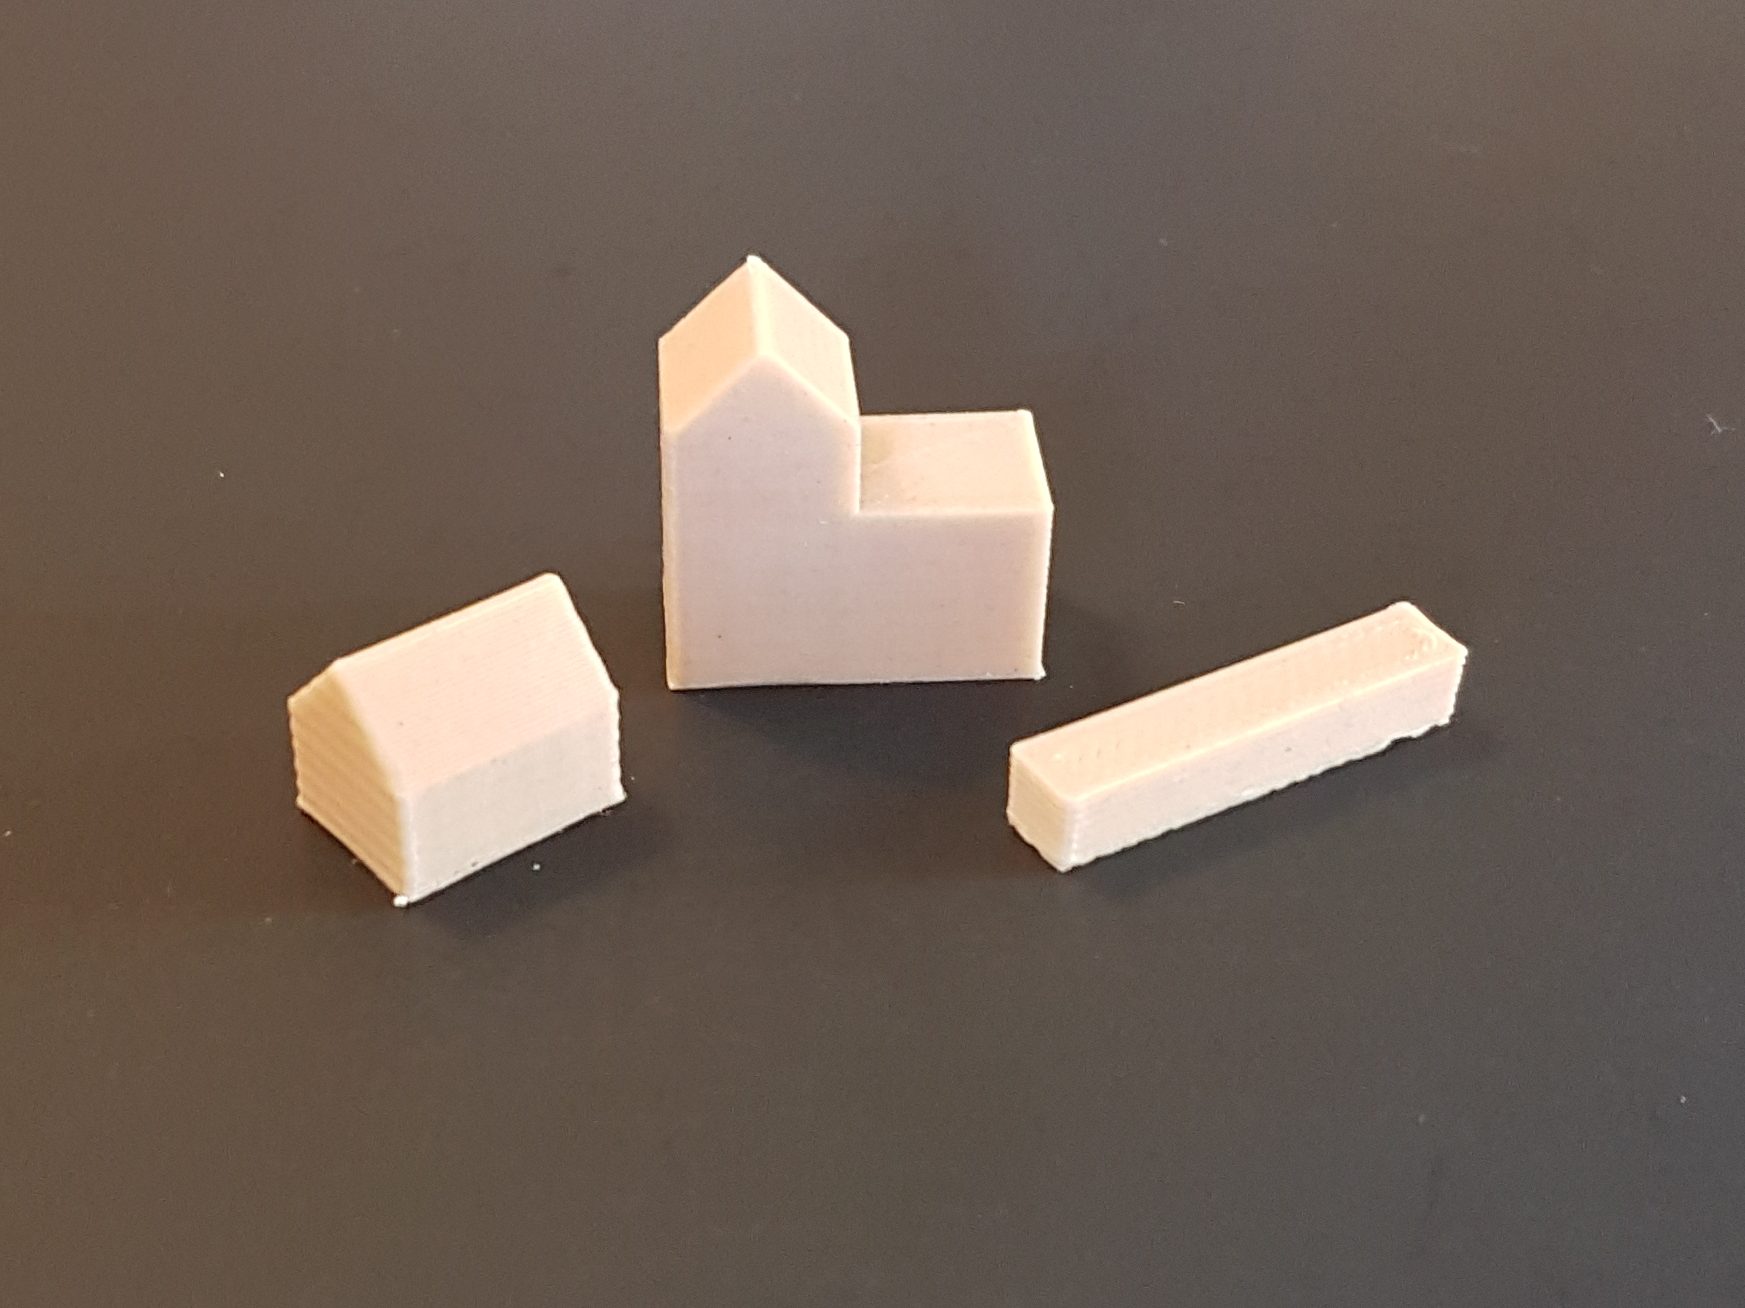
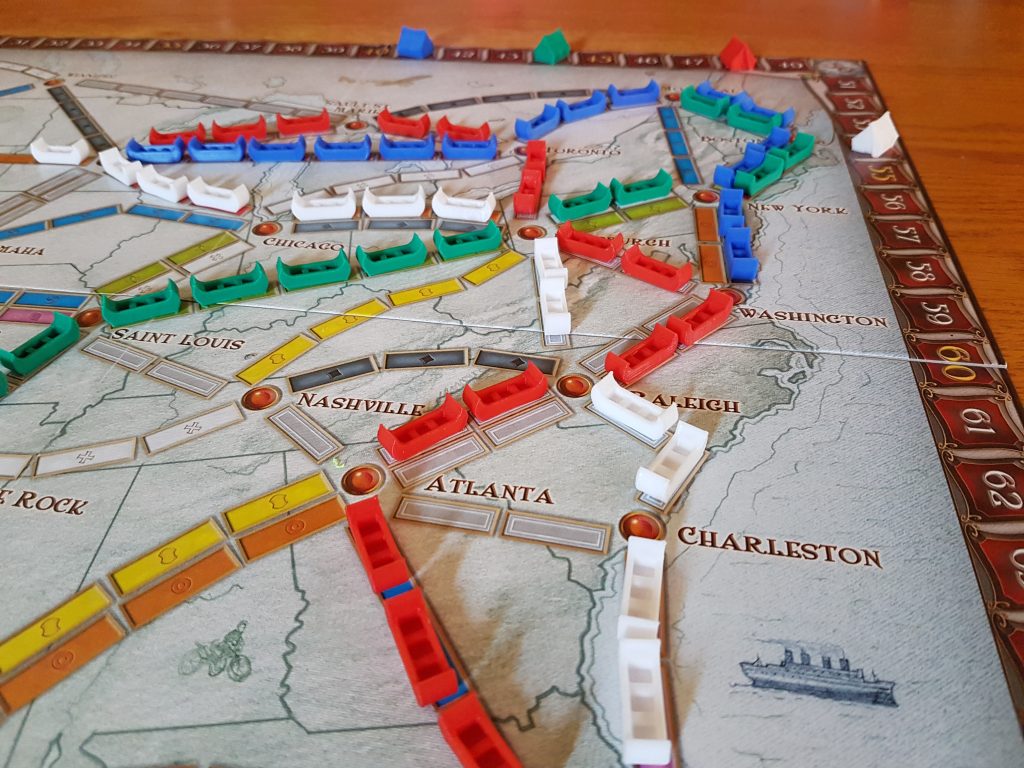
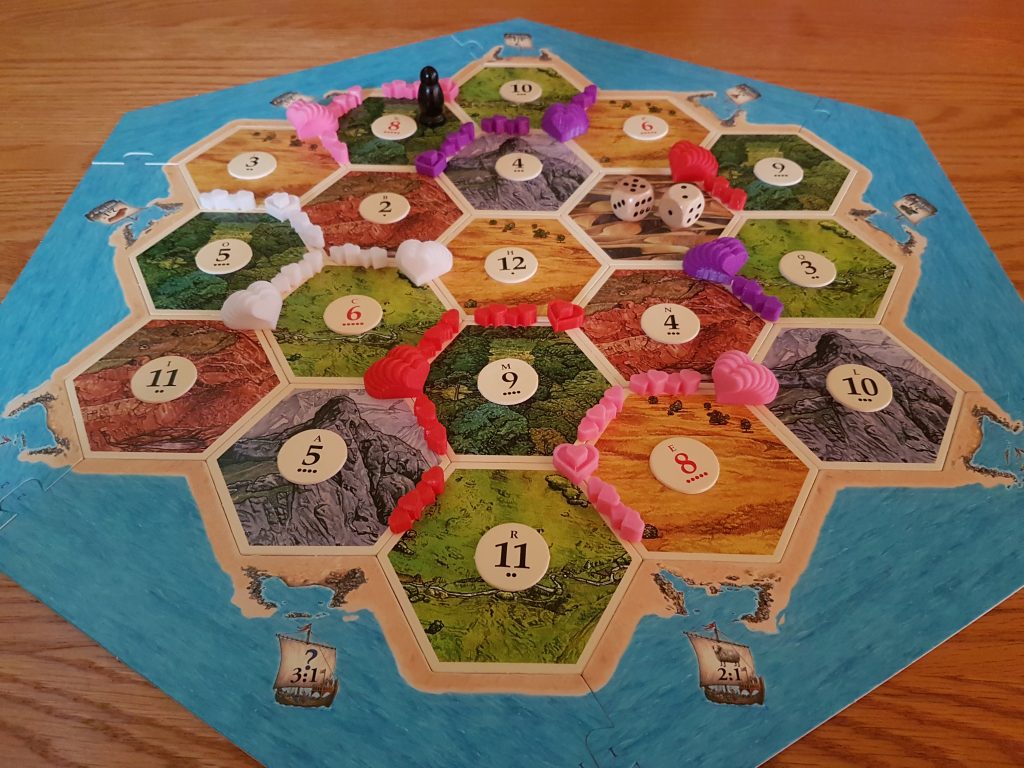
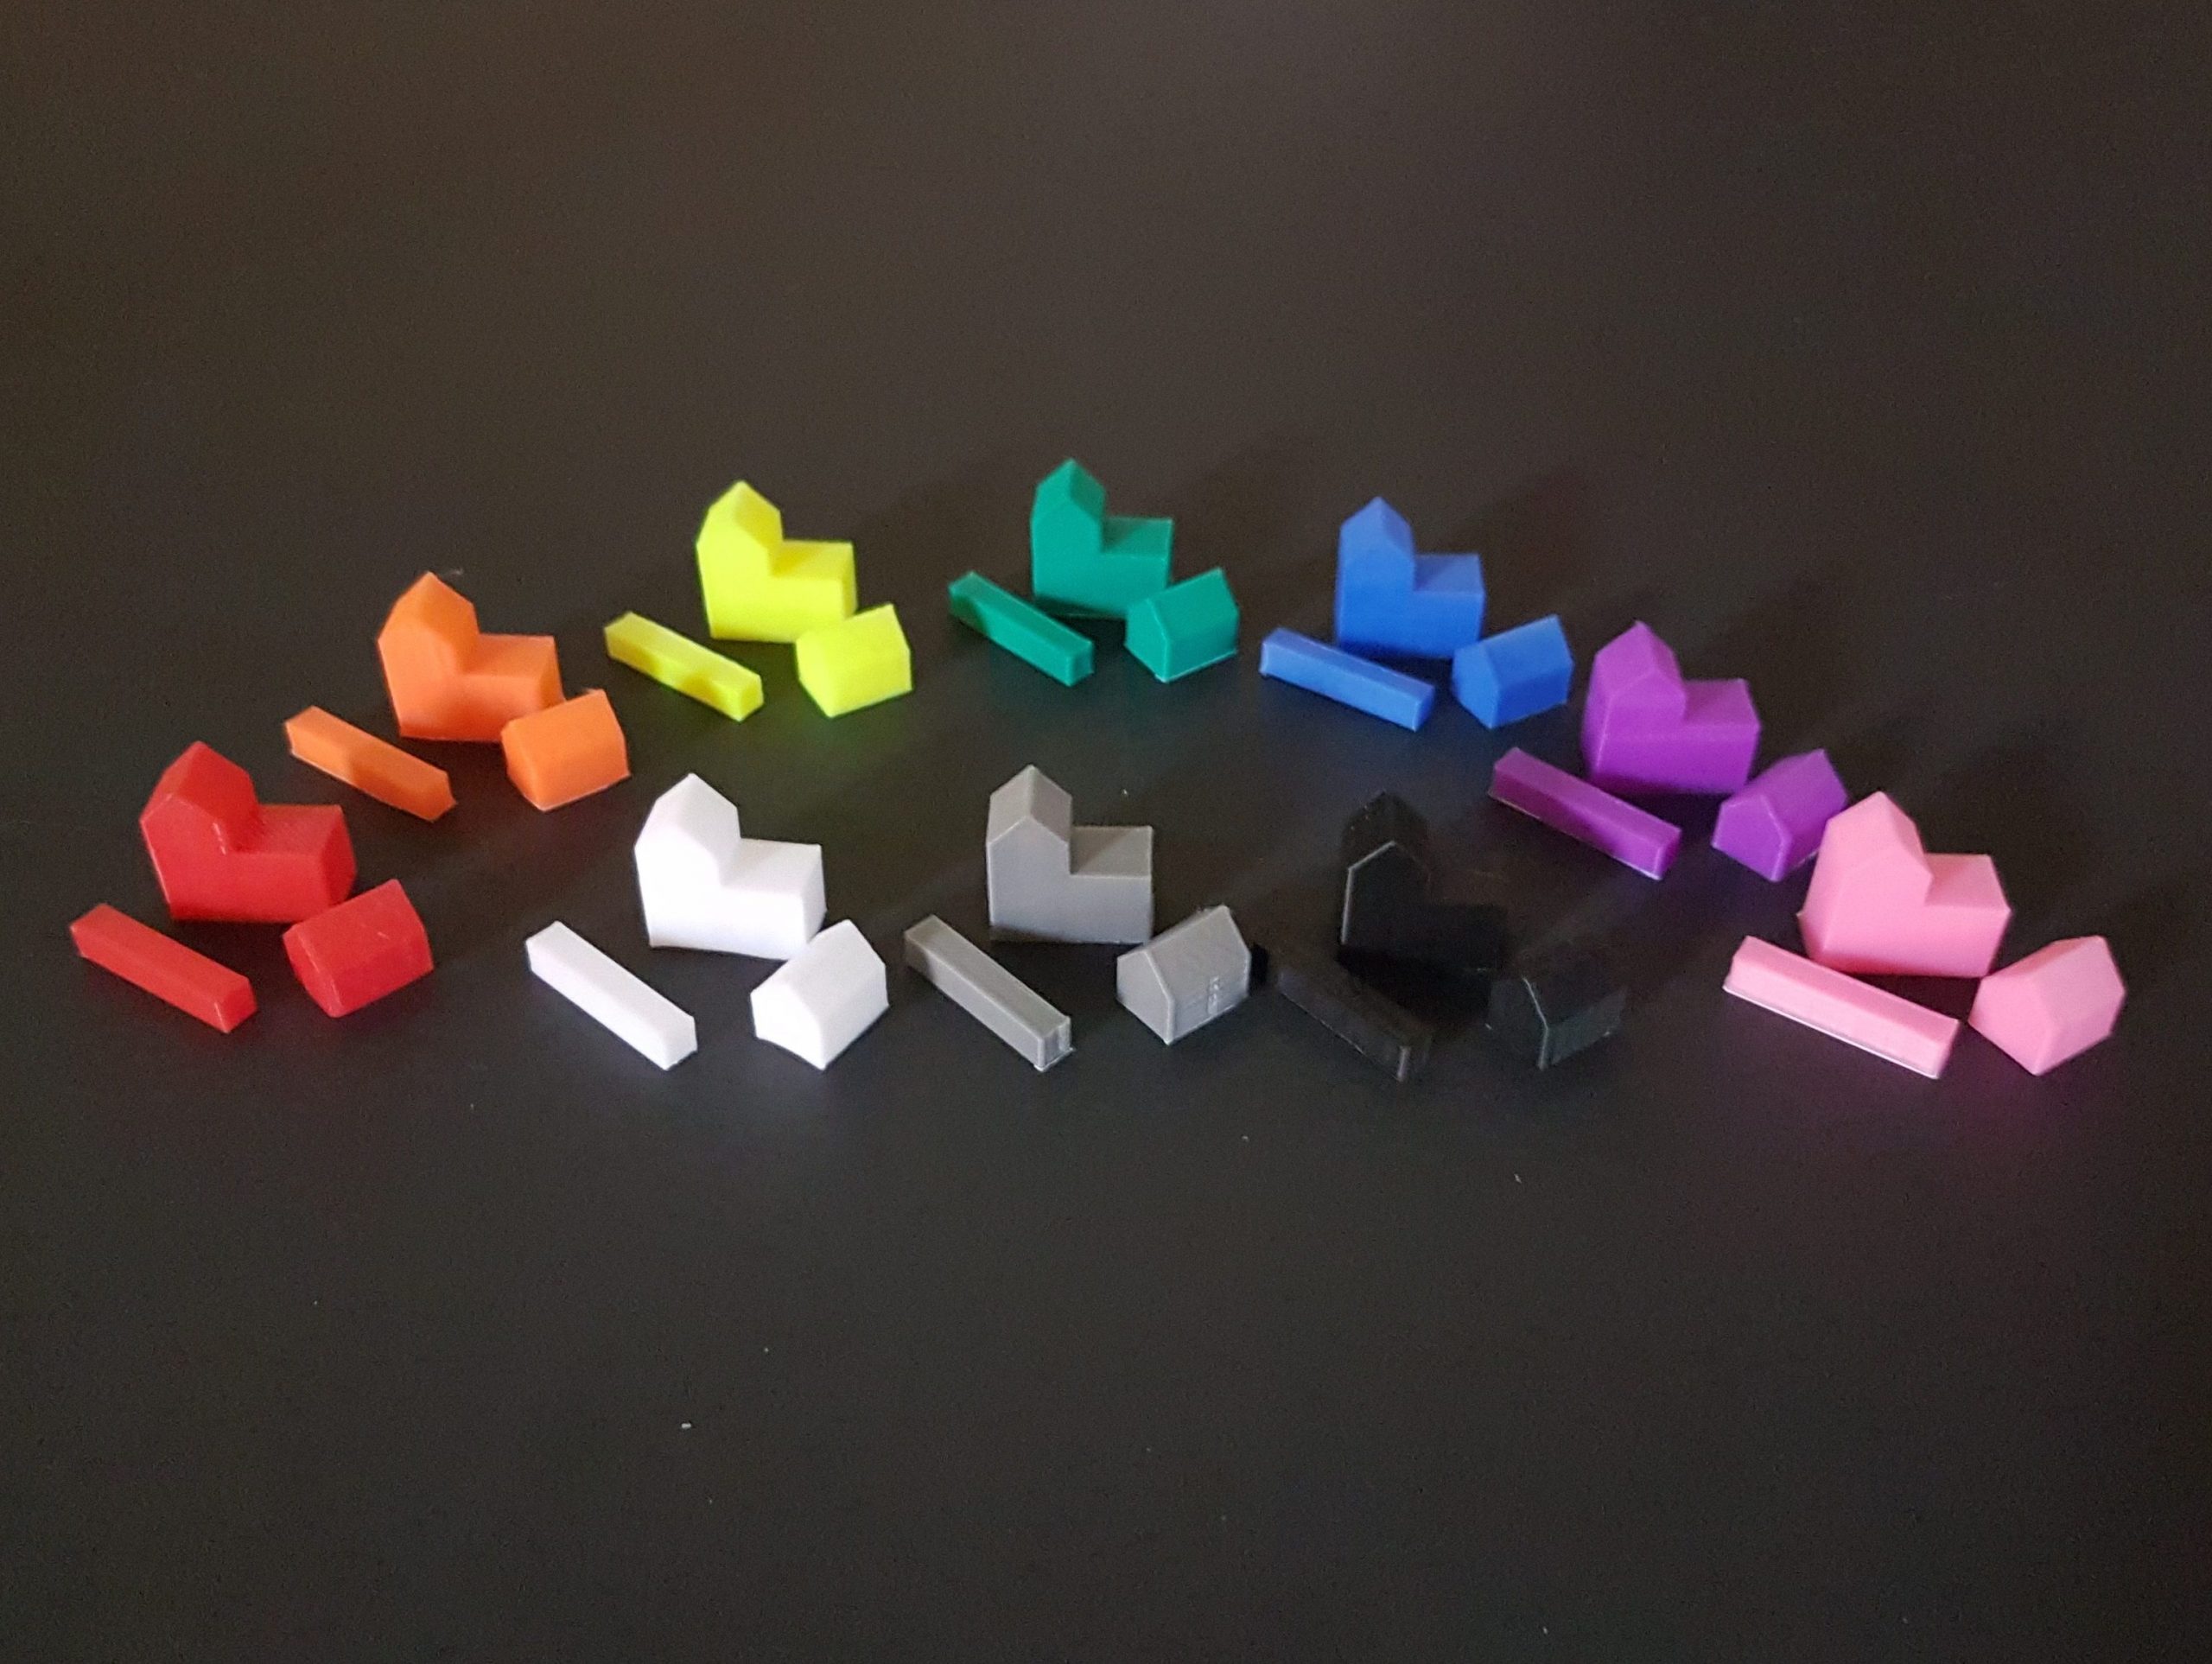
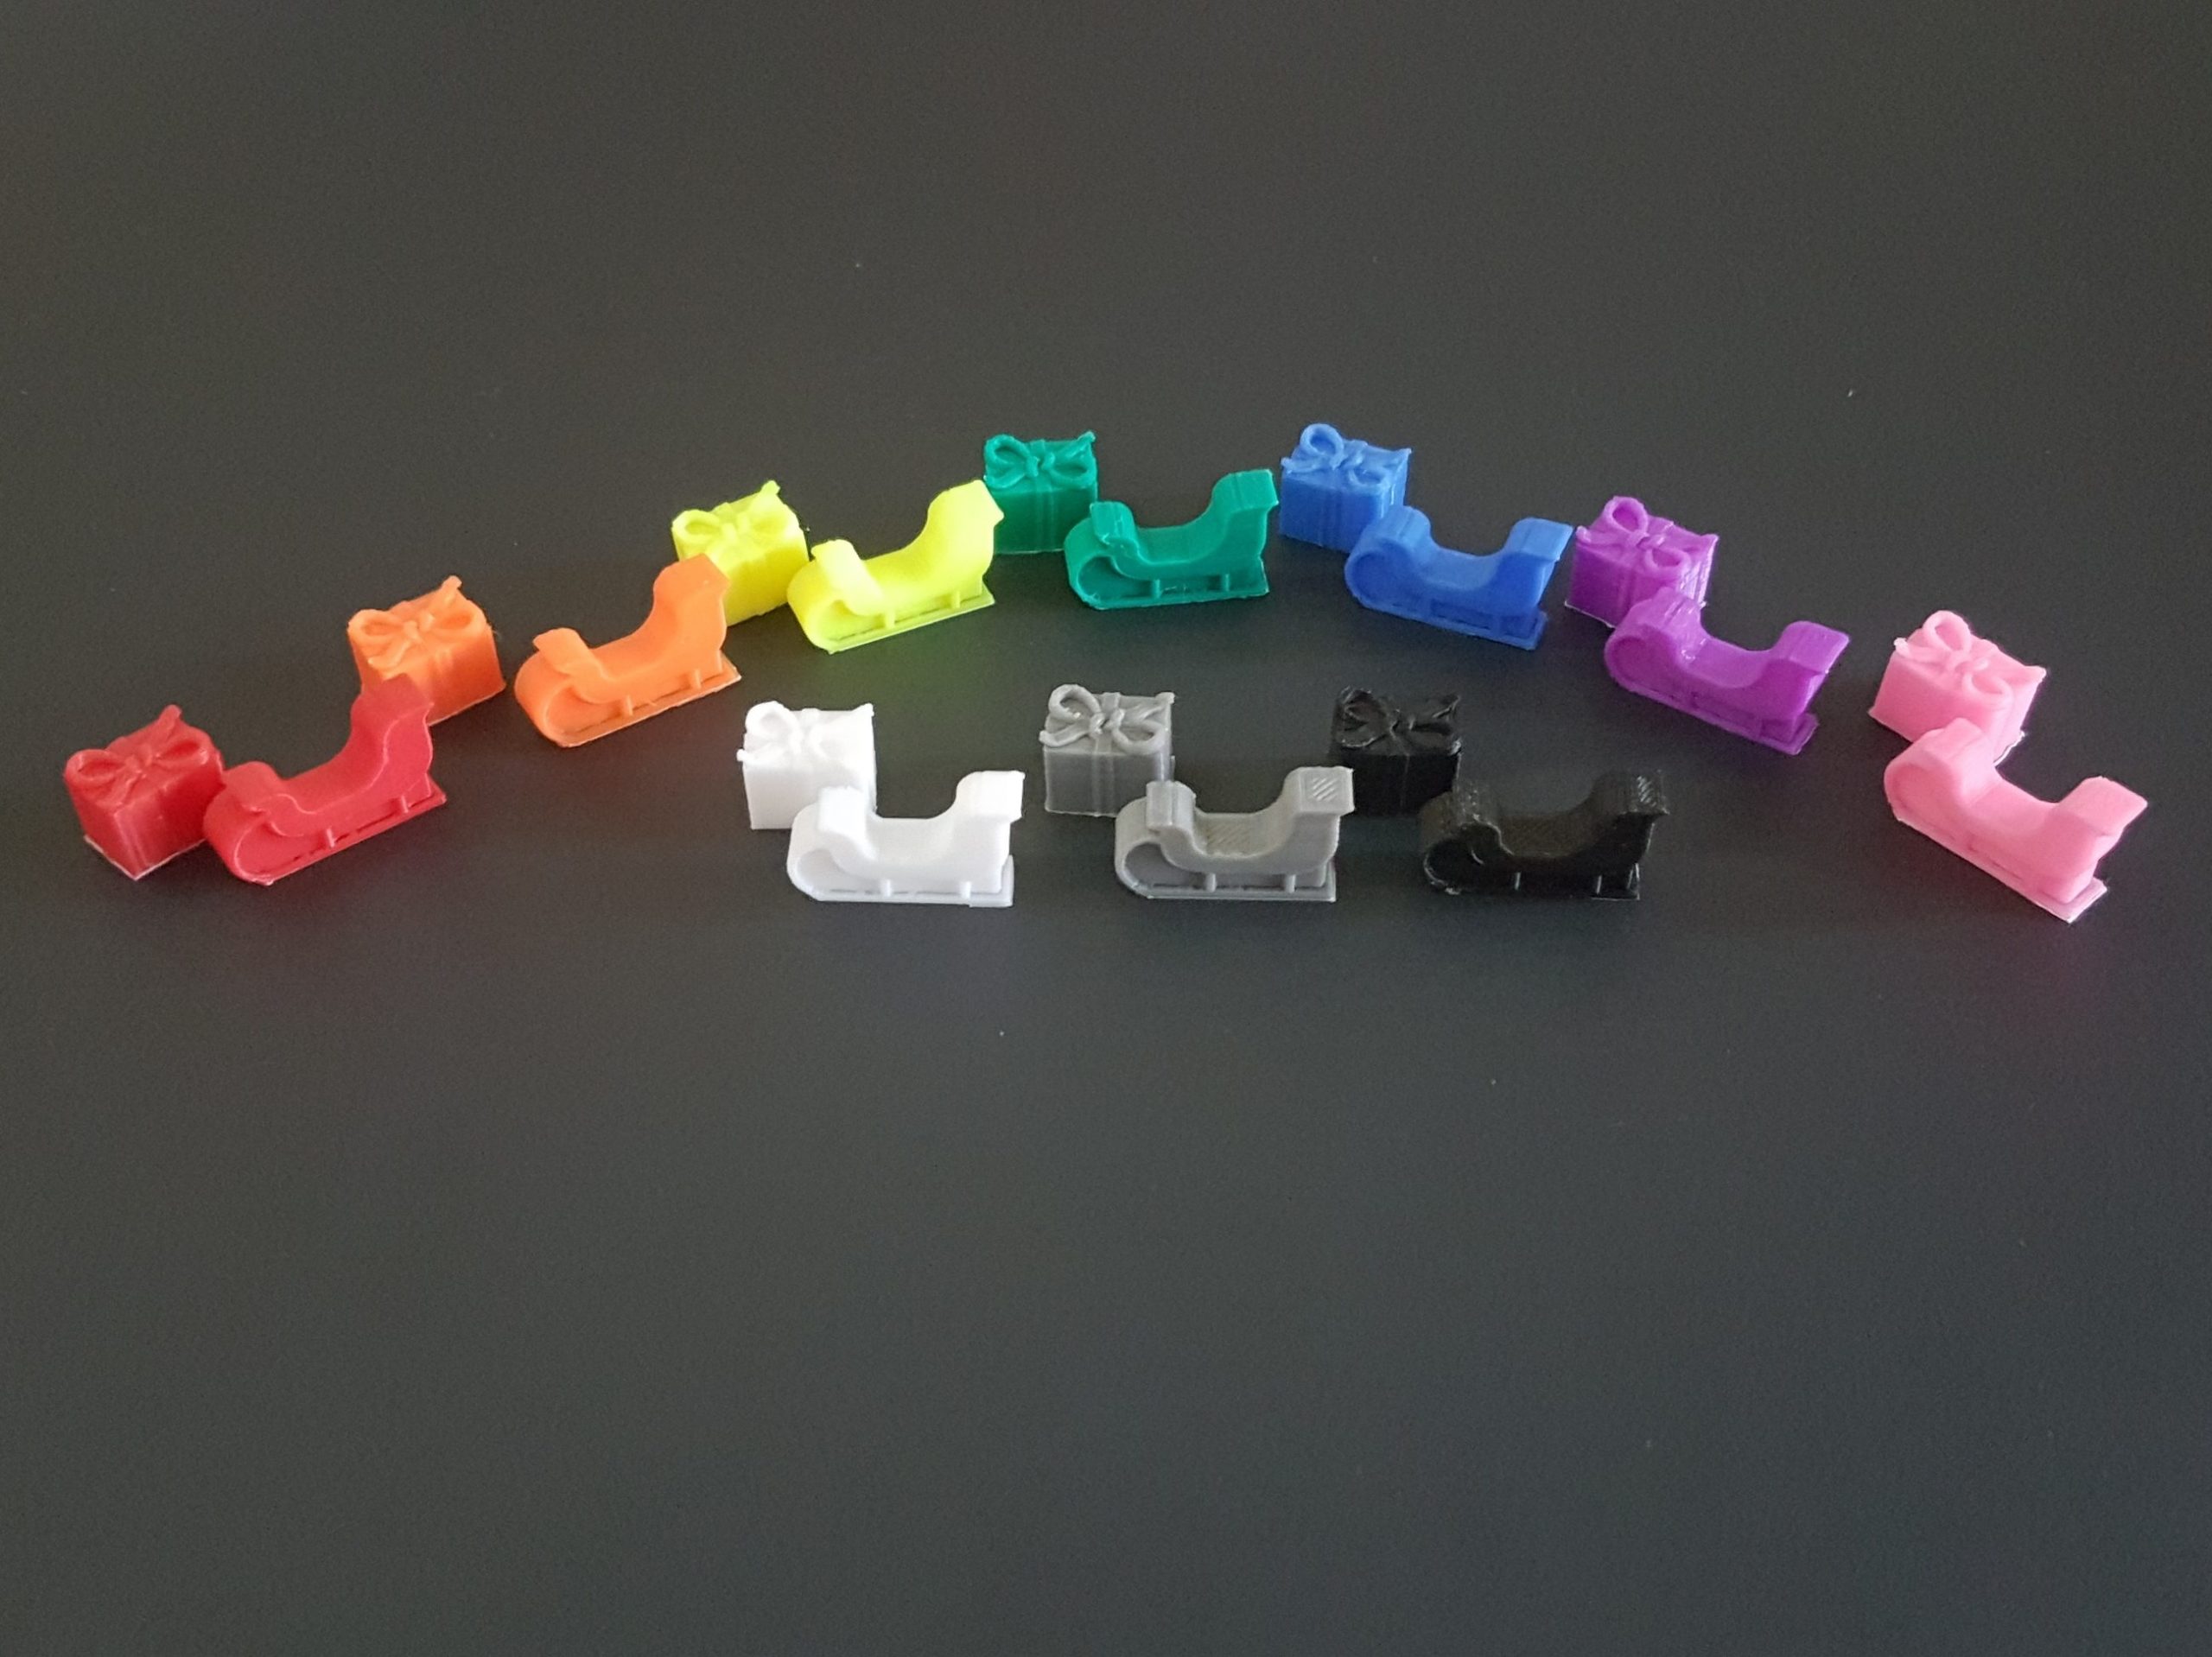
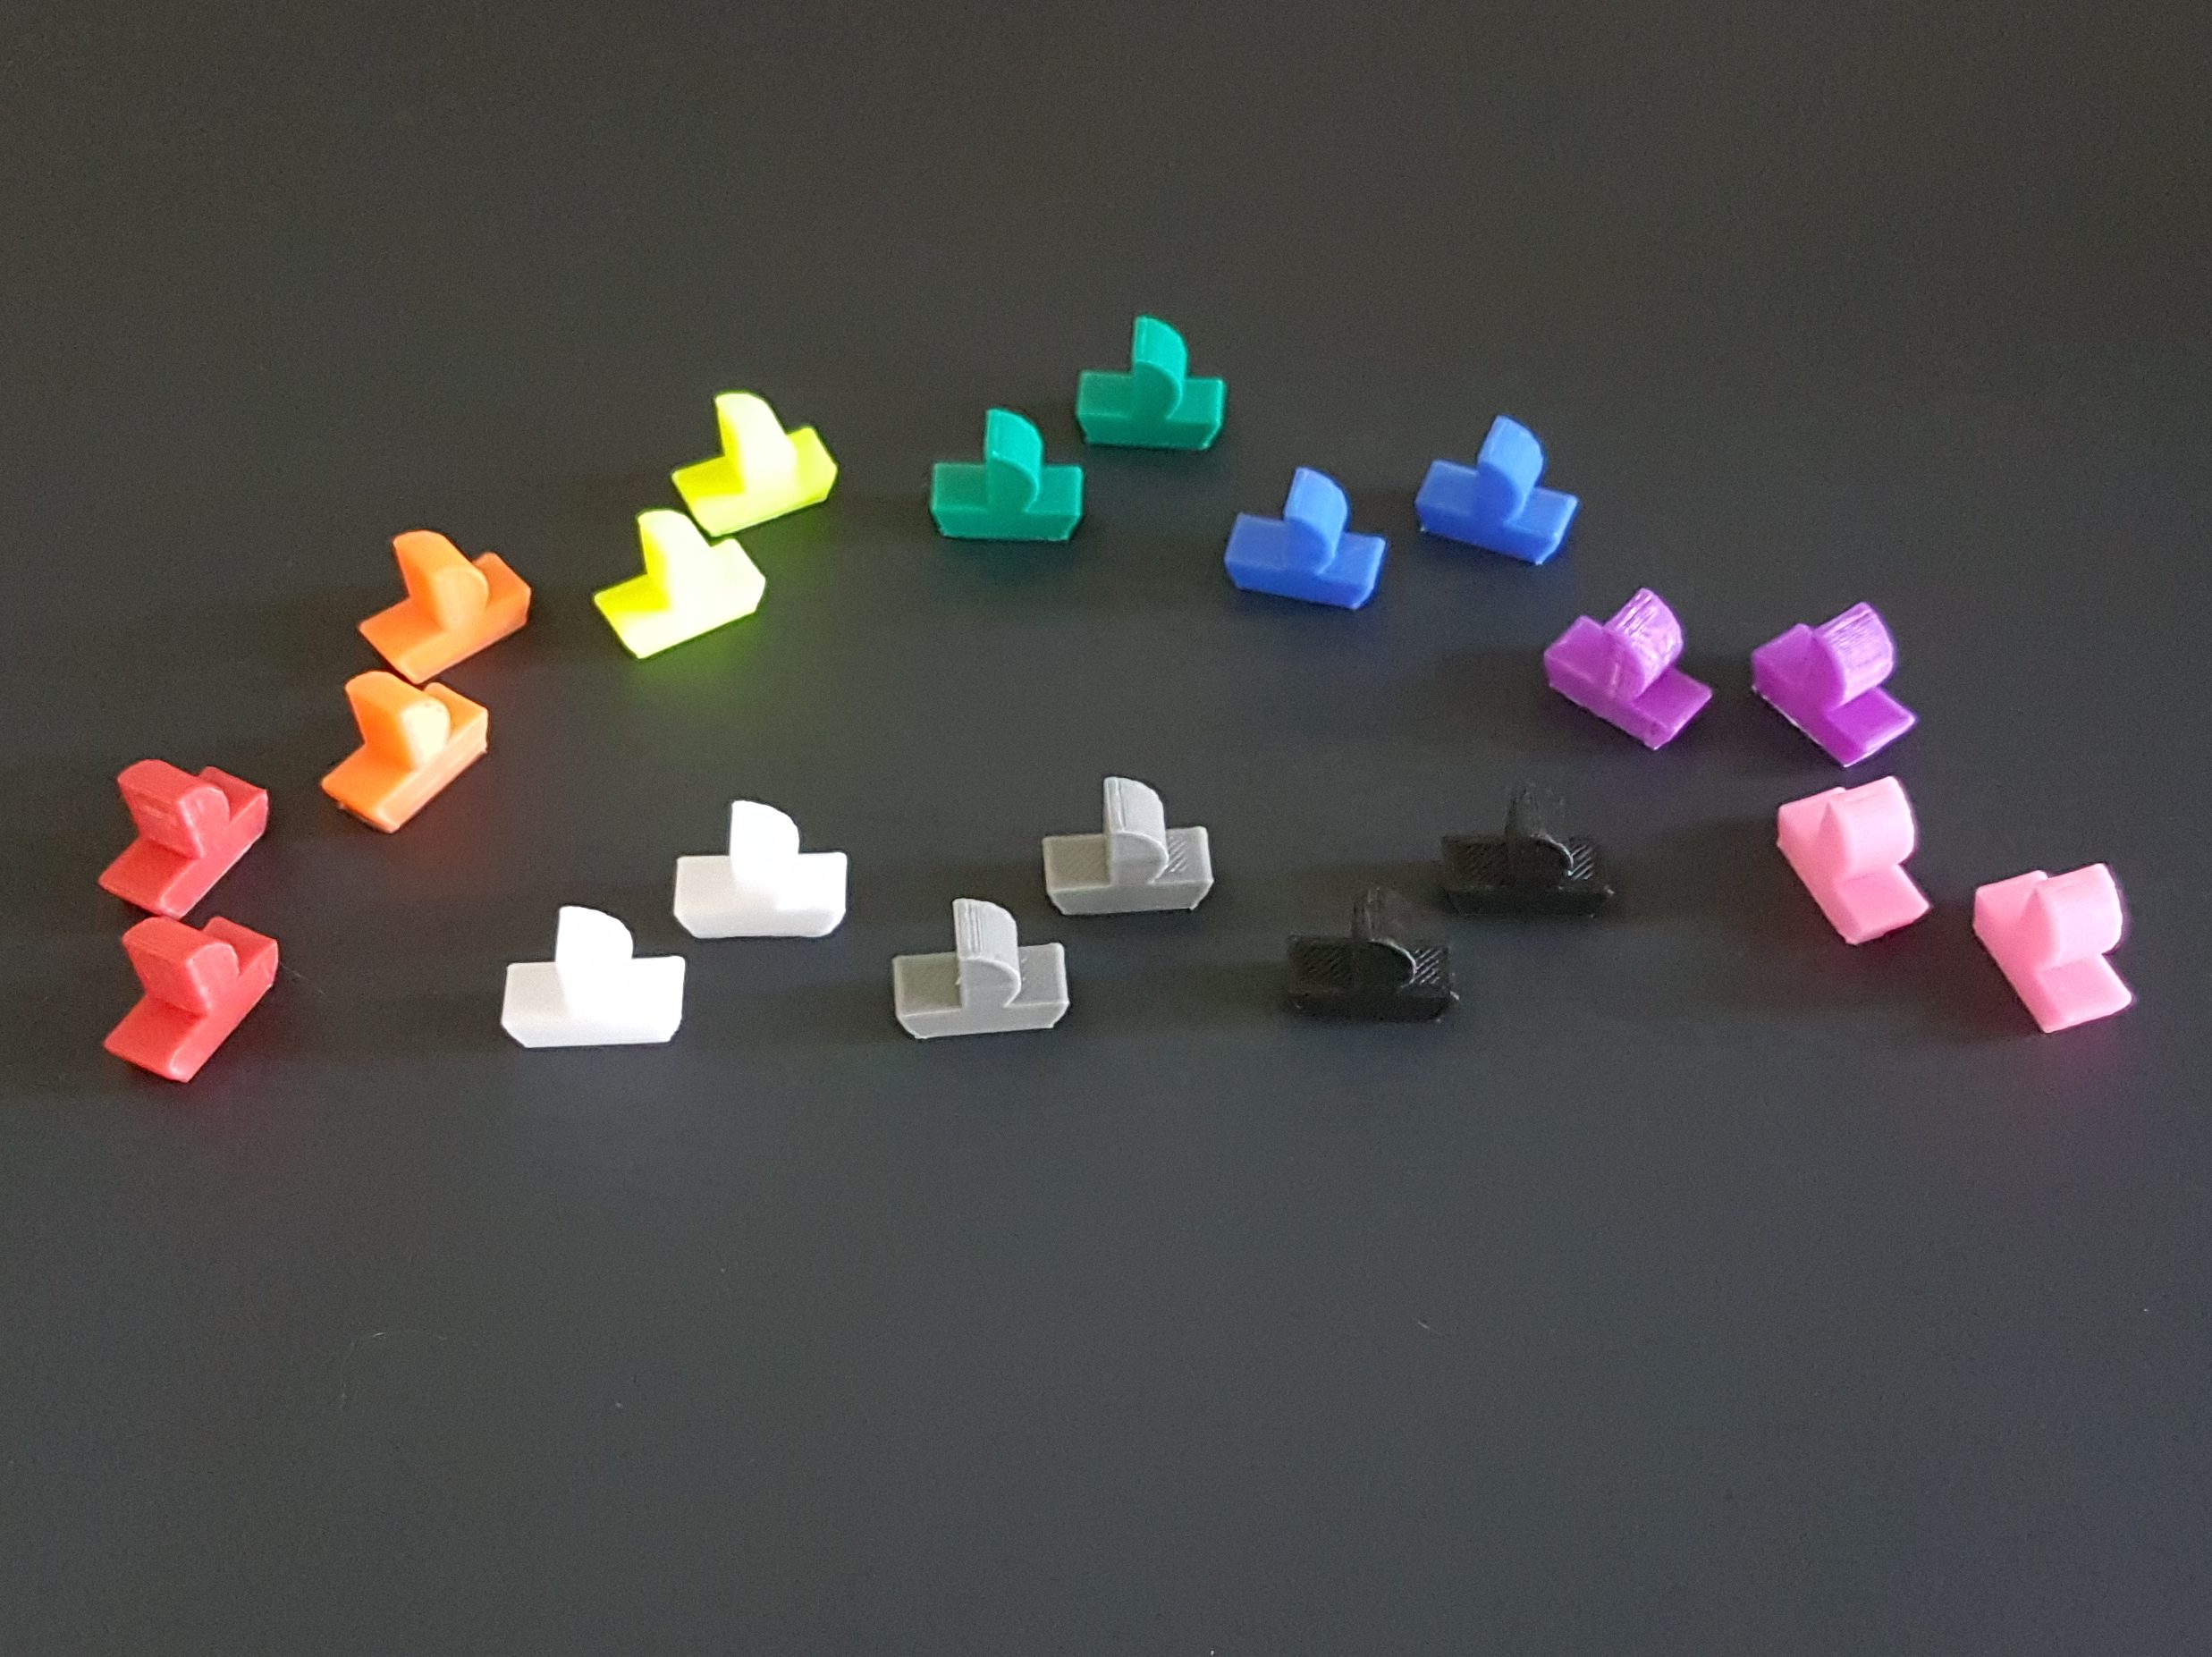
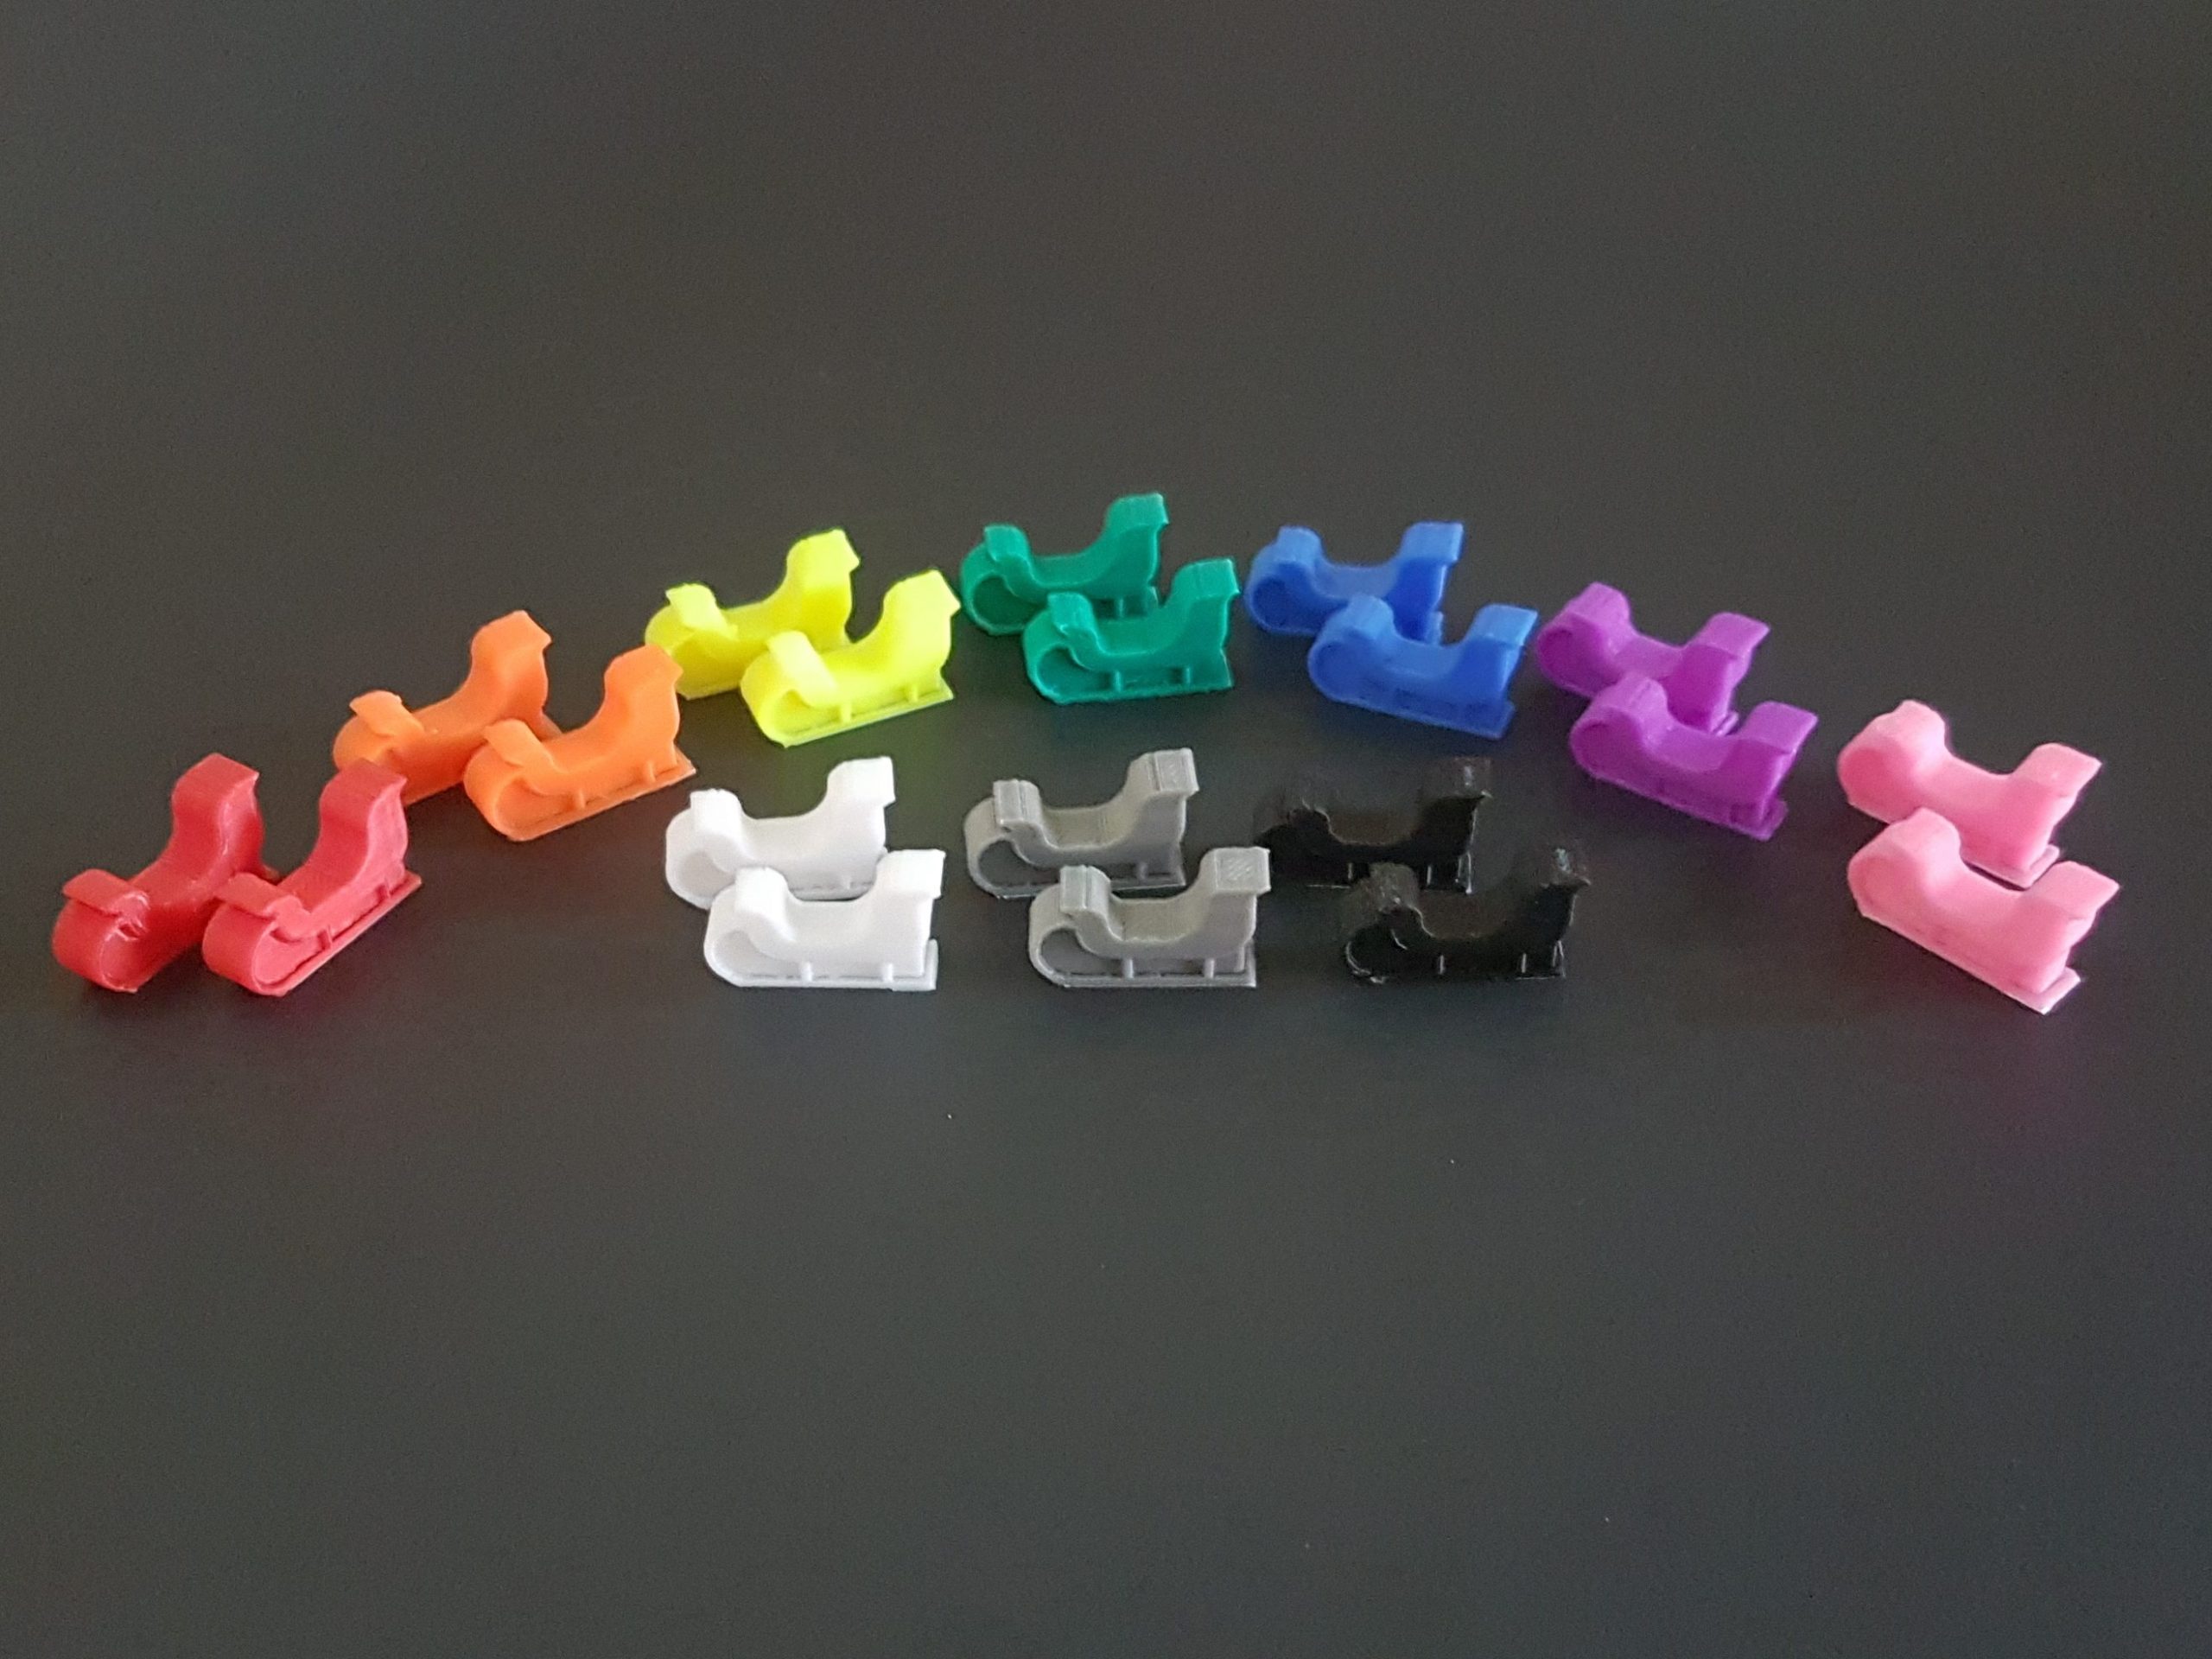
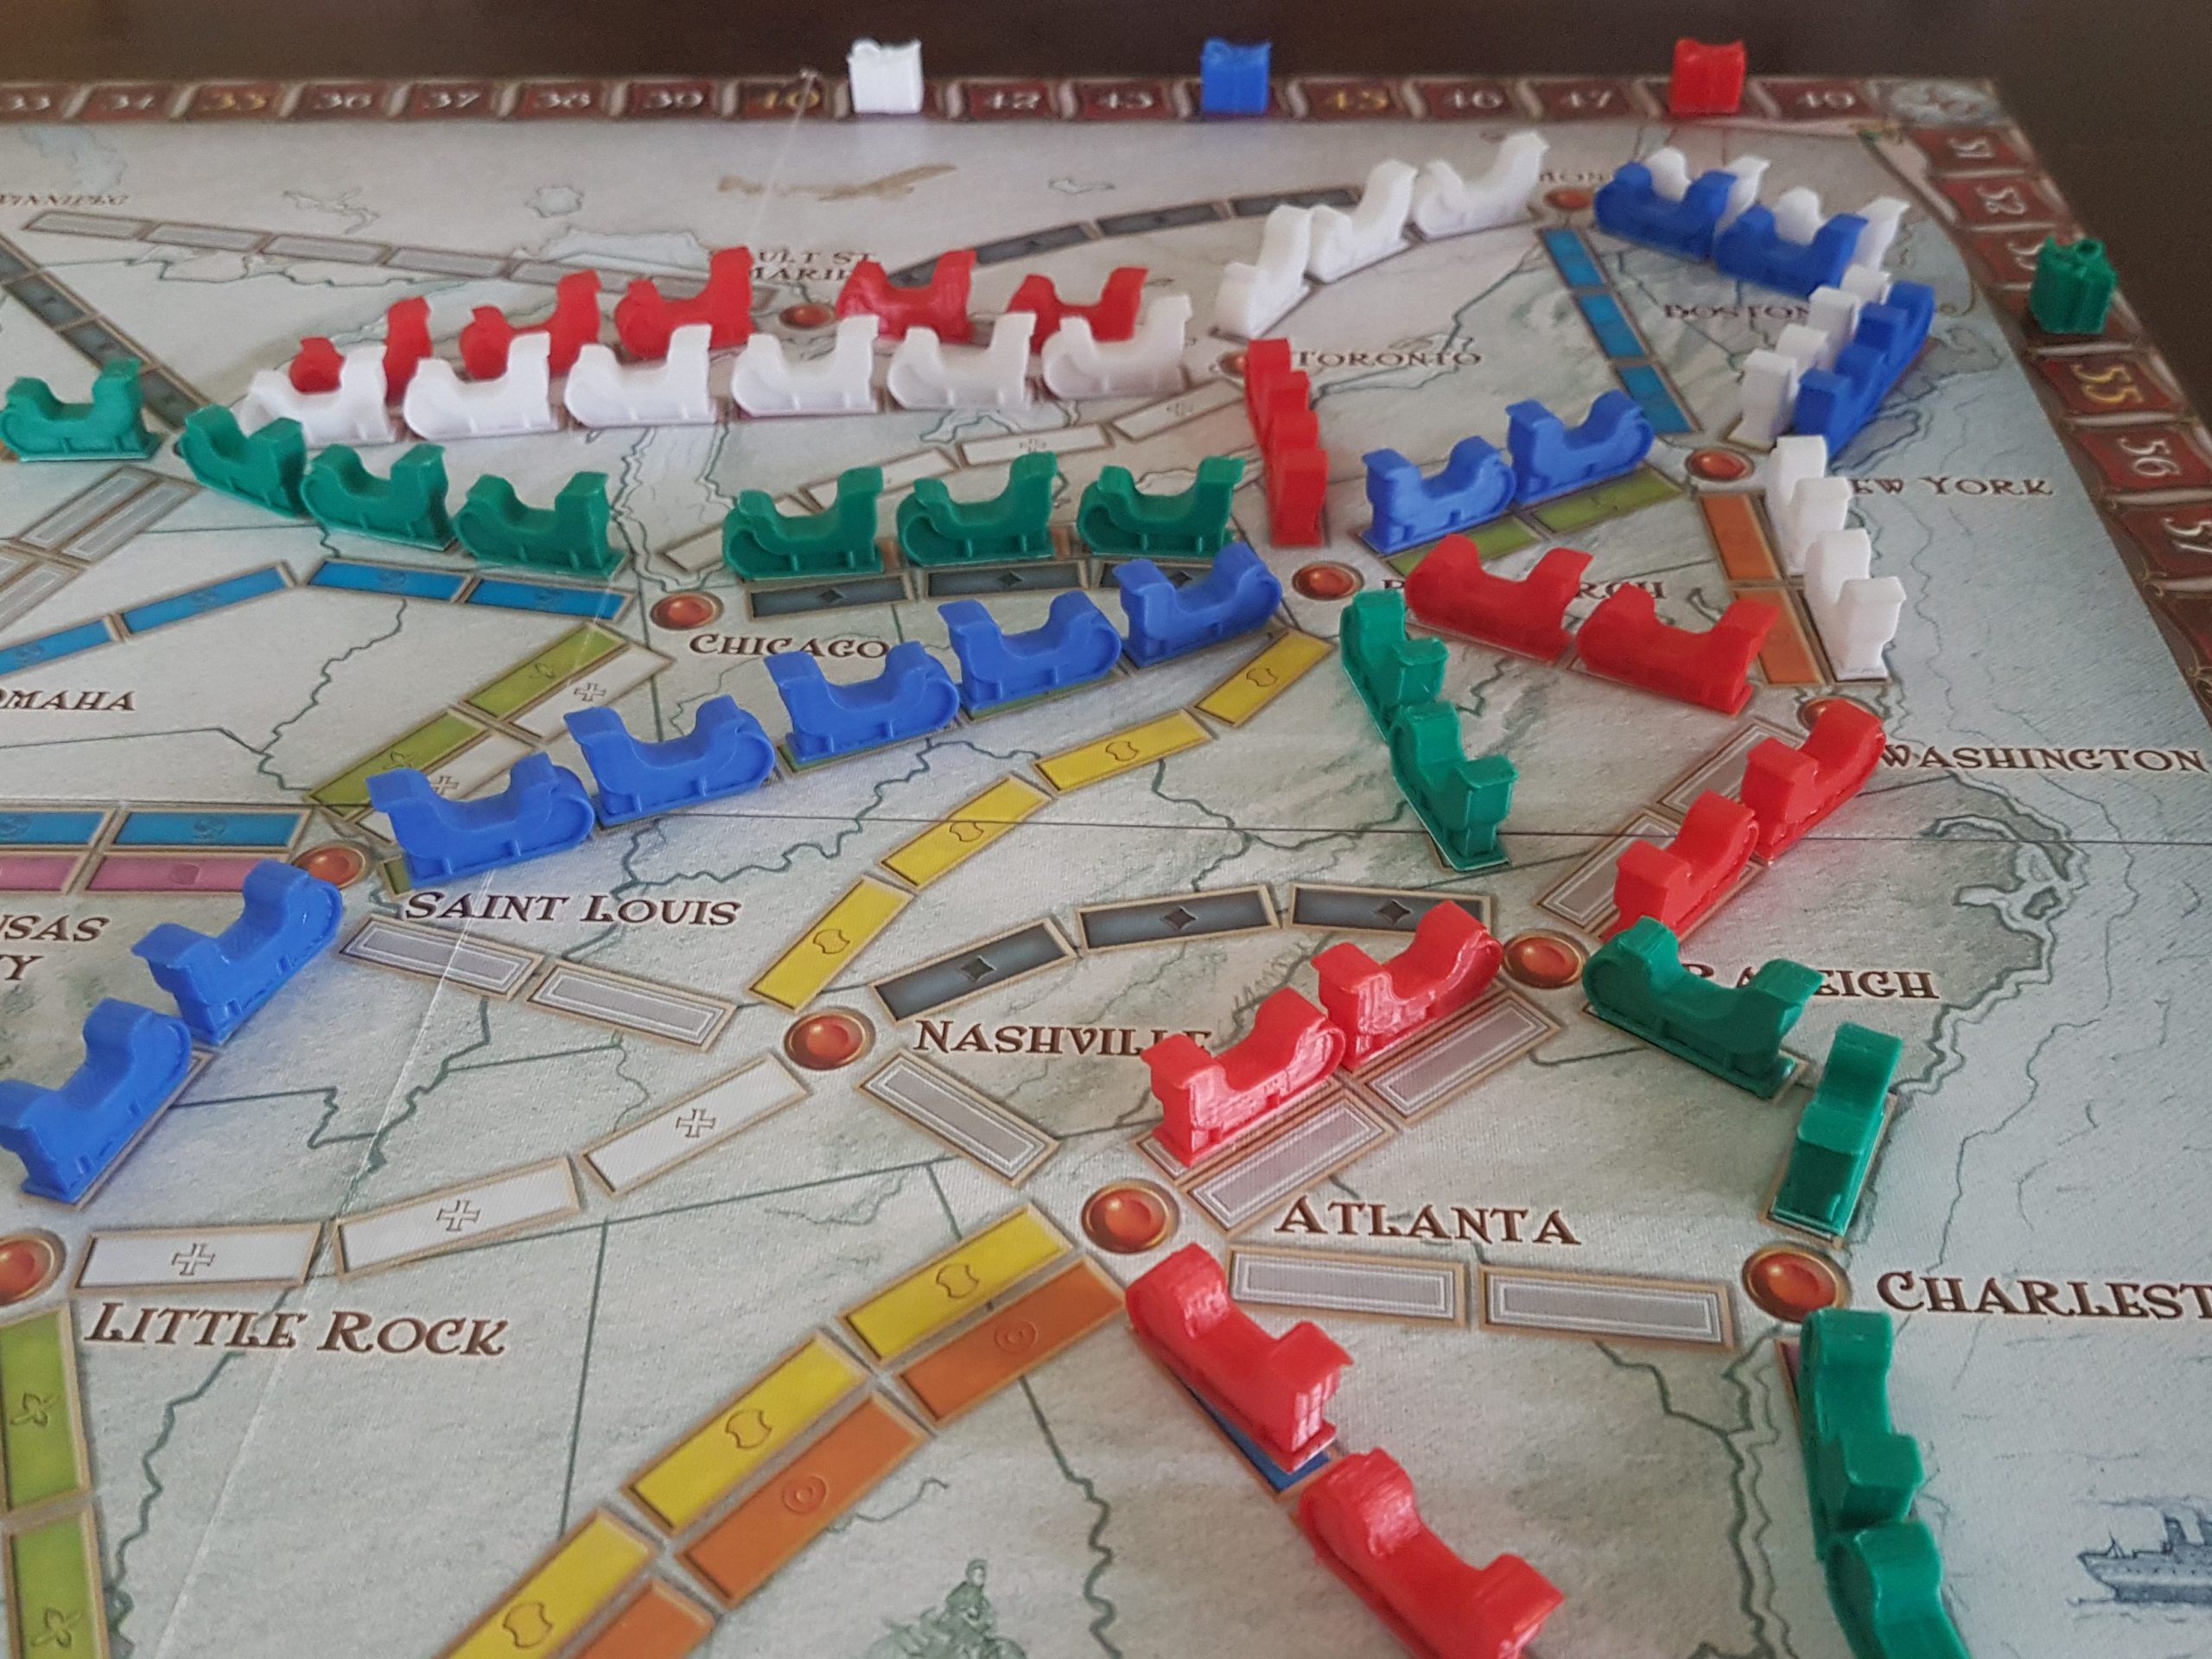
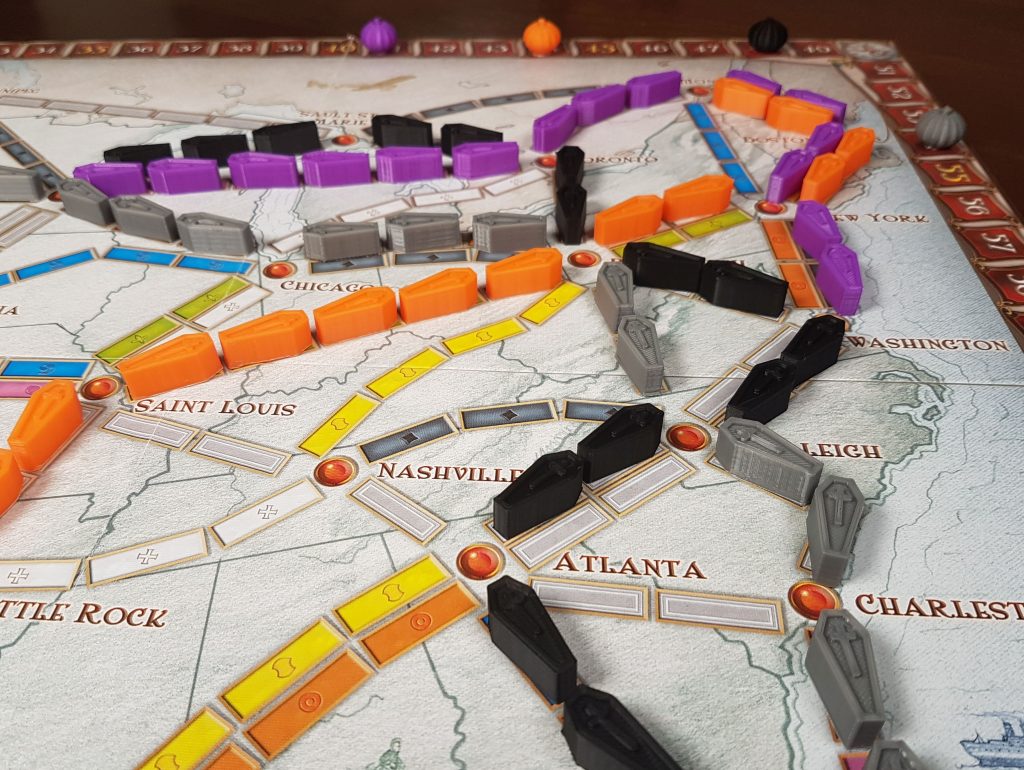
Here it is printing some heart trains from our Valentine Ticket to Ride set. They came out beautifully and the printer is working better than ever! I love our new Capricorn Bowden tube! My research showed it was the best brand on the market, and I have to agree.
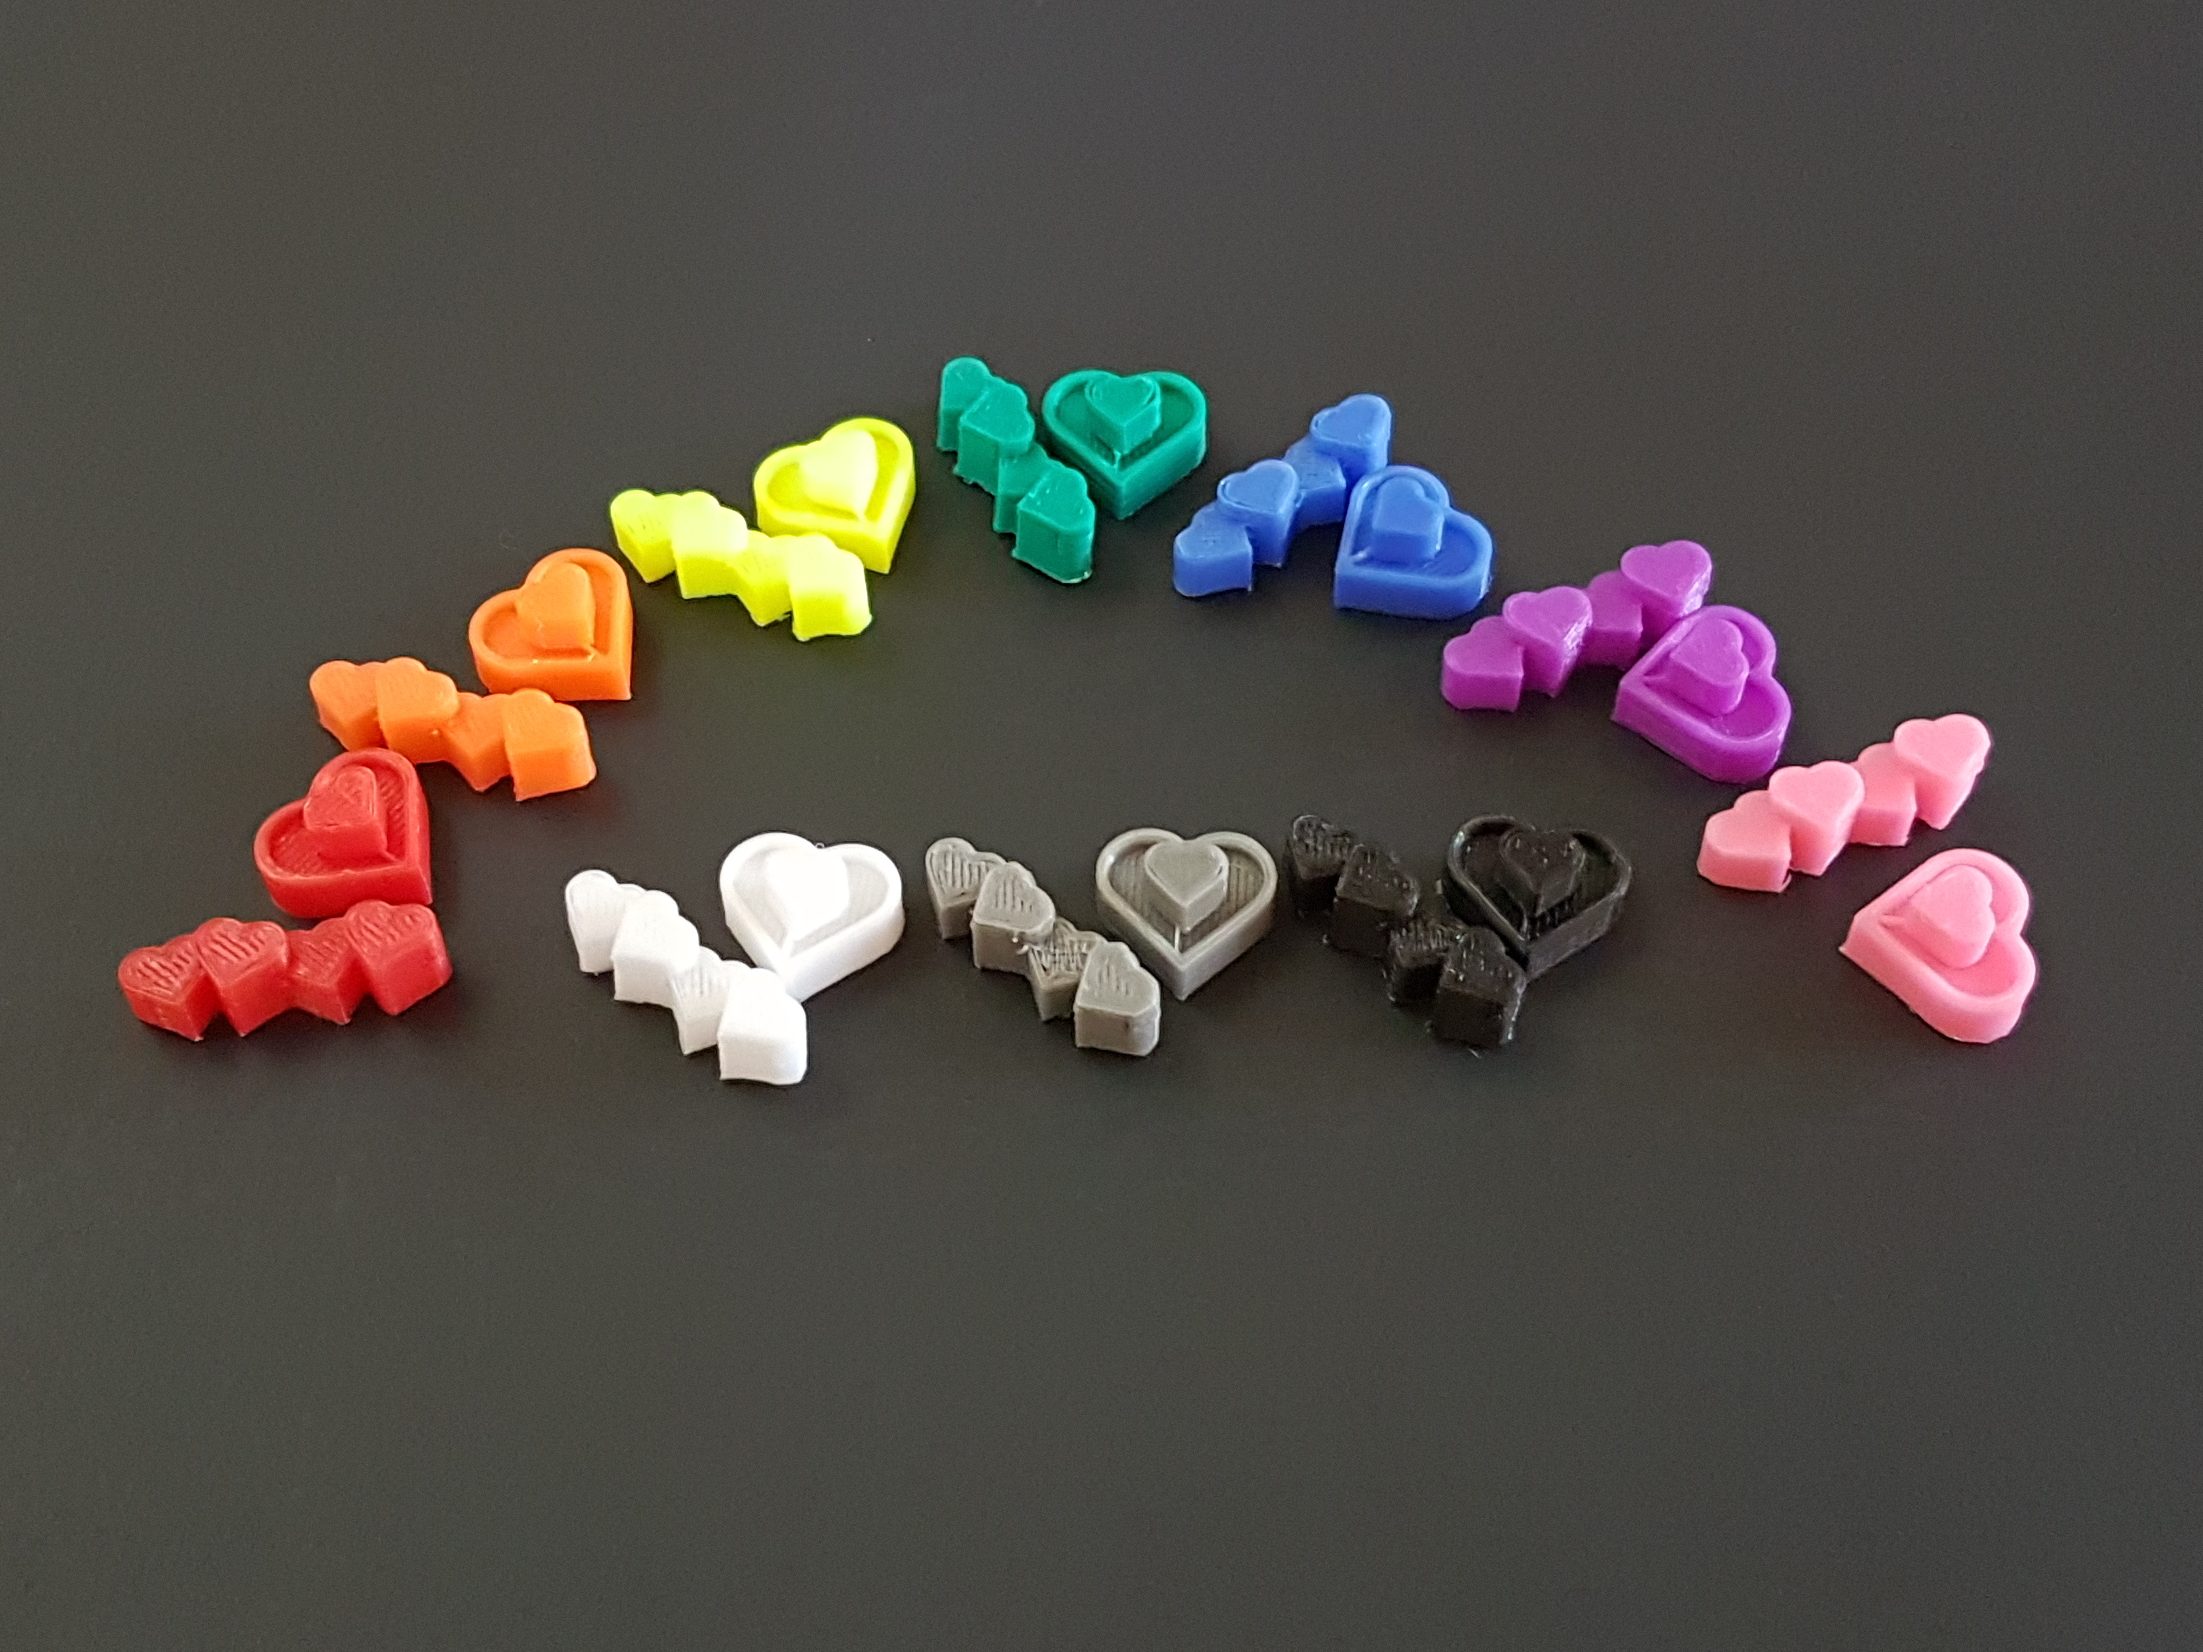
Valentine Earrings

With that major problem out of the way, we could move ahead with our releases for the week, starting with some Valentine earrings! Our first jewelry offering looks stunning! They come in two styles:
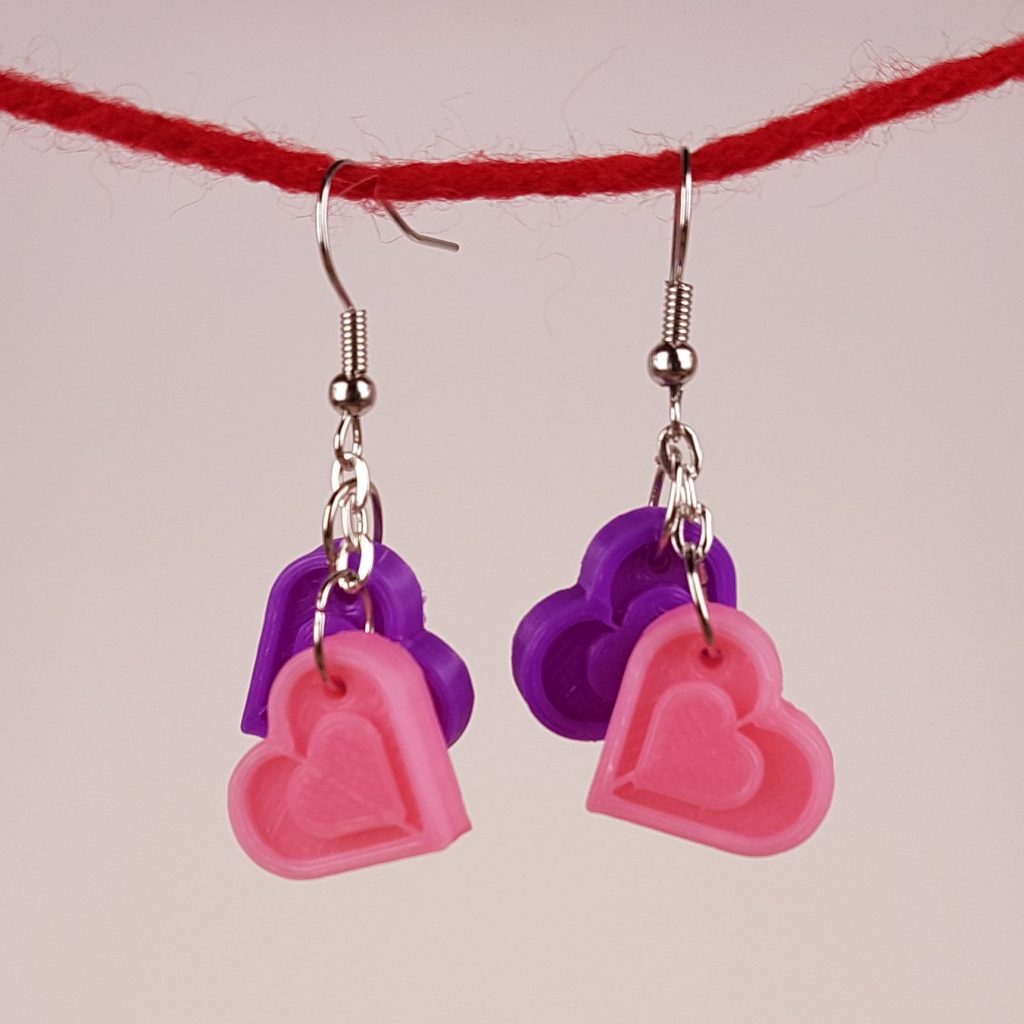
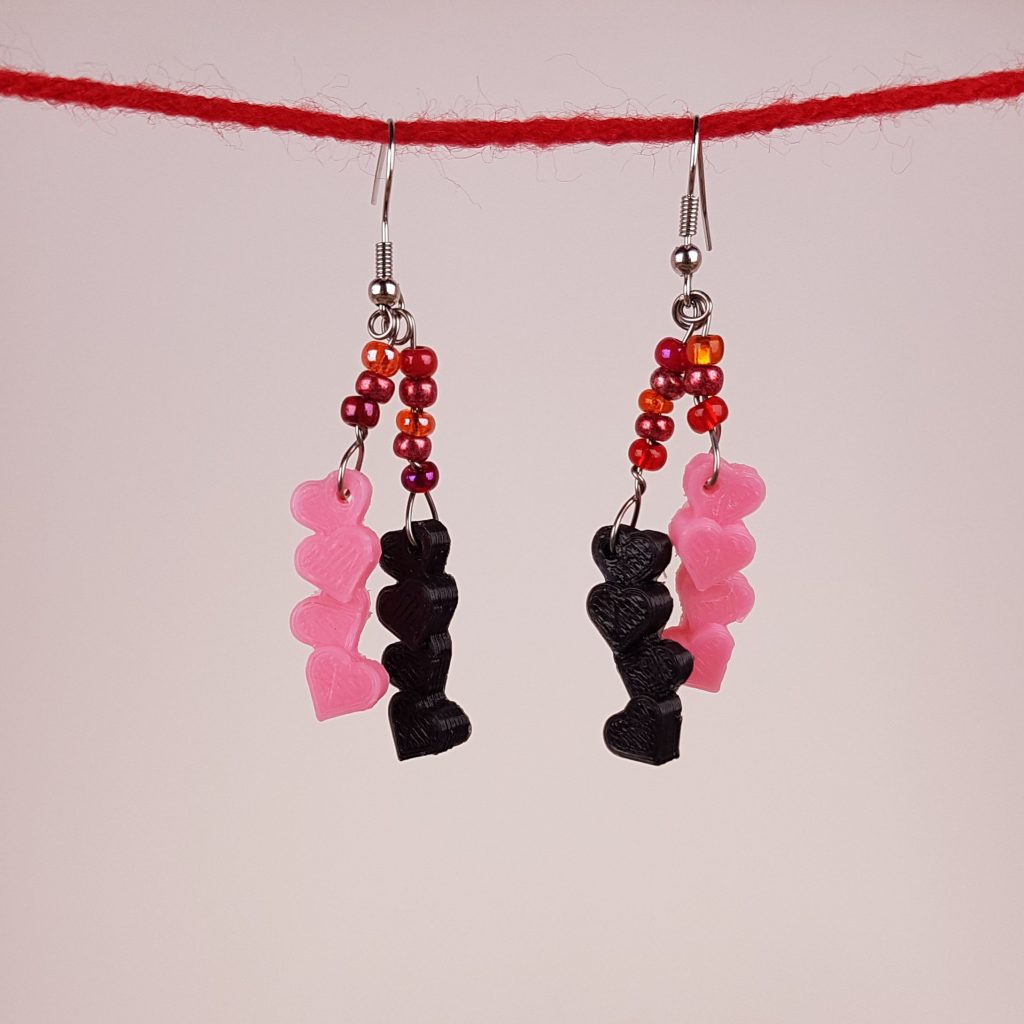
Double Heart

and Cascade Heart.

There are six unique pairs in each style, including several featuring our new metallic filament. Follow the links to our Etsy shop to see them all.

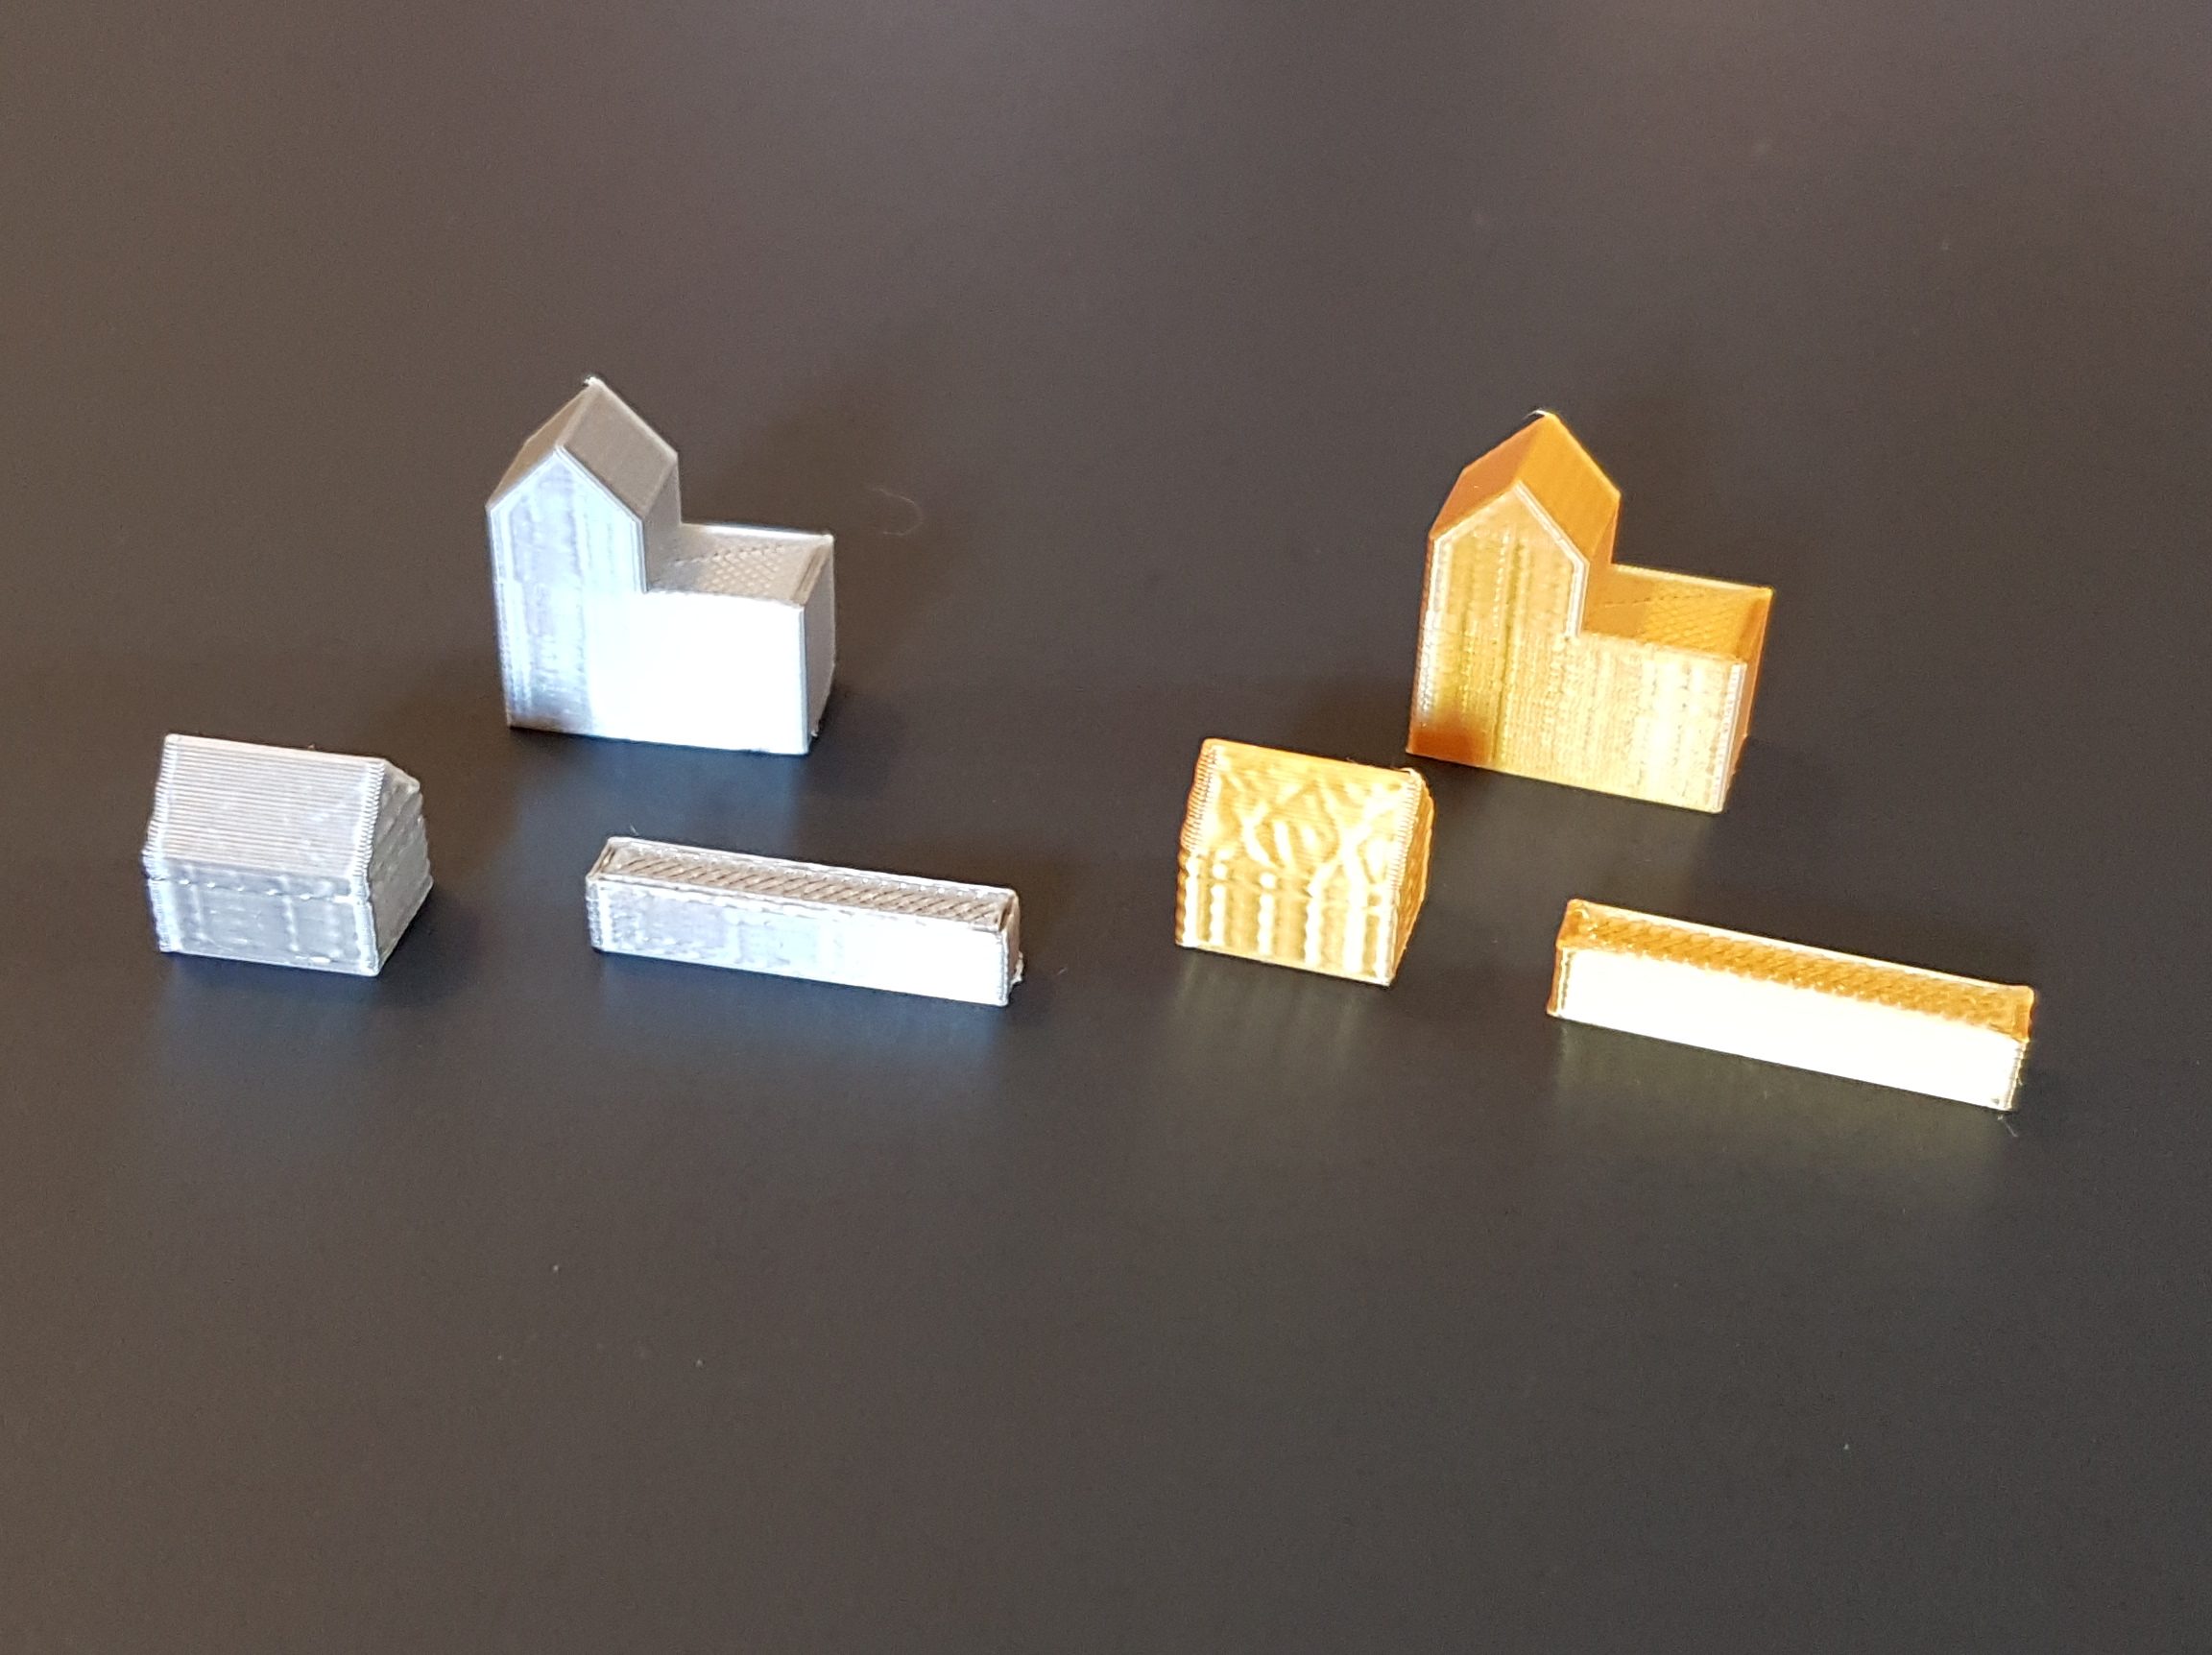
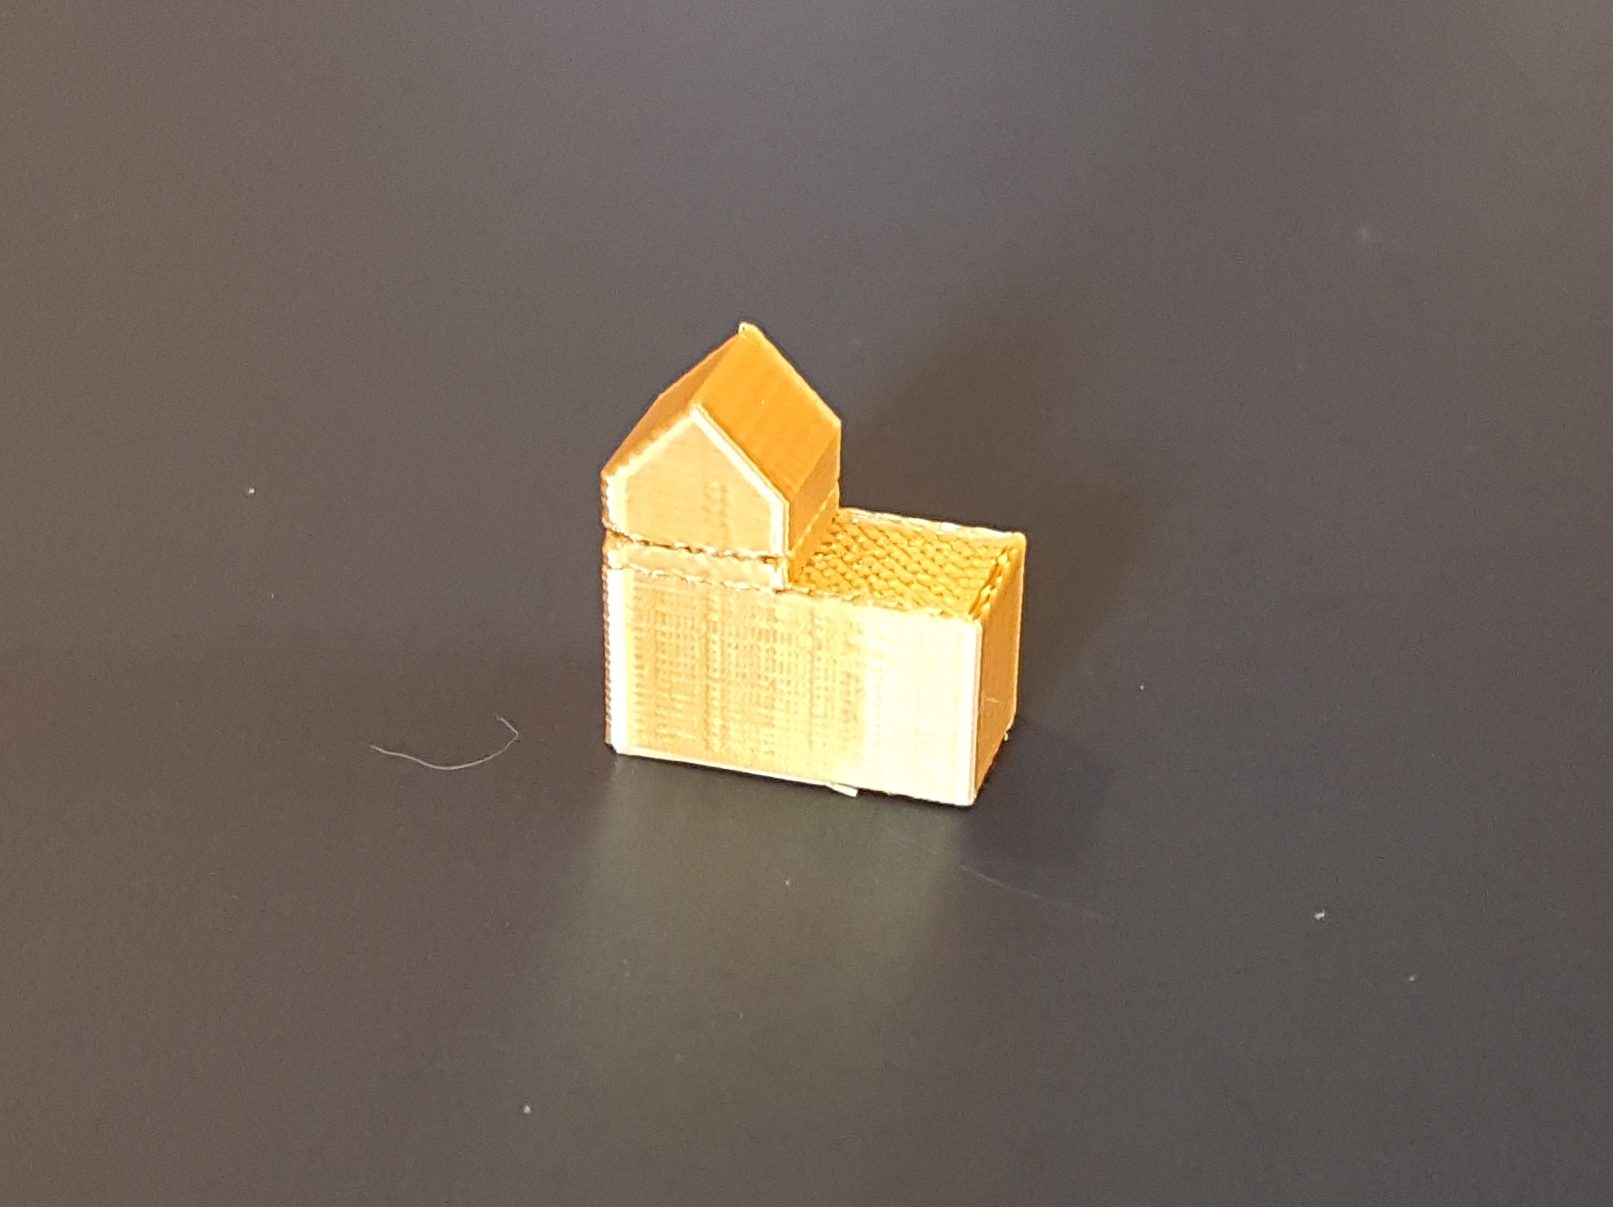
Catan Coasters – With Puns!

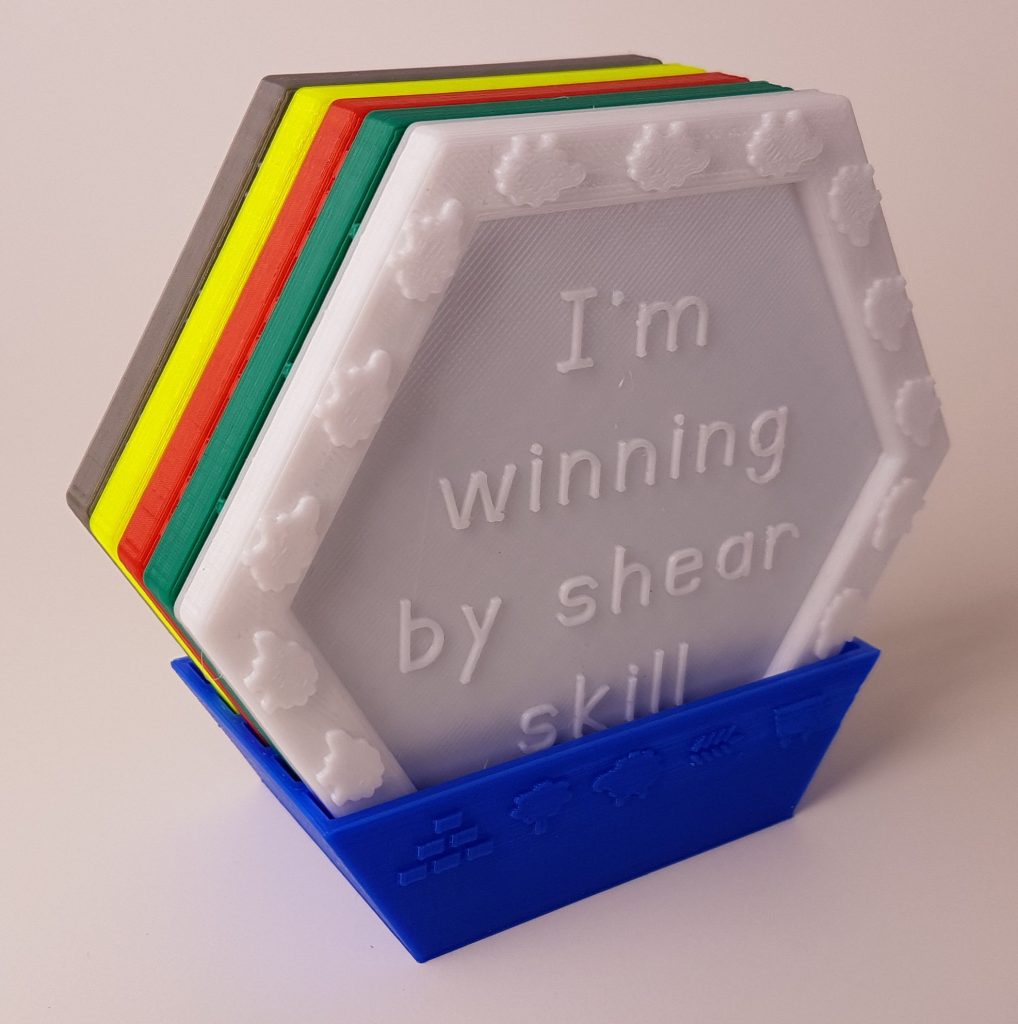
We also launched our first set of drink coasters.

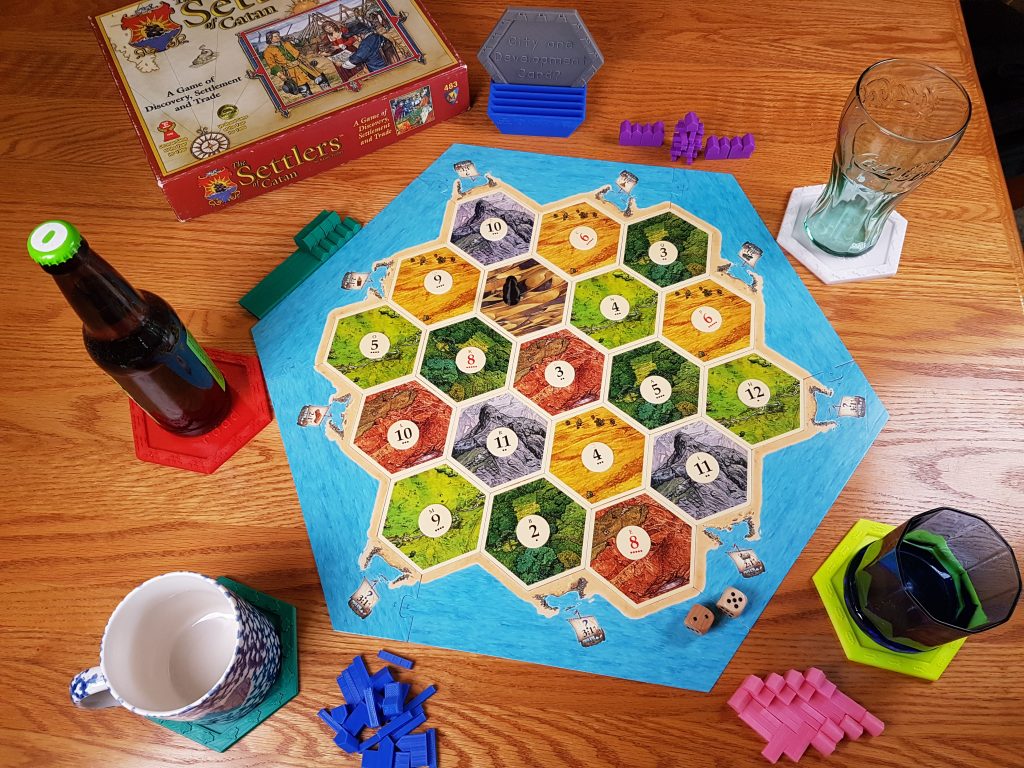
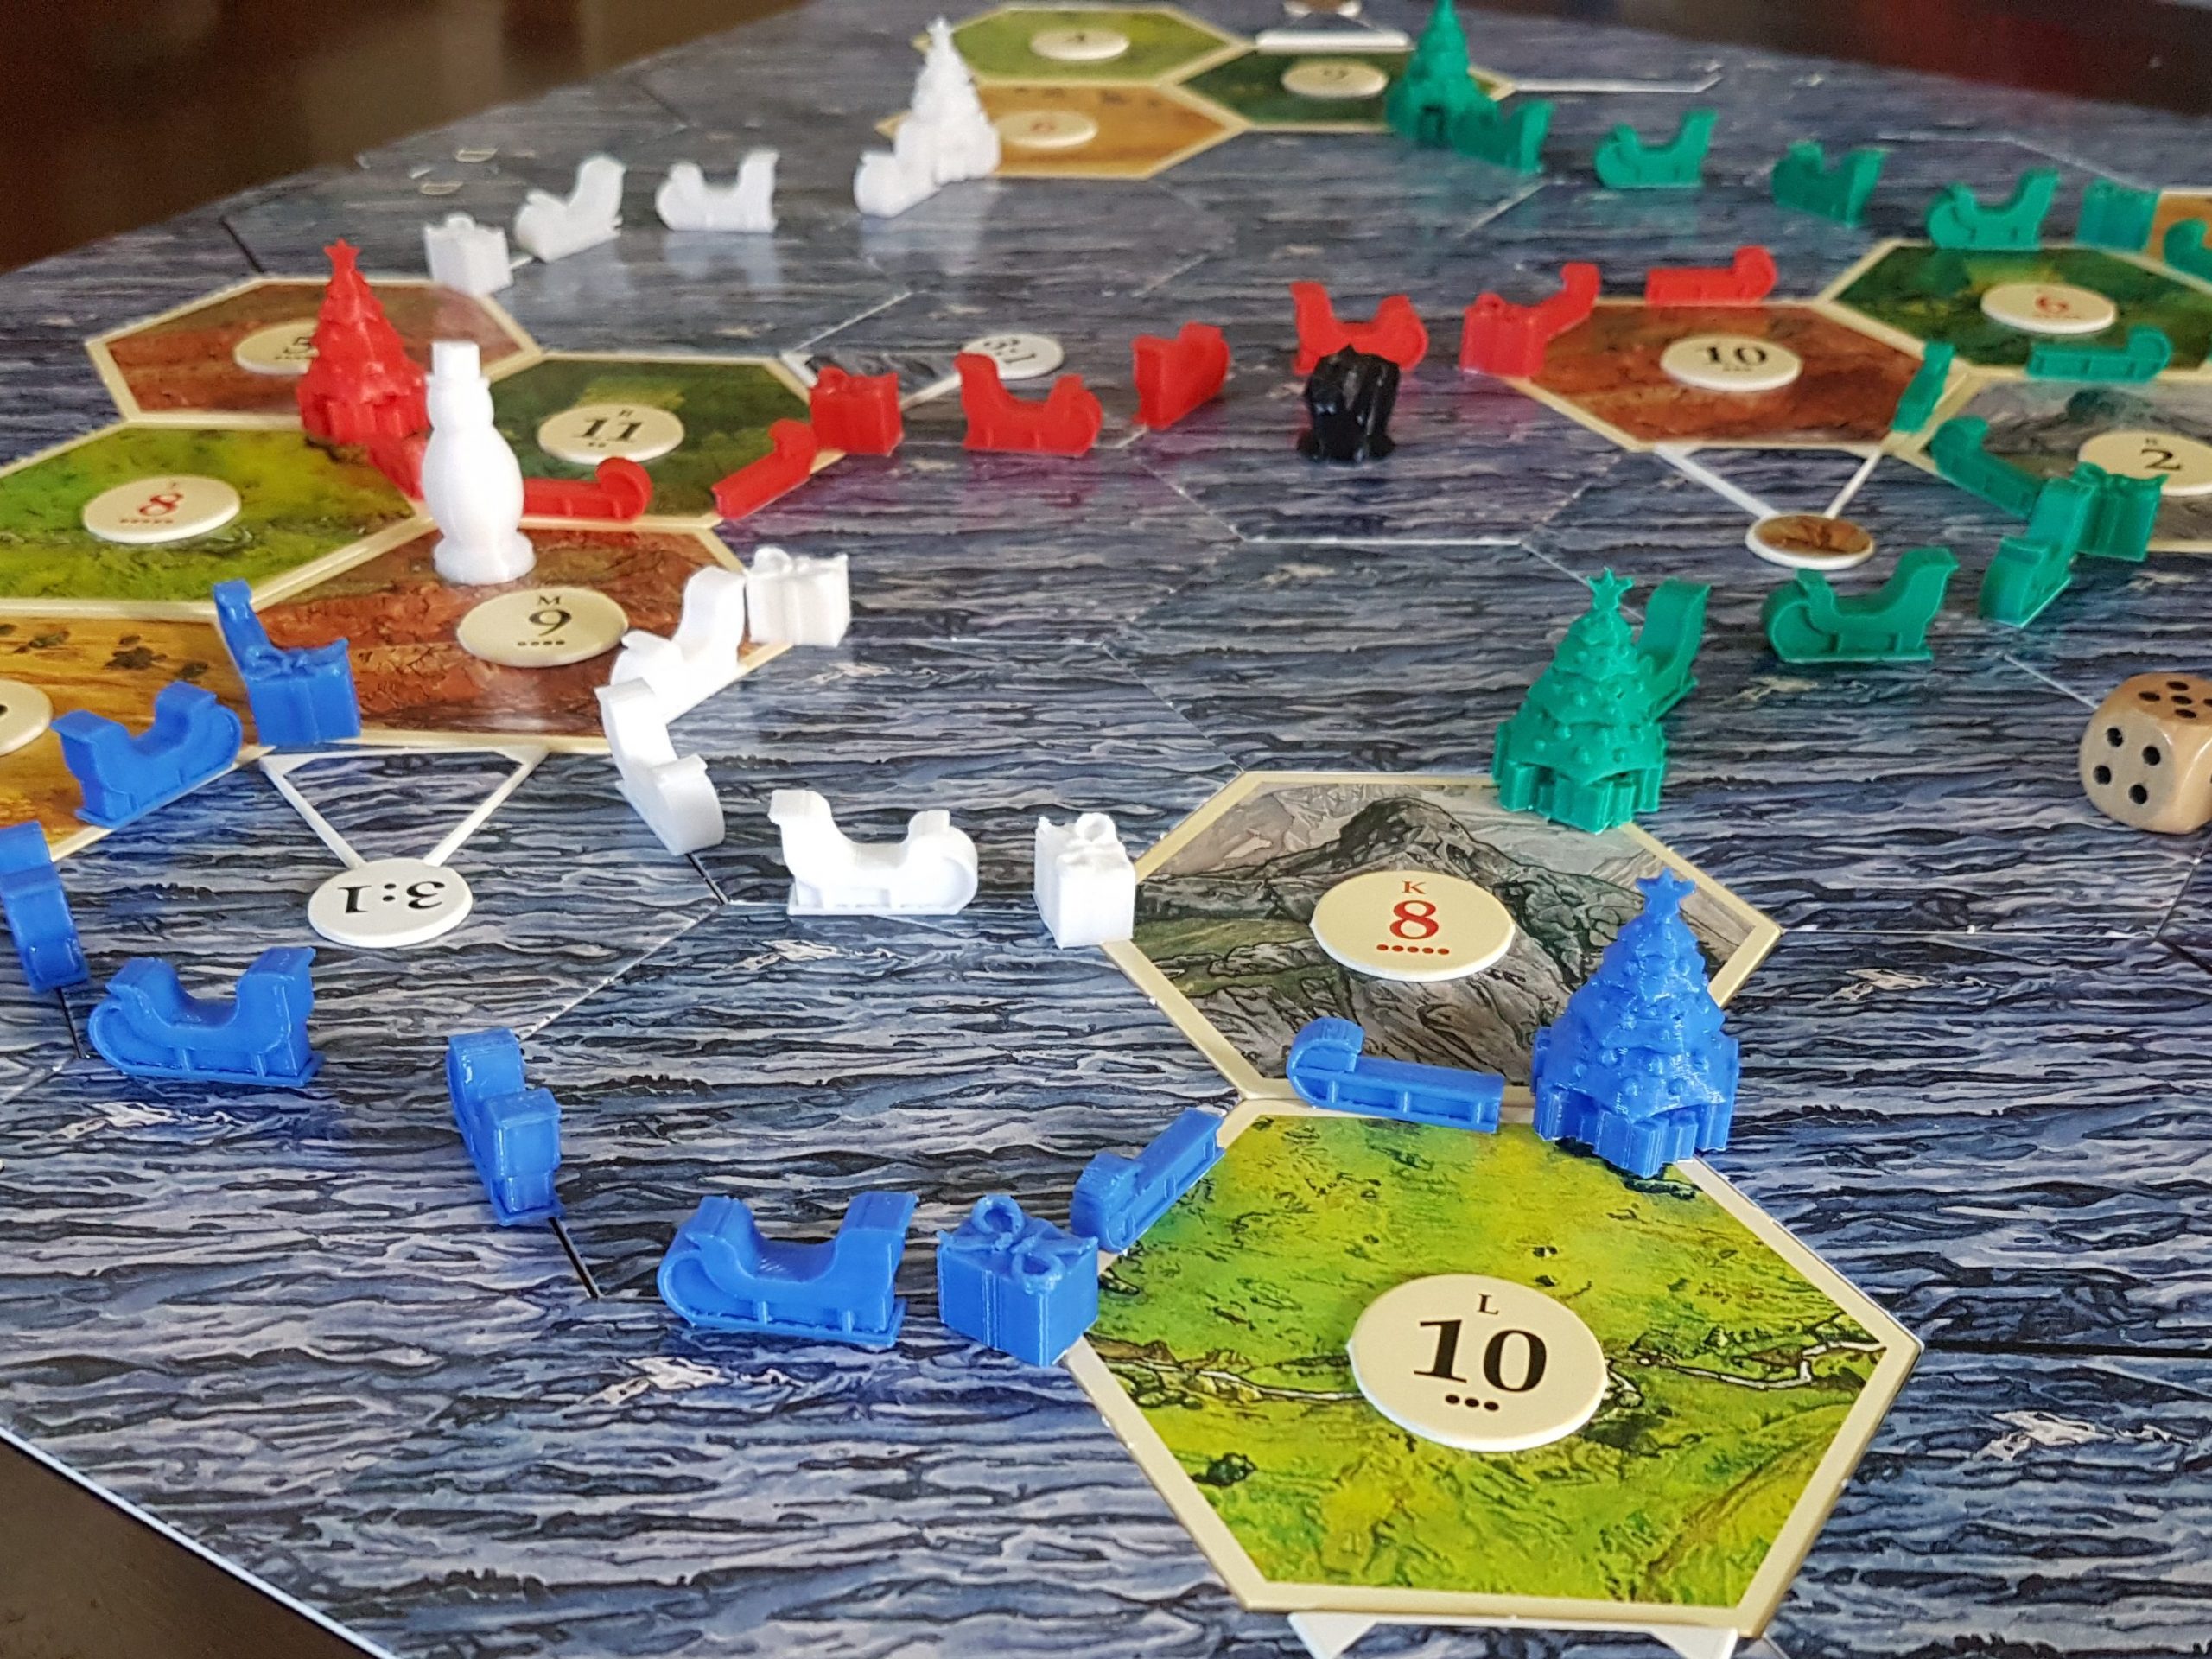
They’re themed to match the five resources from Settlers of Catan and would be perfect to use when hosting game night!

Each hex-shaped coaster is colored to match a resource, has cute little icons around the edges, and features a related pun. The set also comes with a tray to store or display them!

Next Up – A Whole New Game!

The project we’re currently working on gets back to game pieces, but they’re for a game we haven’t worked on before. Whether or not you’re a fan of the game, we guarantee it’s one you’ve heard of! Come back in a week to see if we’ve launched it!

Spreading the Love

Two New Valentine Sets

Last week we announced our Valentine-themed Catan set. Since then we’ve launched Valentine-themed sets for Ticket to Ride

and Seafarers of Catan.

The game boards look wonderful with hearts spread all across them! Will these sets be as popular as our Christmas sets (Settlers, Seafarers, and Ticket to Ride)? Time will tell!

More Valentine Items to Come

Last week we mentioned that we’re also working on some non-gaming items. For reasons unrelated to 3D printing they’re not quite ready to go, so we’re saving them for one more week. For now we can tell you that they’re related to Valentine’s Day and will still be available early enough to order, ship, and arrive before February 14.

Metallic Filament

A couple weeks ago we told you that we had acquired some fun new filament. We’ve been playing with metallic gold and silver, and they look great!

But they’re very finicky to work with, resulting in many failed prints. Even a relatively minor glitch like this one puts an unattractive mark across the shiny surface.

We haven’t decided how to include these in our Etsy shop yet. We’re sure our customers will love them, but we want to be certain we can deliver and we haven’t yet got it to a point that it’s reliable enough.

Wood Filament

We also bought some filament with actual wood fibers infused into the PLA plastic. It’s supposed to make prints look like actual wood, and we were excited to try it! But it turned out to be even more finicky than the metallic colors, and just looked beige, not particularly like wood.

So we returned it. We may try another brand at some point, but for now wood filament is off our agenda.

Heat Creep Blockage

We’ve talked here before about clogged nozzles. It’s been a periodic problem, but one we’ve learned to deal with quickly and effectively. This week though we’ve discovered a new kind of blockage. This one seems to be caused by something called “heat creep”, which is when the heat that melts the plastic filament at the nozzle moves up too high and melts plastic further away from where it’s supposed to. That plastic then solidifies into a clumped mass that new filament can’t pass through.

The result is a clog that can’t be corrected by clearing or replacing the nozzle. When it happens mid-print, the filament simply stops extruding, leaving a half finished print like this Ticket to Ride train.

Caused by Our New Filament?

We suspect this happened because of our new metallic filament, which needs to be extruded at a much higher temperature than our usual filament. It’s likely the heat creep happened then, while the printer was operating at a higher temperature than normal, causing a blockage that’s now interfering with our regular printing. Which means this is yet another reason that we’re not yet officially launching our metallic colors.

For now, we’ve got a temporary workaround, and supplies are on the way that will let us disassemble, clean out, and reassemble the entire hot end.

Development Continues

We’re not letting that problem slow us down though. We’re putting the finishing touches on the Valentine mystery items mentioned above, and also working on another new product. This one is related to one of our favorite board games, but is not a new set of game pieces. With luck, it’ll be ready to launch within the next week too!

Canoes and Tents and Snakes, Oh My!

Paddle Across the Countryside

As promised, we’ve expanded our new Camping theme in a couple of fun directions! First up was Ticket to Ride. We added a canoe as the main piece for this set, to replace the standard train cars. It also gets a tent scoring marker, and all looks wonderful on the game board!

Why Did it Have to be Snakes?!

Next we ported (or portaged!) the canoe over to join our other Catan pieces for the Seafarers expansion. We wanted a suitable pirate piece as a bonus item, and decided on a snake. Don’t let his cute look fool you – he’ll still bring your shipping route to a dead stop!

There’s Something in the Air

As we approach Valentine’s Day we thought a themed set would be fun, but the “something” in the air wasn’t love, it was water. At first we weren’t sure why several of our 3D prints were failing.

After attempting many unsuccessful remedies, we discovered that some of our spools of filament had absorbed too much moisture from the air, even though we always store them in ziplock bags with silica gel packets. They look and feel exactly the same, but they behave differently when heated and extruded in a 3D printer. Fortunately it’s not terribly difficult to dry them out. There are commercial filament dryers available, but instead we added a makeshift cardboard extender to our food dehydrator, and voila – dry filament!

We had to monitor the temperature carefully of course, because if it got too warm in there the filament strands would melt together and we’d have been left with an unusable mass of plastic.

Broken Bowden Tube

With the filament in good shape again, our printer decided to thwart us with a problem of its own. The Bowden tube is what guides the filament from the filament drive gear to the hot end where it gets extruded. Ours is the white tube in this picture. And one day in the middle of what would have been a successful print, it decided to break off inside the connector shown by the arrow. (We suspect it had endured some undue stresses over the past few months while correcting other problems.)

We were lucky that the break was so near the end, and the remaining tube was still long enough. I trimmed the end to even it off, and reinserted it. We were back in business, though we did order a new one to have on hand in case it happens again. If it breaks again, the current tube probably won’t be long enough to keep using it.

Feeling the Love!

Finally we were able to print enough of our new pieces to launch our Valentine-themed Catan set!

With that much love on the board, how could anyone steal your Longest Road?

More Valentines On the Way

In the coming week we plan to launch more Valentine-themed sets, and we’re also venturing into a whole new area that has nothing to do with board games. Intrigued? Come back next Monday to see what we mean!

Back on Track

Life Happens

Here at 3D Orcs, we’ve been experiencing some major life changes (the good kind!) over the last several weeks. Because of that we put some of our work on hold, and sadly that included this blog. Things are settling down now though, and operations are once again going full steam ahead!

Etsy Sales

Even during the crunch we were able to keep our Etsy Shop open, and delighted many customers with our various sets of game pieces.

Most popular was Christmas Themed Catan,

with Standard Catan

and Christmas Themed Ticket to Ride following close behind.

We were thrilled to ship our game pieces not only all across America, but also to Canada, Ireland, England, and Germany!

Seafarers of Catan

In our last blog post, we hinted that we would be launching game pieces for a game expansion set. We did!

We now have standard pieces for Seafarers of Catan available

as well as a Christmas themed set.

The sleigh ships look amazing when played along with our Christmas pieces for the base game.

We’ve got plans for pieces for more game expansions as well as entirely different games. Please let us know if there’s a game you love that you think would be enhanced by custom designed game pieces and we’d be happy to add it to our list for consideration. You can leave a comment on this blog post, or email us: customer.service(at)3dorcs.com

Made to Order

During our slowdown we still undertook some design work, though we had less time for it than we’d have liked. We’re really excited about the results though! The designs need some more work before they’ll be available for sale, but we’ll be announcing them here over the next several weeks.

First up will be a set inspired by a customer request. Someone contacted us through our Etsy Shop and we’ve been working with her to bring her vision to reality. I can tell you now that it’s another themed set of Catan pieces, but you’ll need to come back next Monday to find out more!

A Ticket to Christmas

Changing Plans

That saying about the best laid plans of mice and men apparently also applies to orcs. We had planned to release an exciting new product this past week, but despite our best efforts the results just weren’t good enough. We’ll keep working on it though, and we’ll save the details as a surprise when it’s ready to go.

A Different Product Instead

Because of that, we switched gears mid-week to something else we wanted to do soon anyway, and that turned out great! As a result, we were able to launch a new Christmas-themed set of game pieces this week after all!

Nearly Thwarted

But even with a great design, we needed to produce some prototypes before we could list it on Etsy. And that was nearly thwarted when a mishap caused a collision between an orc and the printer. It turns out orcs are exactly as graceful as one might expect. The wheels allowing smooth movement of the extruder along the X axis were badly damaged … sorry, I don’t mean to get too technical. In orcish terms, “Printer broke. It no work.”

But we were undaunted! Well, ok, we were actually pretty daunted for a while there. But as is becoming common with this nifty device, a generous dose of blood, sweat, and tears (which are as common in our studio as at an orc family gathering) resulted in a working printer, and an increased understanding of its amazing technology. Plus, we learned a new adjustment that makes the leveling process much more precise. Yay!

These are the wheels that were damaged. Unfortunately we didn’t snap a pic until after they were fixed.

Christmas-Themed Ticket to Ride

With things up and running again we were able launch our new game pieces!

The sleighs look really great on the board! So do the Christmas gift scoring markers (you may recognize them from our Christmas Catan set, where they are featured as settlements).

And because Ticket to Ride needs a lot of trains, you get a lot of game pieces when you buy this set! Just as in the original game, we provide 48 sleighs instead of the 45 actually needed to play, so you have a few extras in case some get lost.

Expansions

Do you like to play with game expansion sets? We do! And so this week we plan to release some new game pieces to support one of our favorites! Come back next Monday to see what we’ve developed.

Open for Business!

We Did It!

Our Etsy shop is now up and running! It was another learning curve, but Etsy does a good job of walking you through the set up process. We launched with four different sets of game pieces available in ten colors.

Our Halloween Sets

I love the design we created for our Halloween-themed Settlers of Catan game pieces! The tombstone cities turned out especially well, and the pumpkin settlements and coffin roads are also fantastic!

We also have some great Halloween-themed Ticket to Ride game pieces, with coffin trains and pumpkin scoring markers.

These pieces all look amazing on the game boards, and are very fun to play with!

We Have Standard Sets Too

While the Halloween sets are our favorites, we also have standard sets for both Settlers of Catan and Ticket to Ride, for players who may need replacements for lost pieces, or just want to play with fun new colors.

A Peek Behind the Scenes

You may be interested in how we create designs like these. The simple pieces like the standard Catan pieces and Ticket to Ride scoring marker were pretty easy to create in Blender. The coffins and train took a little more work, but were still possible with the basic Blender tools. The pumpkins needed some special techniques, which we learned from this video by YouTuber TutsByKai and then adapted for the look we wanted.

For the tombstone Catan city, we had a vision, but needed some help. We found what we needed on CGTrader, a website full of excellent 3D models. The license terms prevent us from simply downloading models and then printing and selling them as-is, but we’re allowed to use them commercially if we modify them significantly and/or incorporate them into a larger work, and give attribution to the source designer(s). So we built the actual tombstone ourselves, and then added the skull, rat, and stones from models acquired from CGTrader.

New Sets Coming!

With Halloween nearly upon us, we’re already working on designs for our next themed sets, and some of them are almost ready to go! We expect to announce a new set in next week’s blog, but if you’re eager to see it as soon as it’s ready, follow us on Twitter, where we post everything the moment it’s available.

See you next week!

3D Roller Coaster

Welcome

Welcome back to our blog! This week we’ll talk about our 3D roller coaster. No, not a cool toy we printed, but rather the emotional ups and downs of our first week getting to know our new 3D printer.

It began last week with the printer’s arrival and set up. But the real fun started when we turned it on and tried to use it.


Preliminaries

Before we could print anything, we needed to have something to print. Like with a traditional printer where you need to have a document first. So, what to print?

I mentioned last week that our initial focus will be board game accessories. We wanted something simple to start with, so we decided on a road piece from Settlers of Catan. In case you’re not familiar with the game, this is what the piece looks like – just a thin rectangle about an inch long.

The first task was to create a 3D model of it. We had looked at a couple tools for that, and settled on Blender. It’s an incredible tool, especially considering it’s free. Blender can do amazing things far beyond the requirements of 3D printing (animation, rendering with textures, and special effects like smoke, just to name a few). The downside of such a complex tool is that sometimes it’s hard to figure out how to do something relatively straightforward.

Although we’re still early in that learning curve, we managed to come up with our first 3D model.

It turns out you can’t just send a 3D model to the printer. First you need to convert it to a set of instructions the printer can understand. This is called “slicing” (because it slices your model into distinct printable layers), and produces a g-code file. There are several slicers out there, but our printer manufacturer recommended Cura so that’s what we went with.

The final thing we needed to do before printing was prepping the printer. We had set it up, but it still needed the glass print bed to be properly cleaned and leveled. The latter was another challenge, but finally we were ready.


The First Attempts

So with our model created, our g-code file prepared, and the printer ready to go, we initiated our first print!

And this was the result.

Our roller coaster had taken a major drop.

But we kept trying, and learning, and tweaking things here and there.

Another early attempt was at least starting to show some promise.


Picking Up Speed

Eventually we did it! We had created a small plastic stick! Woo hoo!!!

Once we had the hang of it, we were off and running. Soon we had all of the basic Catan pieces.

It was time for something more challenging. We decided on a train piece for Ticket to Ride. There were some minor missteps along the way, and we’re still making small adjustments, but it’s coming along nicely.


The Big Drop

Things were going well, but there were some seemingly minor issues with the first layer of each print. We determined that the problem was with the leveling process we were using, and so we found and followed this helpful leveling video by YouTuber Tesla Filament.

But in doing so we discovered a problem with the way the print bed was physically attached to the printer. I made the required adjustments, re-leveled the bed, and suddenly the filament would no longer adhere to the bed at all.


Perseverance

More than a day passed, full of research, tweaking, and failed print attempts. It was also full of doubts and questioning whether this whole endeavour was actually viable.

In the end though, we persevered. A trip to Home Depot for some washers to use as spacers and an increasing understanding of the printer’s leveling interface were enough to get the prints to start working again.

With a growing string of successful prints we are once again confident that we can make this work!

Our experience with 3D printing brings to mind how the early days of the automobile must have been, once they were readily available but you still needed to be comfortable with a wrench if you wanted them to work.


Next Steps

Now that we’re up and running again, we’re back on track to opening the Etsy shop. With a little luck, that will be the topic of next Monday’s blog. Plus, we’re working on an exciting new seasonally relevant product design!

Newer posts »